Igniter, High voltage ignition lead, Fig. 13 – L.B. White I-34 Infraconic Spark Ignition User Manual
Page 16: Fig. 14a, Fig. 14b, Fig. 12
NUTS
1 Disconnect the ignition lead from the ignitor. Remove
ignitor mounting screws. See Fig. 13.
Fig. 13
2. Remove the igniter from the heater. Clean the rod with
steel wool or emery cloth.
3. The rod and its insulating ceramic body must be rigid
within its mounting flange. If the rod or its body are
capable of movement, the igniter will not be properly
positioned to the combustion cone. The igniter must
then be replaced.
A
Ad
djju
us
sttiin
ng
g IIg
gn
niitto
orr G
Ga
ap
p
Ignitor gap may need to be adjusted if spark is still weak
or non-existent after the ignitor has been either cleaned
or replaced. Refer to the following instructions.
a. Ensure the three burner plate nuts are securely
tightened. See Fig 14a.
FIG. 14a
b. Use gapping tool, part # 23967, to set the gap to .175
inches. See Fig.14b.
FIG. 14b
c. Insert tool at opening between inner and outer
combustion cone tips.
1155
IGNITER
SCREWS
IGNITOR W/ BRACKET
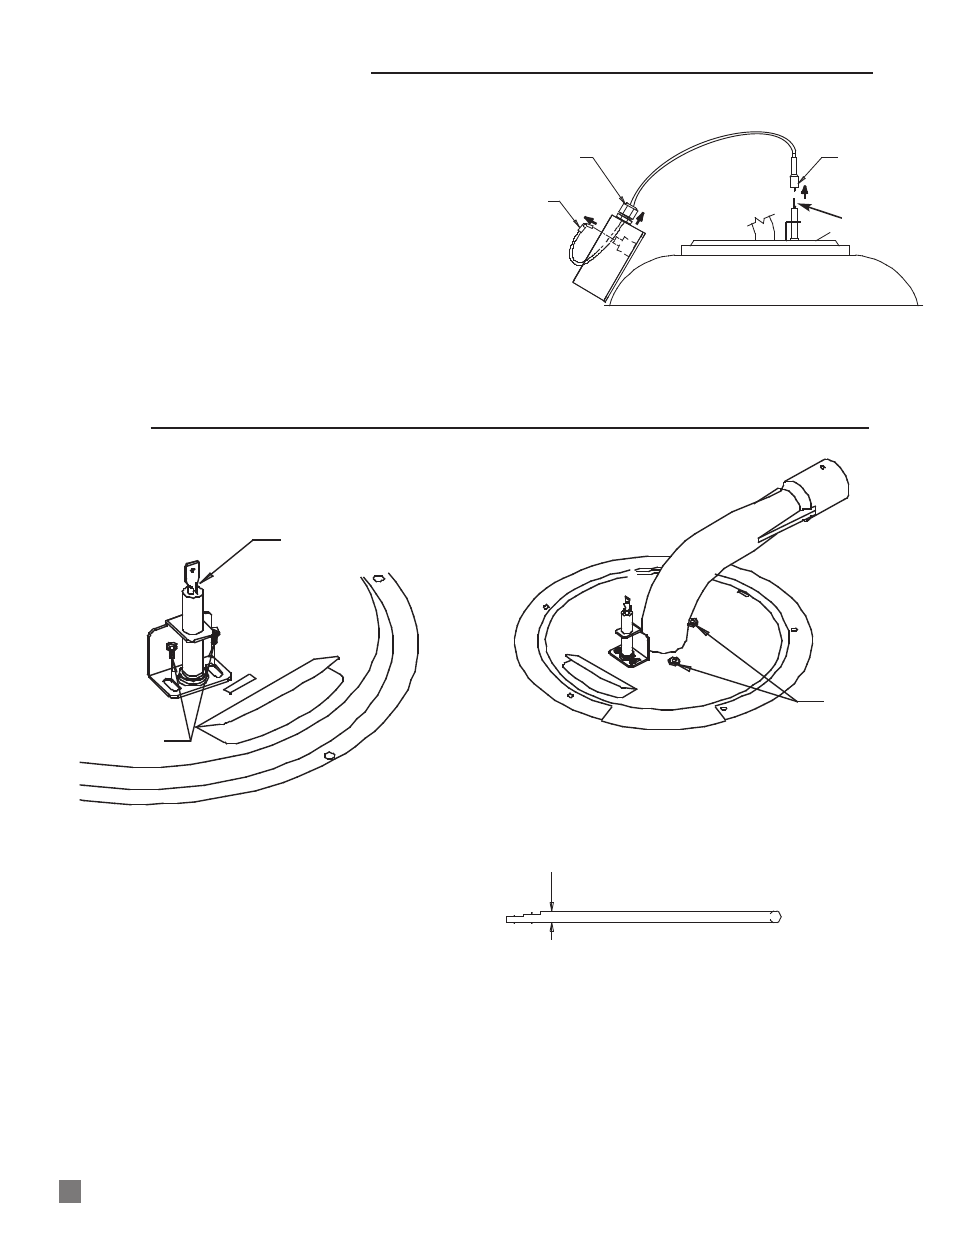
1. Disconnect the igniter lead from ignition module.
2. Loosen the water tight connector nut. See Fig. 12.
Pull the ignition lead through this connection.
3. Disconnect the high voltage ignition lead from the
ignitor. See Fig. 12.
4. Remove the connector nut from the ignition cable.
This nut will be used on the replacement ignition
cable.
5. Although the ignition lead is self locating, ensure it is
positioned away from the venturi tube and the lead
boot is covering the ignitor terminal.
FIG. 12
DISCONNECT FROM
IGNITOR LEAD
LOOSEN NUT
DISCONNECT
IGNITOR LEAD FROM
CONTROL BOX
B
A
C
HIGH VOLTAGE IGNITION LEAD
IGNITOR
TERMINAL
DISCONNECT
LEAD FROM
IGNITION
CONTROL
LOOSEN WATER
TIGHT NUT
DISCONNECT
LEAD FROM
IGNITOR
TERMINAL
GAPPING TOOL
.100
.125
.175
.100 .125
.175
GAPPING TOOL