Getting started, Installation – Fluid Management VR-1 Mixer User Manual
Page 11
Fluid Management Customer Service 1.800.462.2466
10 | V-Series
Getting Started
Installation
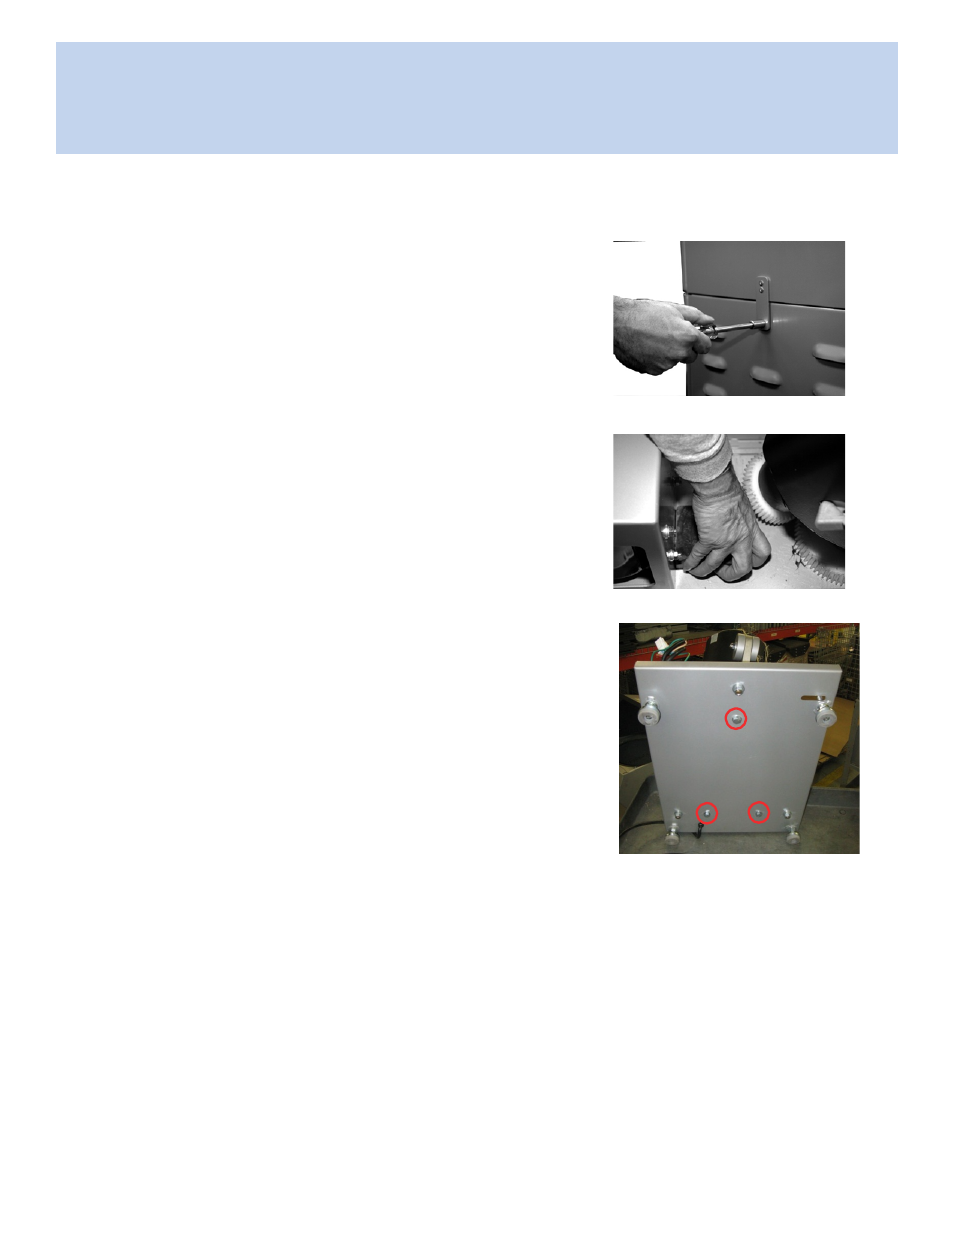
5a
Remove the packing blocks from inside the mixer
(for V1 models only)
a. Carefully lift up the top cover until it rests on the front of the mixer.
b. Unscrew the wooden block on the interior of the mixer between the
gears and the motor (see Figure 2).
c. Remove the wooden block.
d. Close the top cover and reattach the latch (see Figure 1).
5b
Remove the packing blocks from inside the mixer
(for VR1 models only)
a. Close the upper cabinet and secure it to the lower cabinet by
reattaching the back screw (see Figure 1).
b. Carefully lift up the mixer at an angle providing access to the bottom.
c. Remove the three (3) central bolts holding the shipping blocks
(see Figure 3).
d. Carefully set the mixer down and open the top cover.
e. Use the cord that joined together the shipping blocks to pull the
blocks out of the mixer.
6
Position mixer in permanent location.
a. Choose a location for your mixer capable of supporting its weight.
(V-1 = 165 pounds, 75 kilograms, VR-1 = 117 pounds, 53 kilograms).
b. Make sure there is enough room to access the rear of the machine to
perform routine maintenance.
c. Adjust the feet to level the mixer and prevent it from rocking.
7
Final preparations.
Plug in the power cord. Follow Basic Operations for operating
instructions.
Figure 1
Figure 2
Figure 3