Optimizing the image, Selecting a picture mode, Selecting a picture – BenQ W500 User Manual
Page 28: For det, Mode. see, Selecting a picture mode" on, Selecting a, English
2 8
U s in g th e p r o je c to r
English
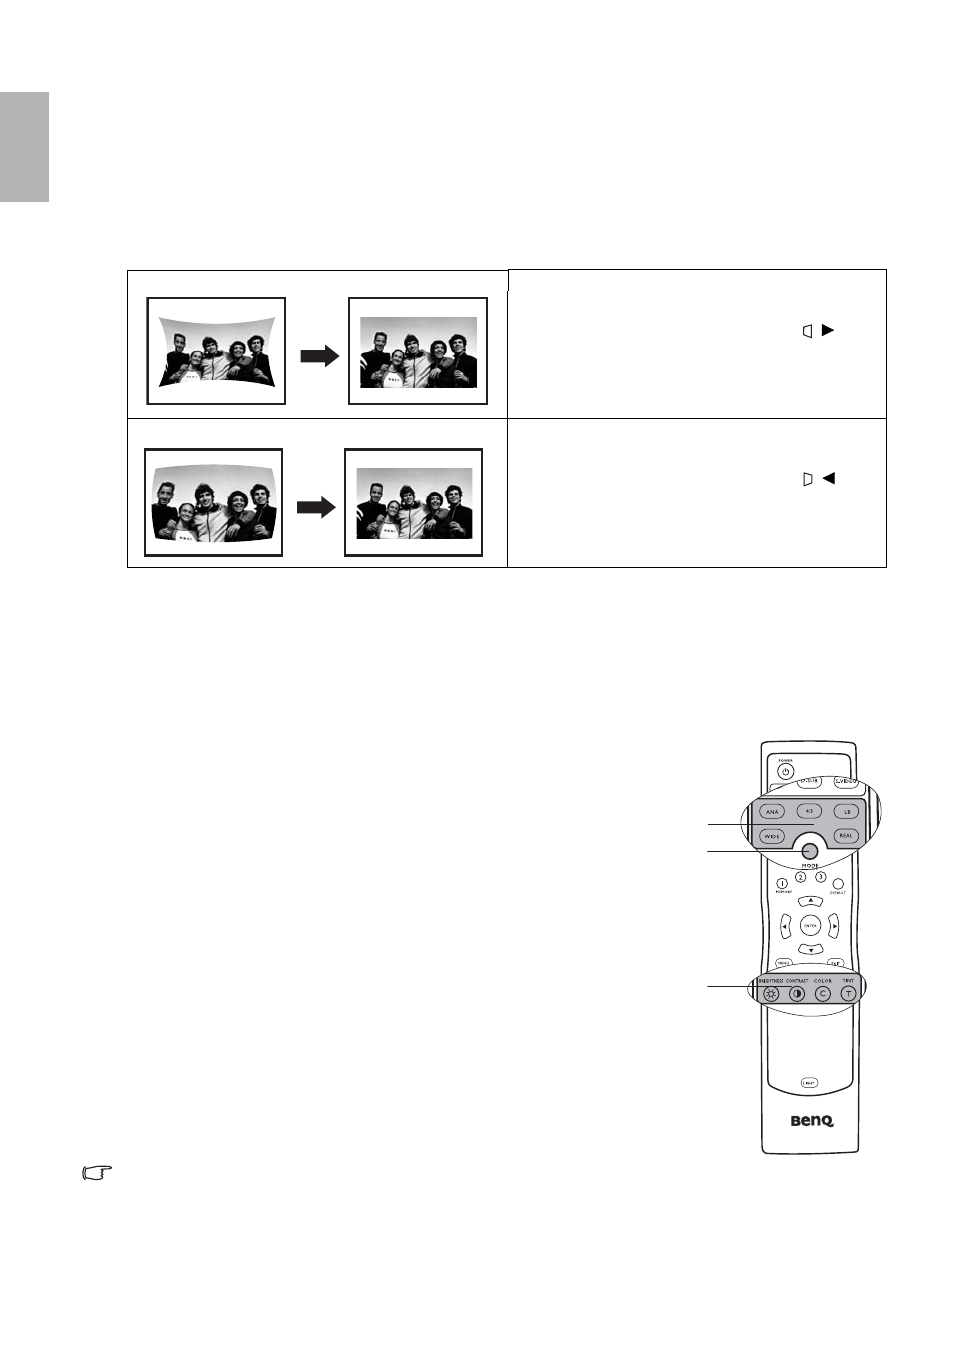
To correct the image's shape, you can perform the following steps.
1. Press MENU on the projector or remote control. Go to the Display > Keystone menu and highlight
Pincushion Correction.
2. Press eLeft orfRight repeatedly to adjust the image until you are satisfied with the shape.
The values on the adjustment bar of the page change while pressing. When the values reach their maximum or
minimum with repeated button presses, the image's shape will stop changing. You will not be able to change the
image further in that direction.
Optimizing the image
To optimize the image, use the remote control or on-screen menus. For the operation of on-screen menus, please
refer to
.
The following steps are optional. You do not need to follow every step. It depends on the image quality you
desire.
1. Selecting a picture mode
Select a picture mode on the remote control, or in the Picture--Basic > Picture
Mode menu. You can also press MODE on the control panel or remote control
repeatedly until your desired mode is selected. There are 7 modes available for
each input. These modes consist of preset values suitable for various projection
situations as described below:
• Dynamic Mode: Maximizes the brightness of the projected image. This mode
is suitable for environments where extra-high brightness is required, such as
using the projector in well lit rooms.
• Cinema Mode: With well-balanced color saturation and contrast with a low
brightness level. This is most suitable for enjoying movies in a totally dark
environment (as you would find in a commercial cinema).
• Standard Mode: Is slightly brighter than Cinema Mode, and suitable for use in
rooms where there is a small amount of ambient light.
• Photo Mode: Designed for viewing digital pictures in a living room.
• User 1/User 2/User 3 Modes: Recalls the customized settings. See
User 1/User 2/User 3 modes" on page 29
for details. These three modes can
also be selected directly by pressing the Memory 1/2/3 buttons on the remote
control.
If you are not satisfied with the picture quality made by the preset picture
modes. You can manually adjust the settings through the Picture--Basic and Picture--Advanced menus.
See
"Picture--Basic menu" on page 37
and
"Picture--Advanced menu" on page 38
for details.
• Pincushion distortion
1. Go to the Display > Keystone menu.
2. Highlight Pincushion Correction and press
/
repeatedly until the image’s shape becomes square.
• Barrel distortion
1. Go to the Display > Keystone menu.
2. Highlight Pincushion Correction and press
/
repeatedly until the image’s shape becomes square.
3
2
1