Adjusting source levels 126, Enhancing bass (bass booster) 126, Options on the – Pioneer AVIC-F910BT User Manual
Page 126: Av system settings, Menu, Displaying the “av system settings, Setting video input 1 (av1) 126, Setting video input 1, Options on the “av system settings ” menu, Customising preferences
Adjusting source levels
SLA (source level adjustment) lets you adjust
the volume level of each source to prevent ra-
dical changes in volume when switching be-
tween sources.
p Settings are based on the FM tuner volume
level, which remains unchanged.
1
Compare the FM tuner volume level
with the level of the source you wish to ad-
just.
2
Touch [SLA] on the
“AV Sound Settings”
menu.
= For details, refer to Displaying the “AV
3
Touch [+] or [
–] to adjust the source vo-
lume.
+4 to -4 is displayed as the source volume is
increased or decreased.
The following AV sources are set to the same
source level adjustment volume automatically.
! CD, ROM, DivX (for AVIC-F910BT and AVIC-
F9110BT)
! CD, ROM (for AVIC-F710BT)
! AV1 and AV2
p The different source volume level can be set
between
iPod and USB.
p For AVIC-F910BT and AVIC-F9110BT, the
source volume level can be set to
DVD-V
and
DVD-VR respectively as well as differ-
ently from the other sources of the built-in
DVD drive previously mentioned.
Enhancing bass (Bass Booster)
The
“Bass Booster” enhances bass sounds,
which can be muted by driving noise.
1
Touch [Bass Booster] on the
“AV Sound
Settings
” menu.
= For details, refer to Displaying the “AV
2
Touch [+] or [-] to adjust the range from
0 to 6.
Options on the
“AV System
Settings
” menu
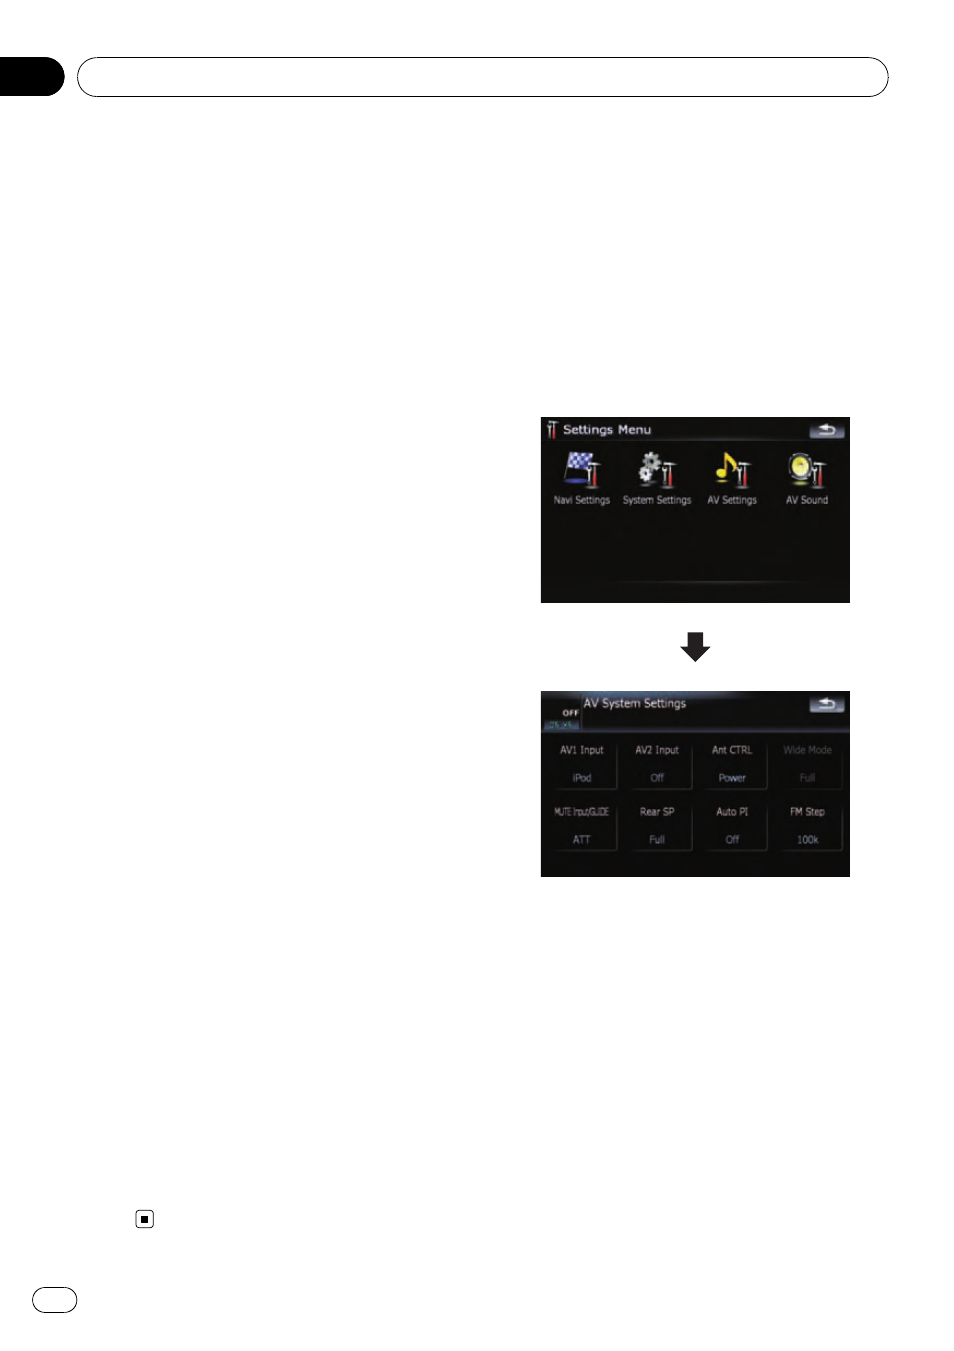
Displaying the
“AV System
Settings
” menu
1
Press the MENU button to display the
“Top Menu”, and then touch [Settings].
2
Touch [AV Settings].
The
“AV System Settings” menu appears.
p You can only adjust [Wide Mode] when se-
lecting an AV source with video.
p You can only adjust the following items
when the AV source is
“OFF”;
[
MUTE Input/GUIDE], [Rear SP], [Auto PI]
and [
FM Step]
Setting video input 1 (AV1)
You can switch this setting according to the
connected component.
p This setting applies to RCA inputs
(AUDIO INPUT and VIDEO INPUT) on the
back of the system.
Customising preferences
Engb
126
Chapter
21