Step 2, Installing the driver & software, Macintosh – Brother DCP-353C User Manual
Page 28
Installing the Driver & Software
26
STEP 2
Macintosh
®
Ma
c
int
os
h
®
Netw
o
rk
6
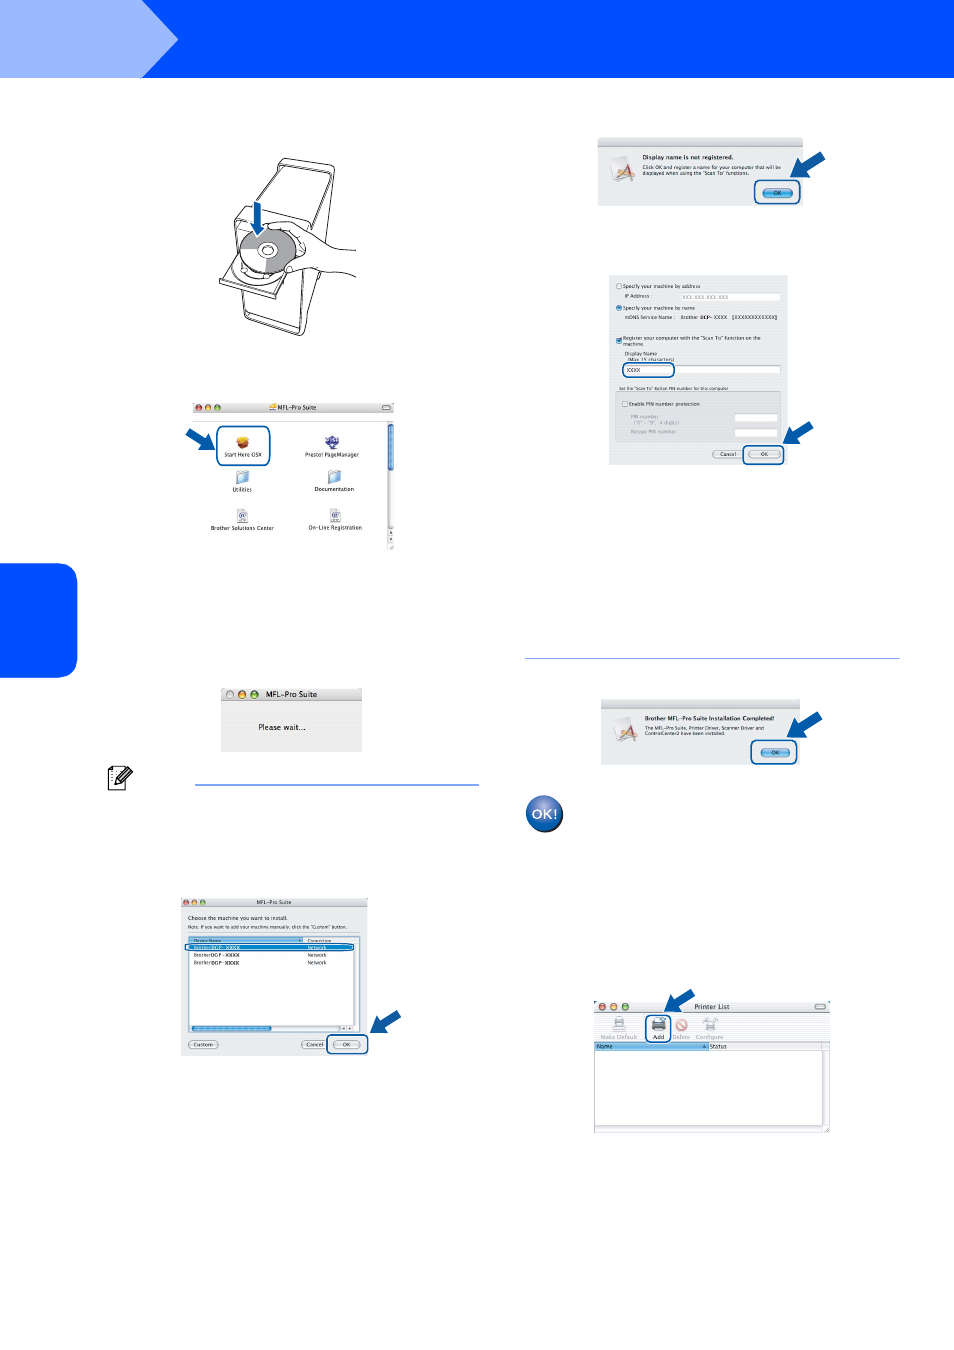
Put the supplied CD-ROM into your CD-ROM
drive.
7
Double-click the Start Here OSX icon to install.
Follow the on-screen instructions.
Please wait, it will take a few seconds for the
software to install. After the installation, click
Restart to finish installing the software.
8
The Brother software will search for the Brother
device. During this time the following screen
will appear.
Note
• If the machine is configured for your network,
choose the machine from the list, and then click
OK. This window will not appear if there is only one
machine connected on the network, it will be
chosen automatically. Go to step
• If this screen appears click OK.
Enter a name for your Macintosh
®
in
Display Name up to 15 characters long and click
OK. Go to step
• If you want to use the machine’s Scan key to scan
over the network you must check the Register
your computer with the “Scan To” function on
the machine box.
• The name you enter will appear on the machine’s
LCD when you press the Scan key and choose a
scan option. (For more information, see Network
Scanning in the Software User’s Guide on the
CD-ROM.)
9
When this screen appears, click OK.
For Mac OS
®
X 10.3.x or greater users:
The MFL-Pro Suite, Brother printer driver,
scanner driver and Brother
ControlCenter2 have been installed and
the installation is now complete.
Go to step
10
For Mac OS
®
X 10.2.4 to 10.2.8 users:
Click Add.