3 optional changes, Preliminary steps, Modify passwords – ATTO Technology 2700C User Manual
Page 20: 1 follow the preliminary steps, 2 click bridge, 5 click submit, Set up a vlan: virtual local area network, 2 click on the ethernet menu item, 4 press submit, Optional changes
15
ATTO Technology Inc. iPBridge Installation and Operation Manual
3.3 Optional changes
Default values, even if you have not used the ExpressWizard, are appropriate for most configurations,
but may be modified.
Preliminary steps
1
If you are not already in the ExpressNAV
interface, type the IP address of your iPBridge
in a standard browser as found in
on page 27, click Enter Here,
type in your user name and password, and click
OK.
2
The Status page appears.
View the default settings by clicking on each
element in the left hand menu, then use the
individual pages listed on the side menu to
make changes or use other features.
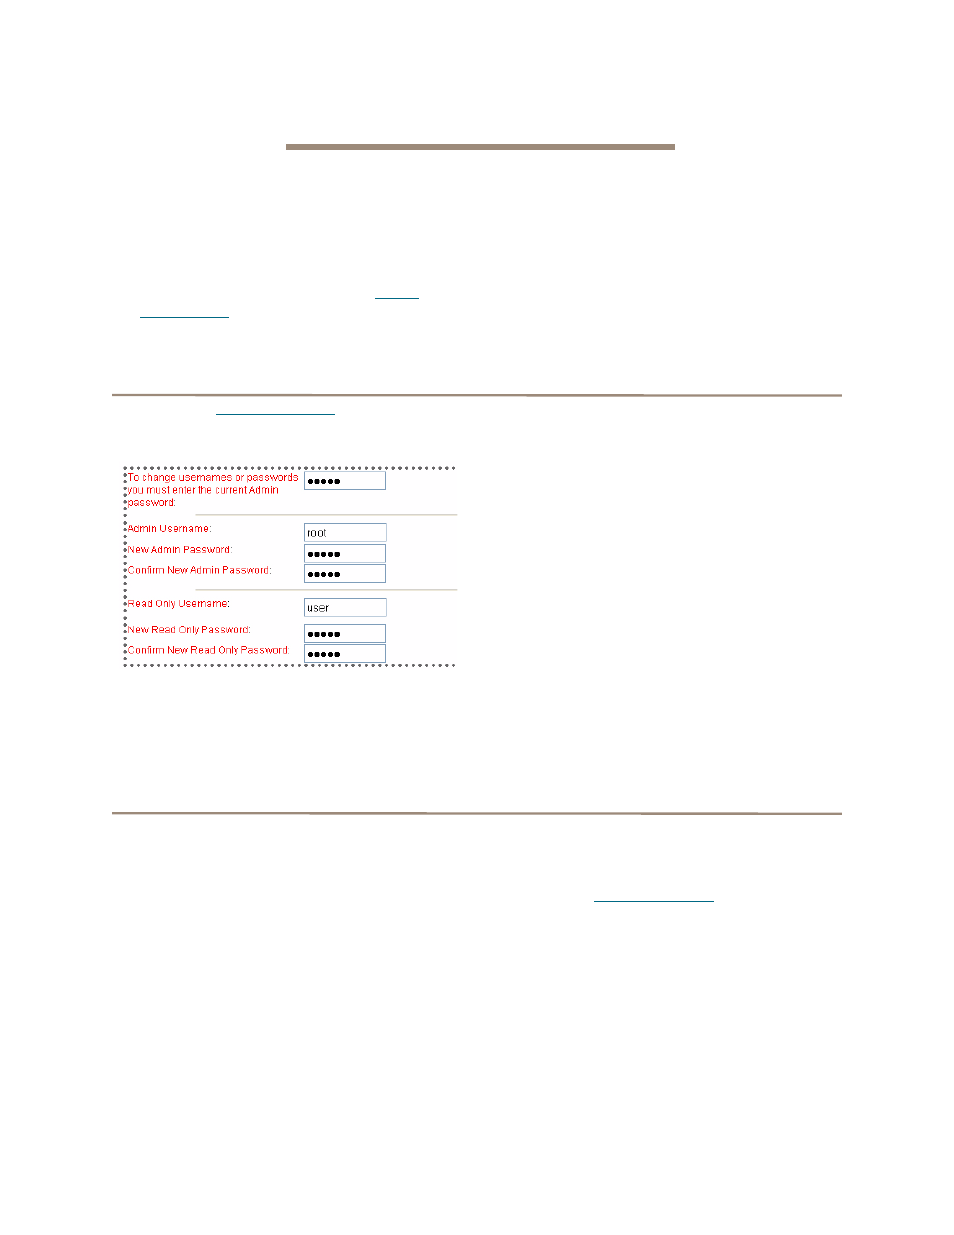
Modify passwords
1
Follow the
Preliminary steps
2
Click Bridge.
The Bridge Configuration page is displayed.
The Administrator user name that you are
currently logged in with and the current read
only user name, if present, are displayed in
their text boxes.
3
Enter the Administrator (Admin) password
where indicated.
4
Enter appropriate information into the New
Admin Password, Confirm New Admin
Password or New Read Only Password and
Confirm New Read Only Password text
boxes.
5
Click Submit.
6
Go to the Restart page and restart the
iPBridge.
Set up a VLAN: Virtual Local Area Network
A Virtual LAN (VLAN) is a group of devices on
the same physical LAN which can communicate
with each other as if they were all on different
physical LANs. This creates a network that is
independent of physical location, allows grouping
of users into logical workgroups, increases
efficient use of resources, and adds security
options by allowing some users into the LAN and
keeping other users out.
You may create up to eight Virtual LAN IDs for
each Ethernet data port. Each VLAN ID is
assigned a VLAN name of up to 64 characters. If
no VLAN Id exists for a data port, VLAN is
disabled for that port.
1
2
Click on the Ethernet menu item.
3
The Ethernet Port Configuration page
appears. Add a VLAN ID number and name in
the appropriate boxes.
4
Press Submit.
5
Go to the Restart page and restart the
iPBridge.
After rebooting, Virtual LAN takes effect.