Konica Minolta KN-419 User Manual
Page 40
Connecting the Computer and Copier
7
KN-419
7-11
5
Start up PageScope Light/Network Management Utility Light and log
in to the Administrator mode, select
NetWare Configuration
from the
“Network” tab, and then use PageScope Light/Network Management
Utility Light to specify the following settings on the copier.
❍
Refer to “8 Using PageScope Light/Network Management Utility
Light” for details.
6
Load MONITOR.NLM using the NetWare server console.
7
From the NetWare Server console, display the print server screen,
and check that the printer name entered in step 4 is displayed for
Printer 0 and that it is listed as “Waiting for job”.
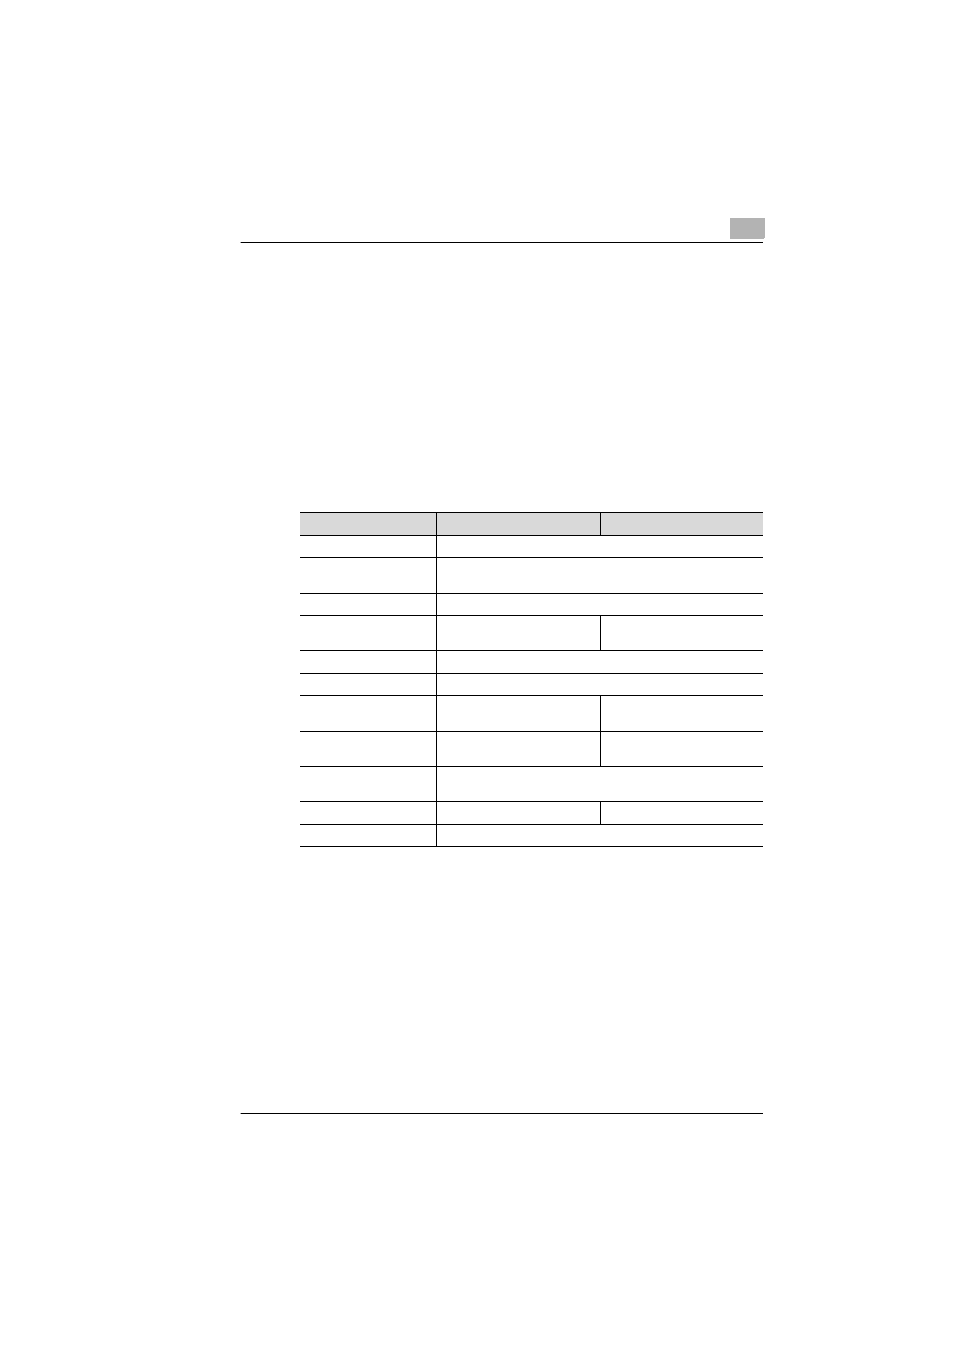
* If changes are made to settings marked with “*”, turn the machine off, then on again.
NDS
Bindery
[Enable NetWare] [*]
Enable (Enabled if check box is selected.)
[Frame Type] [*]
Auto detect (Select the frame type suitable for your network
environment.)
[Print Server Name]
Manually enter the name of the print server created in step 4.
[NDS Context Name]
The context name for the
Pserver
No settings required
[Print Server Password]
(Only specify this setting if it is also set on the NetWare server.)
[Password Retype]
(Only specify this setting if it is also set on the NetWare server.)
[Preferred File Server]
No settings required
The file server name for the
Pserver
[Preferred NDS Tree]
The tree name for Pserver
login
No settings required
[Print Queue Scan Rate]
[*]
1 (Change as necessary.)
[Connection Mode]
Directory Services
Bindery
[Mode] [*]
NPrinter