Lenovo IdeaCentre B520e User Manual
Page 44
Step 1.
Remove the computer cover. Refer to “Removing the computer cover”
Step 2.
Remove the back deco. Refer to “Removing the back deco”.
Step 3.
Remove the computer stand. Refer to “Removing the computer stand”.
Step 4.
Remove the EMI cover. Refer to “Removing the EMI cover”.
Step 5.
Remove the system fan. Refer to “Replacing the system fan”.
Step 6.
Remove the heatsink. Refer to “Replacing the heatsink”.
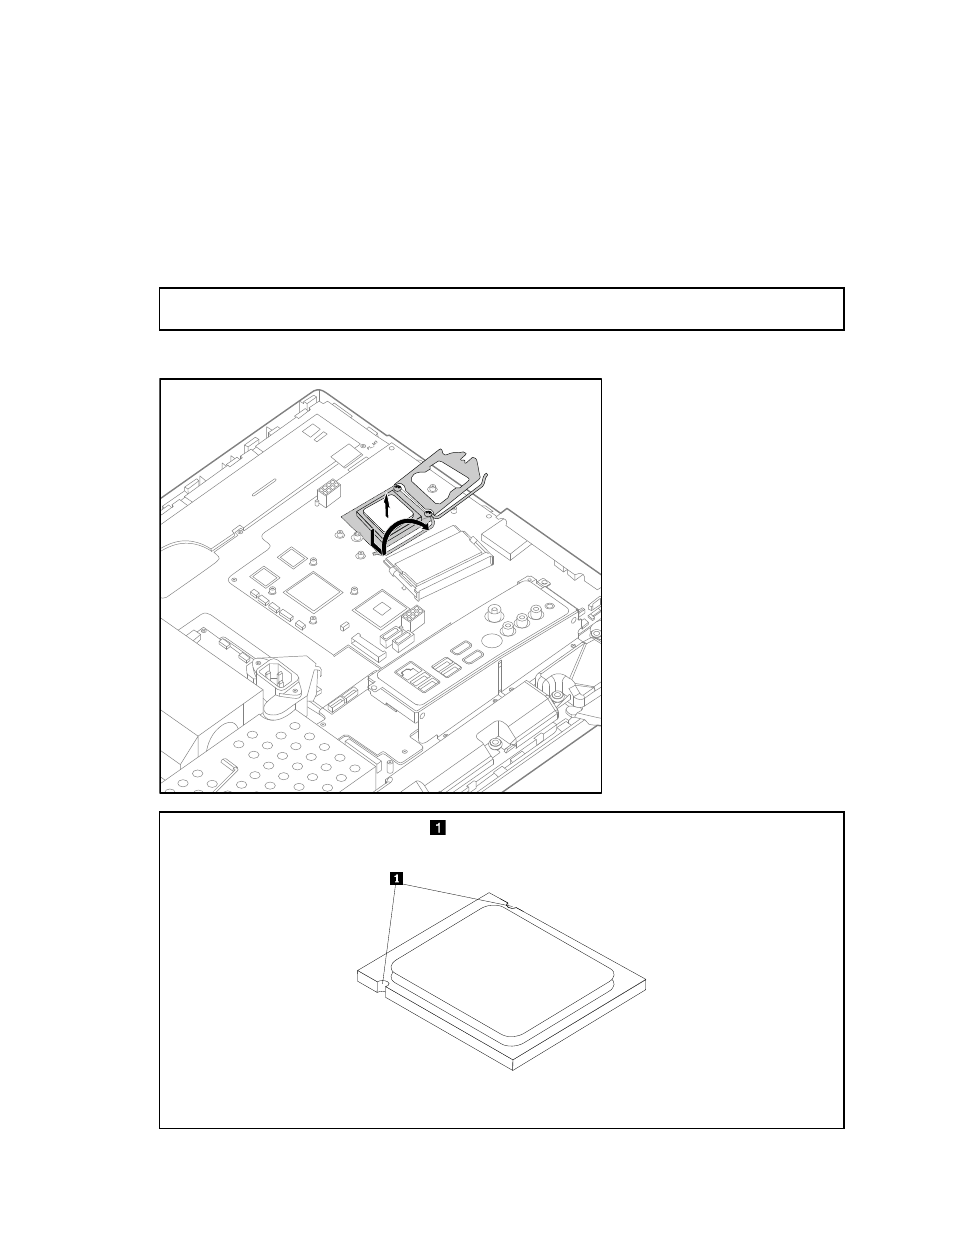
Step 7.
Lift the small handle and open the retainer.
Attention: Do not touch the gold contacts on the bottom of the microprocessor. When handing the
microprocessor, touch only the sides.
Step 8.
Lift the microprocessor straight up and out of the socket.
Note: Note the orientation of the notches
on the microprocessor. This is important when installing the
new microprocessor on the motherboard.
Note: Do not drop anything onto the microprocessor socket while it is exposed. The socket pins must
be kept as clean as possible.
38
IdeaCentre B520e Hardware Maintenance Manual
- IdeaCentre B325 (53 pages)
- IdeaCentre B320 (1 page)
- IdeaCentre B310 (64 pages)
- IdeaCentre B325 (27 pages)
- IdeaCentre Q150 (33 pages)
- H320 Desktop (47 pages)
- C325 (47 pages)
- IdeaCentre A320 (57 pages)
- IdeaCentre K320 (43 pages)
- H330 Desktop (49 pages)
- IdeaCentre K320 (37 pages)
- 3000 H Series (41 pages)
- 6077 (80 pages)
- 1048 (130 pages)
- 5023 (94 pages)
- 5053 (78 pages)
- 6393 (68 pages)
- THINKSTATION D10 (58 pages)
- THINKSTATION S10 (4 pages)
- 3856 (154 pages)
- 3000 J (90 pages)
- THINKSTATION 4157 (66 pages)
- THINKSTATION 4158 (74 pages)
- Think 6429-16x (4 pages)
- THINKSERVER 387 (248 pages)
- 0B39663 (52 pages)
- ThinkVision E50 (62 pages)
- TD230 (3 pages)
- 3000 J Series (96 pages)
- 6522 (216 pages)
- 1045 (140 pages)
- 6436 (88 pages)
- TS200V (96 pages)
- 1040 (26 pages)
- 4013 (94 pages)
- IdeaCentre D400 (1 page)
- 6447 (112 pages)
- THINKSERVER 3823 (304 pages)
- THINKSTATION S10 (62 pages)
- Think 5500 Series (2 pages)
- 3650 (98 pages)
- 6491 (98 pages)
- 6434 (96 pages)
- 6432 (284 pages)
- H320 Desktop (35 pages)