Replacing the front panel connector assembly, Removing the front panel connector assembly – Lenovo ThinkStation D20 User Manual
Page 43
9. Reinstall the hard disk drive fan bracket if removed.
10. Reinstall the front bezel.
11. Go to Chapter 4 “Completing the parts replacement” on page 45.
Replacing the front panel connector assembly
Attention: Do not open your computer or attempt any repair before reading and understanding the “Important safety
information” in the ThinkStation Safety and Warranty Guide that came with your computer. To obtain a copy of the
ThinkStation Safety and Warranty Guide, go to:
This section provides instructions on how to replace the front panel connector assembly.
To replace the front panel connector assembly:
1. Remove the computer cover. See “Removing the computer cover” on page 11.
2. Remove the front bezel. See “Removing the front bezel” on page 12.
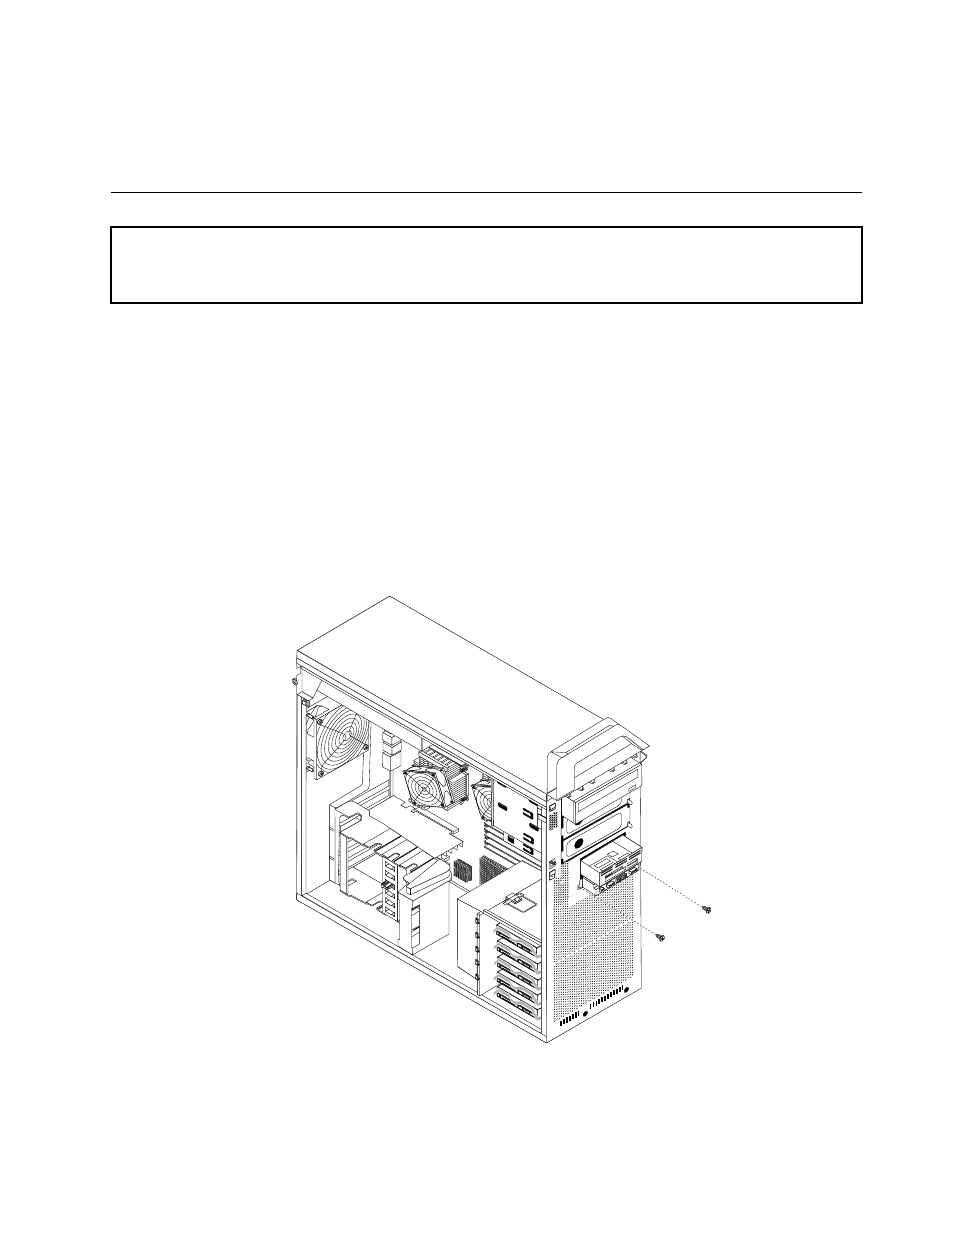
3. Locate the front panel connector assembly.
4. Access system board components. See “Accessing system board components” on page 13.
5. Disconnect the front audio, front USB, auxiliary LED, and IEEE 1394 cables from the system board and
note the routes of the cables.
6. Remove the two screws that secure the front panel connector assembly to the chassis and then
completely release the front panel connector assembly from the chassis.
Figure 39. Removing the front panel connector assembly
Chapter 3
.
Installing options and replacing hardware
37