Replacing adapter cards, Removing a full length adapter card – Lenovo ThinkStation D20 User Manual
Page 36
7. Connect any adapter card cable to the system board.
8. Latch the adapter card retainer to secure the adapter card.
What to do next:
• To work with another option, go to the appropriate section.
• To complete the installation, go to Chapter 4 “Completing the parts replacement” on page 45.
Replacing adapter cards
To replace an adapter card:
1. Remove the computer cover. See “Removing the computer cover” on page 11.
2. Unlatch and open the card retainer.
3. Take note of the location of all cable connections on the adapter card. It will be necessary to reconnect
them properly when installing a new card.
4. Disconnect all cables connected to the adapter card. See “Identifying parts on the system board”
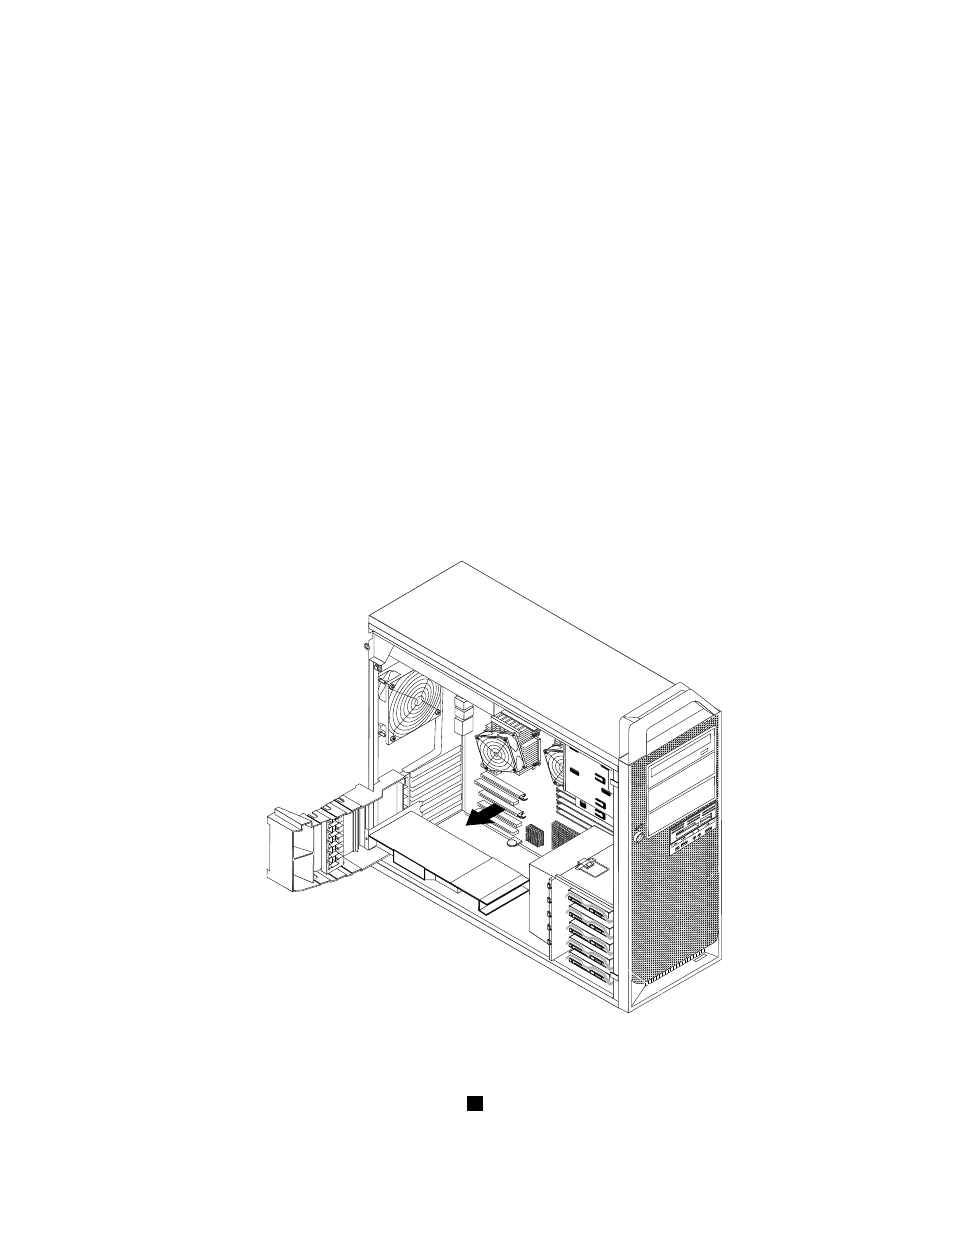
5. To remove the adapter card, do one of the following:
• If you are replacing a full length adapter card, remove the duct on the hard disk drive fan bracket by
pressing downwards on the top of the duct and then rotating the duct. Grasp the adapter card and
pull the adapter card out of the slot.
Figure 31. Removing a full length adapter card
• Some adapter cards are held in place by a retaining latch, such as video cards that are smaller than
512 MB. Press the adapter card retaining latch
1
as shown to disengage the latch. Grasp the adapter
card and then pull the adapter card out of the slot.
30
ThinkStation Hardware Installation and Replacement Guide