Front, Power and drive activity led removable cover, Screws secure drive here – Addonics Technologies ZSAES256EU User Manual
Page 2
www.addonics.com
Technical Support (M-F 8:30am - 6:00pm PST)
Phone: 408-453-6212
Email: www.addonics.com/support/query/
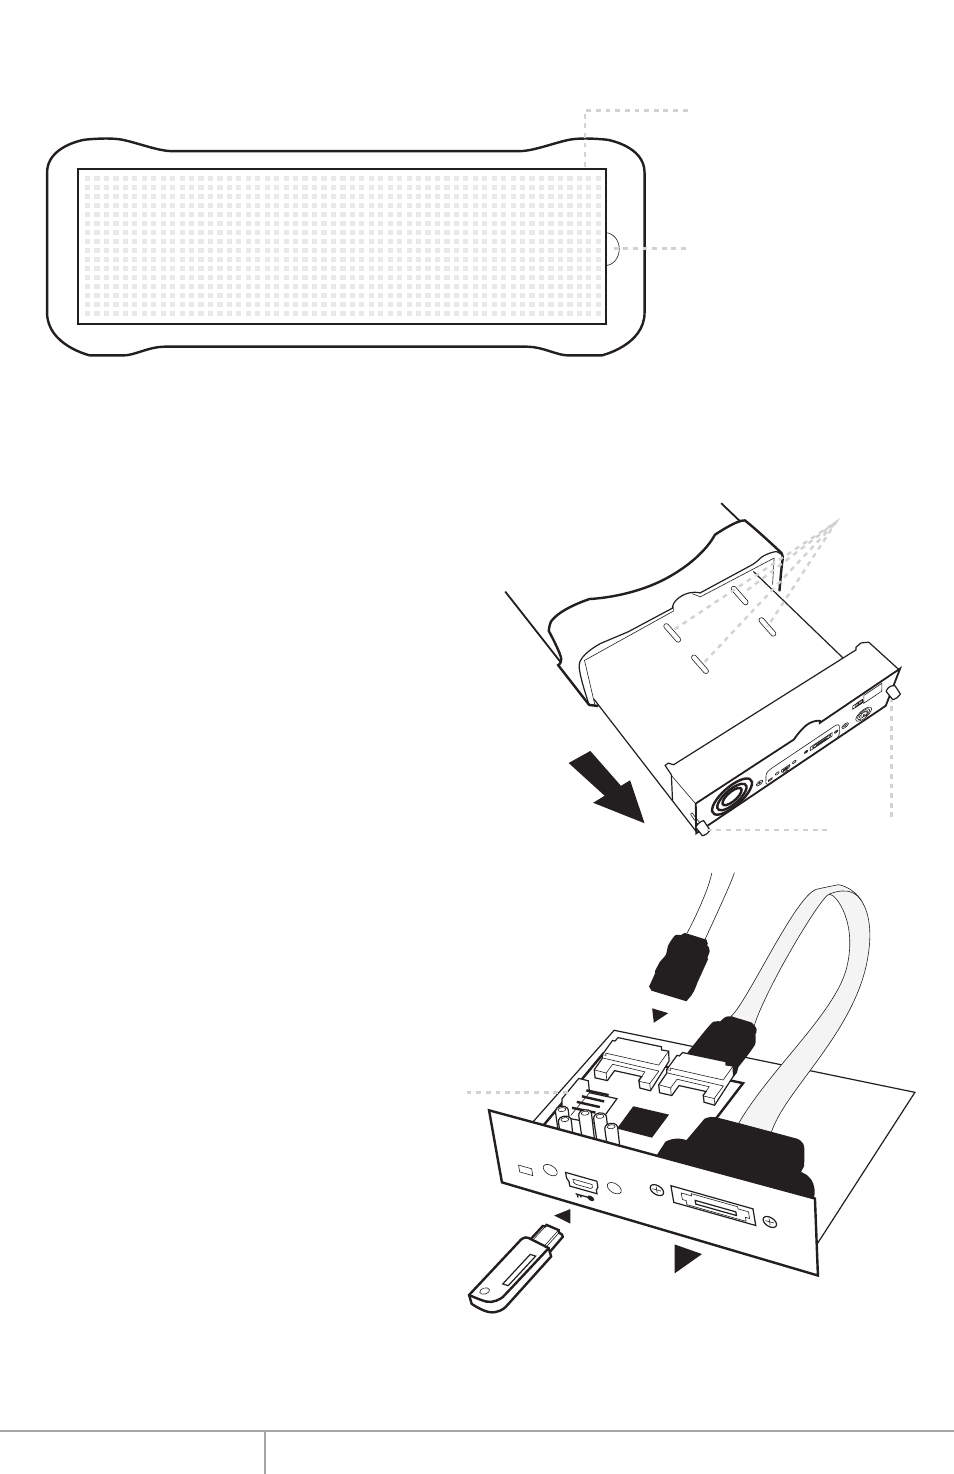
Removing the front panel:
You can remove the front panel of the enclosure to access the drive drawer of the SATA
drive.
Hard drive installation:
1. Loosen the two screws from the rear
panel. Pull out the interior tray from the
enclosure.
2. Connect the 15-pin SATA power cable
to the power connector of the hard drive.
Also connect the 7-pin SATA data cable to
SATA port of the hard drive.
3. Use the enclosed screws to secure the
hard drive to the tray.
4. After the hard drive is installed, slide the
tray back into the enclosure and then
fasten the two screws properly.
Front
Power and Drive
Activity LED
Removable
Cover
H
D
D
C
ipherChain
PWR
R
ES
E
T
C
ipher
eS
A
TA
(to
host)
Screws
Secure
Drive
Here
HDD
CipherChain
PWR
RESET
Cipher
eSATA
(to host)
Connect to eSATA Host
Cipher Key
Connect to
SATA Drive
4-pin Floppy
Power Connection