Using your ice cream maker comousar elaparato, Before first use, Antesde usarlapor primeravez – Aroma AIC-234 User Manual
Page 6: Par ah ace rh ela do
4
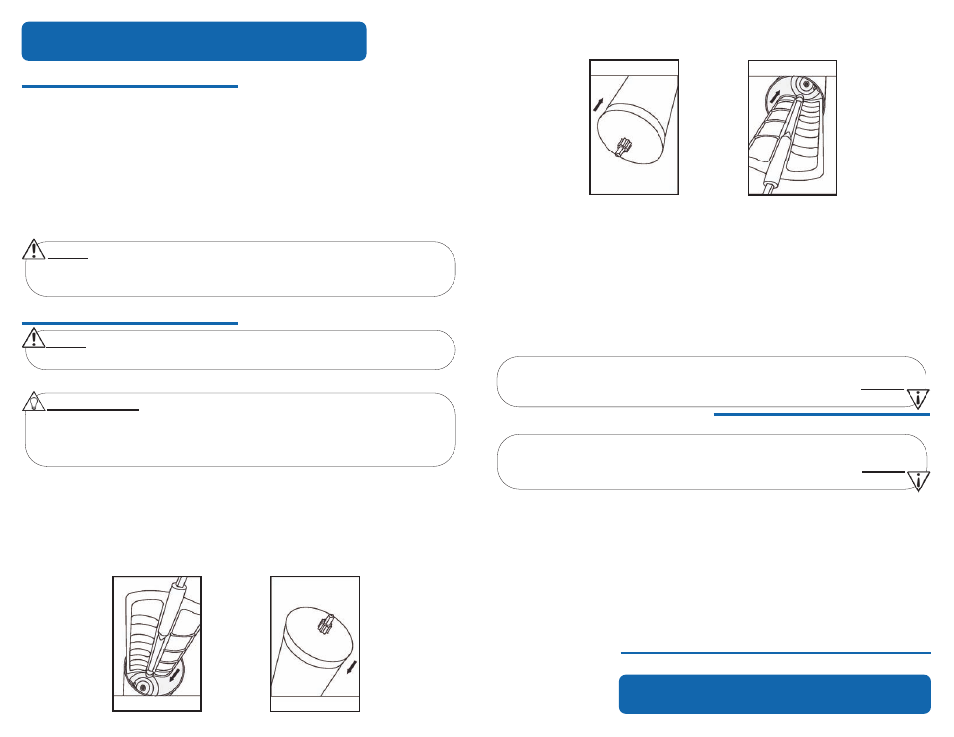
Figure 1
Before First Use:
1. Read all instructions and important safeguards.
2. Remove all packaging materials and make sure items have been received
in good condition.
3. Tear up all plastic bags, as they can pose a risk to children.
4. Wash the lid, mixing canister and all accessories in warm, soapy water.
5. Rinse and dry all parts thoroughly.
6. Wipe electric motor with a damp cloth.
7. Pour water (about 2/3 full) into the wooden bucket and leave in the sink or
water-safe area for one and a half hours. This will give the wood a chance
to expand so that the salt/ice mixture will not leak out during the freezing
process.
1.Lea
todaslas
instruccionesy
lasmedidas
deseguridad
importante.
2.Retire
todoslos
materialesde
empaquey
asegúresede
quelos
artículosse
recibanen
buenascondiciones.
3.Rompa
todaslas
bolsasde
plástico,ya
quepueden
representarun
riesgo
paralos
niños.
4.Lave
enagua
tibiacon
jabónla
cubierta,la
garrafadel
congeladory
todos
losaccesorios.
5.Enjuague
yseque
perfectamentetodas
laspartes.
6.Agregue
aguadentro
dela
cubetade
madera(a
llenarlahasta
2/3
aproximadamente)y
déjeladurante
unahora
ymedia.
Estodará
tiempo
paraque
lamadera
sehinche,
demanera
quedurante
elproceso
de
congelamientono
hayafugas
dela
mezclade
saly
hielo.
USING YOUR ICE CREAM MAKER
COMOUSAR
ELAPARATO
To Make Ice Cream:
1. Select your recipe and prepare ingredients per recipe instructions.
Antesde
usarlapor
primeravez:
1.
Seleccionesu
recetafavorita
yprepare
losingredientes
deacuerdo
con
lasinstrucc
ionesde
lareceta.
2.
Enfríela
mezclaen
elrefrigerador
hastaque
estácompletamente
fría.Enfríe
elbote
parael
heladoen
elcongelador
(haciaatrás)
parapor
lomenos
unahora
(serecomienda
durantela
noche).
3.
Agreguela
mezclafría
delhelado
dentrodel
botefrío
parael
helado(sólo
hastallenar
2/3de
sucapacida
d,ya
quela
mezclase
expandirádurante
el
procesode
congelamiento).
4.
Insertela
agitadoray
asegúreseque
suparte
inferiorquede
fijaen
el
centrode
laparte
inferiordel
bote(vea
“Dibujo
1”).
5.
Coloquela
tapaderasobre
elbote
(vea“
Dibujo2
”).
Par
ah
ace
rh
ela
do:
Dibujo2
Figure 2
NOTE:
• Do not use abrasive cleaners or scouring pads.
• Do not immerse the electric motor, cord or plug in water at any time.
NOTE:
• SEE STEP 7 IN “BEFORE FIRST USE” SECTION BEFORE MAKING ICE CREAM.
HELPFUL HINT:
• There are many classic ice cream recipes included in this manual. See
“Recipes” beginning on page 10. Even more delicious ice cream recipes
can be found online at www.AromaCo.com. You can even upload your
own!
2. Chill the mixture in the refrigerator until cold. Chill the mixing canister in
the freezer (towards the back) for at least one hour (overnight is
recommended).
3. Pour chilled ice cream mixture into chilled mixing canister (fill no more
than 2/3 full, as mixture will expand during freezing process).
4. Insert the dasher and ensure the bottom of dasher is fixed in the center of
the bottom of the mixing canister (see “Figure 1”).
5. Place the lid securely onto the mixing canister (see “Figure 2”).
4
NO
TA
:
•No
utilicelimpiadores
abrasivosni
fibraspara
lavar.
•Nunca
sumerjaen
aguani
enotro
líquido,la
baseni
elcordón
eléctrico.
NO
TA
:
•Véase
elnúmero
6de
“Antes
deusarla
porprimera
vez”
antesde
empezar.
Dibujo1