M&G DuraVent DuraStack® User Manual
Page 8
8
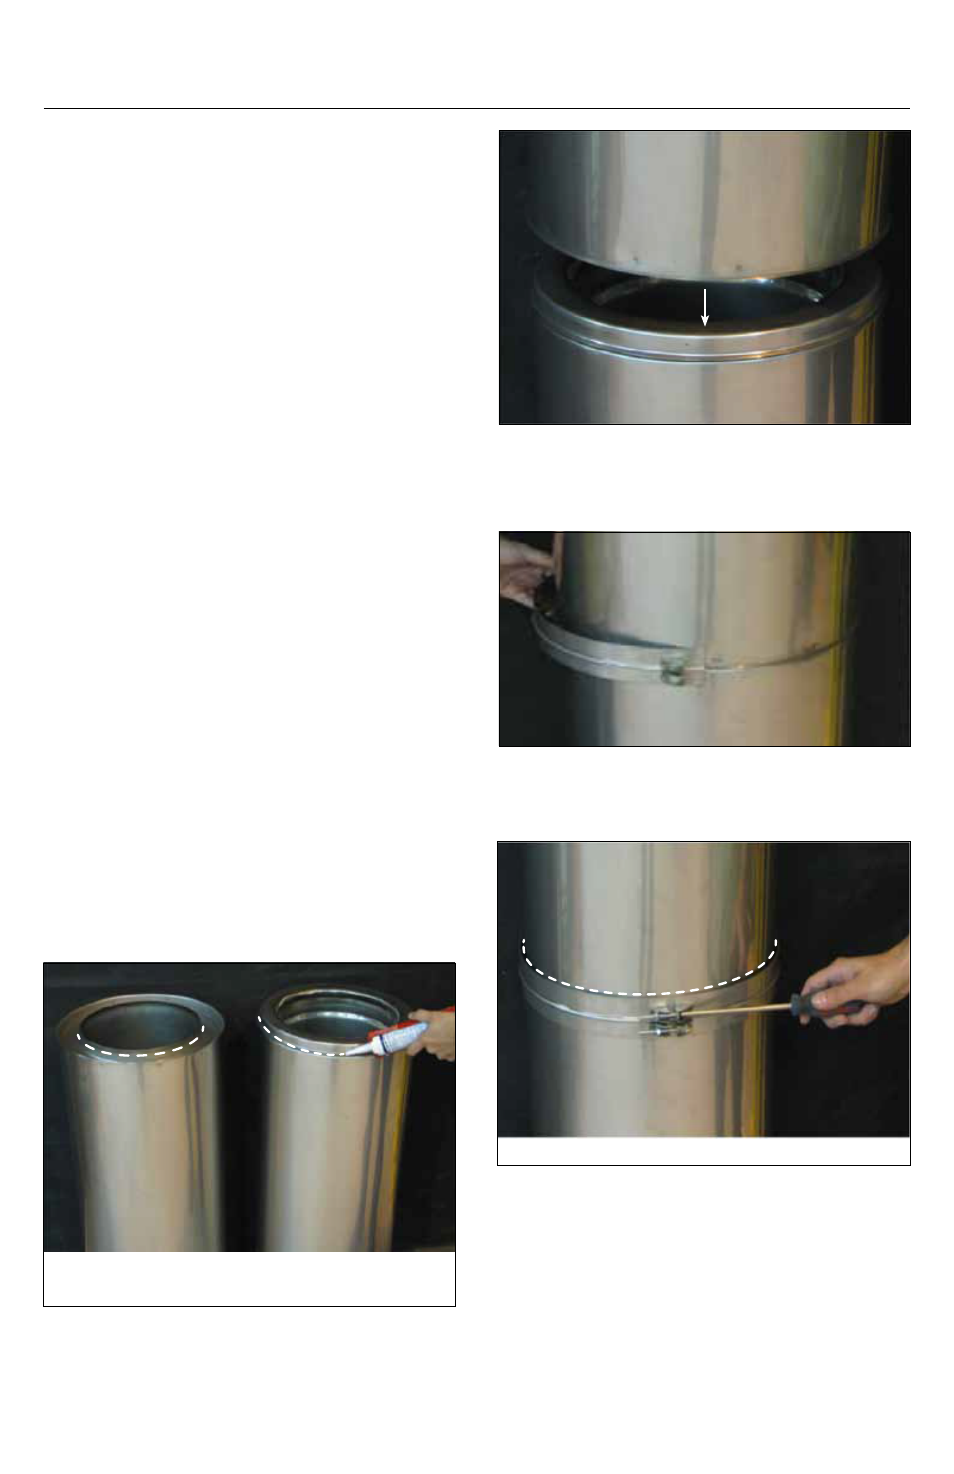
CHImnEy anD FIttIng JoInt aSSEmBLy
All components have a male and female end.
The installation orientation is indicated on
the labeling of each chimney section with an
arrow. The arrow indicates the direction of
the flow. Clean all inner and outer surfaces
of the male and female ends with an
appropriate organic solvent, such as acetone,
Mek, or other commercial degreaser.
1. Apply a bead of S-650 sealant about 1/8”
thick around the male end of chimney and
for Grease duct application, add a bead of
S-2000 sealant at the edge of the female
chimney (see Figure 2). See Table 5 for
approved sealants.
2. Insert the female end, of another section
of chimney, over male end with sealant (see
Figure 3).
3. Insert the assembly band (see Figure
4) around the joint of the two sections
assembled in Step 2. A small bead of S-650 can
be applied on the inner groove of the band
prior to installation for better leak tightness.
4. Using a phillips screwdriver, connect the
two ends of the band as shown in Figure 5.
5. Where the chimney is installed outside, an
exterior sealant S-375 must be applied at the
upper joint of the band and the outer casing,
see Figure 5.
Figure 2
Figure 3
Figure 4
Figure 5
Grease Duct Application: Add a
bead of S-2000 sealant at the
edge of the female end.
Add S-650 sealant here.
Apply S-375 sealant here for exterior installation.