Joint connections, Appliance connection, Condensate drains – DuraVent FasNSeal Single-Wall User Manual
Page 7
7
JOINT CONNECTIONS
The female end of each FasNSeal®
component incorporates a sealing gasket
and a mechanical locking band. Examine all
components prior to installation. Gaskets
must be in proper position or flue gases
could leak and result in carbon monoxide
poisoning.
1. Insert the male end into the female
section. Push the units together and turn
them until half of the bead on the male
end is covered by the flared edge of the
female end. (see Figure 2). This creates
the needed airtight seal for Category II, III
or IV appliances. Align the seams on the
vent lengths and orient them upward in all
horizontal applications.
2. Tighten the locking band with a nut driver
until snug plus 1/4 turn.
Before proceeding, recheck all joints and
ensure that all male sections extend to the
top of the flared female end and all clamps
are tightened.
APPLIANCE CONNECTION
Connect FasNSeal® to the appliance
flue collar as directed in the appliance
manufacturer’s instructions. If the appliance
flue collar is not designed to accept FasNSeal®
directly, an adapter may be available.
CONDENSATE DRAINS
If instructions or local regulations call for
a condensate drain, use a FasNSeal® Drain
Fitting (FSDF) and a 5/8” ID plastic tube (3/8”
for the Horizontal Drain Fitting, FSHDT) of
appropriate size to connect the Tee into the
sanitary sewer drain. Always create a siphon
loop in the plastic tube. Follow all local and
national codes for draining acidic effluent. Do
not use copper as a drain as it may corrode.
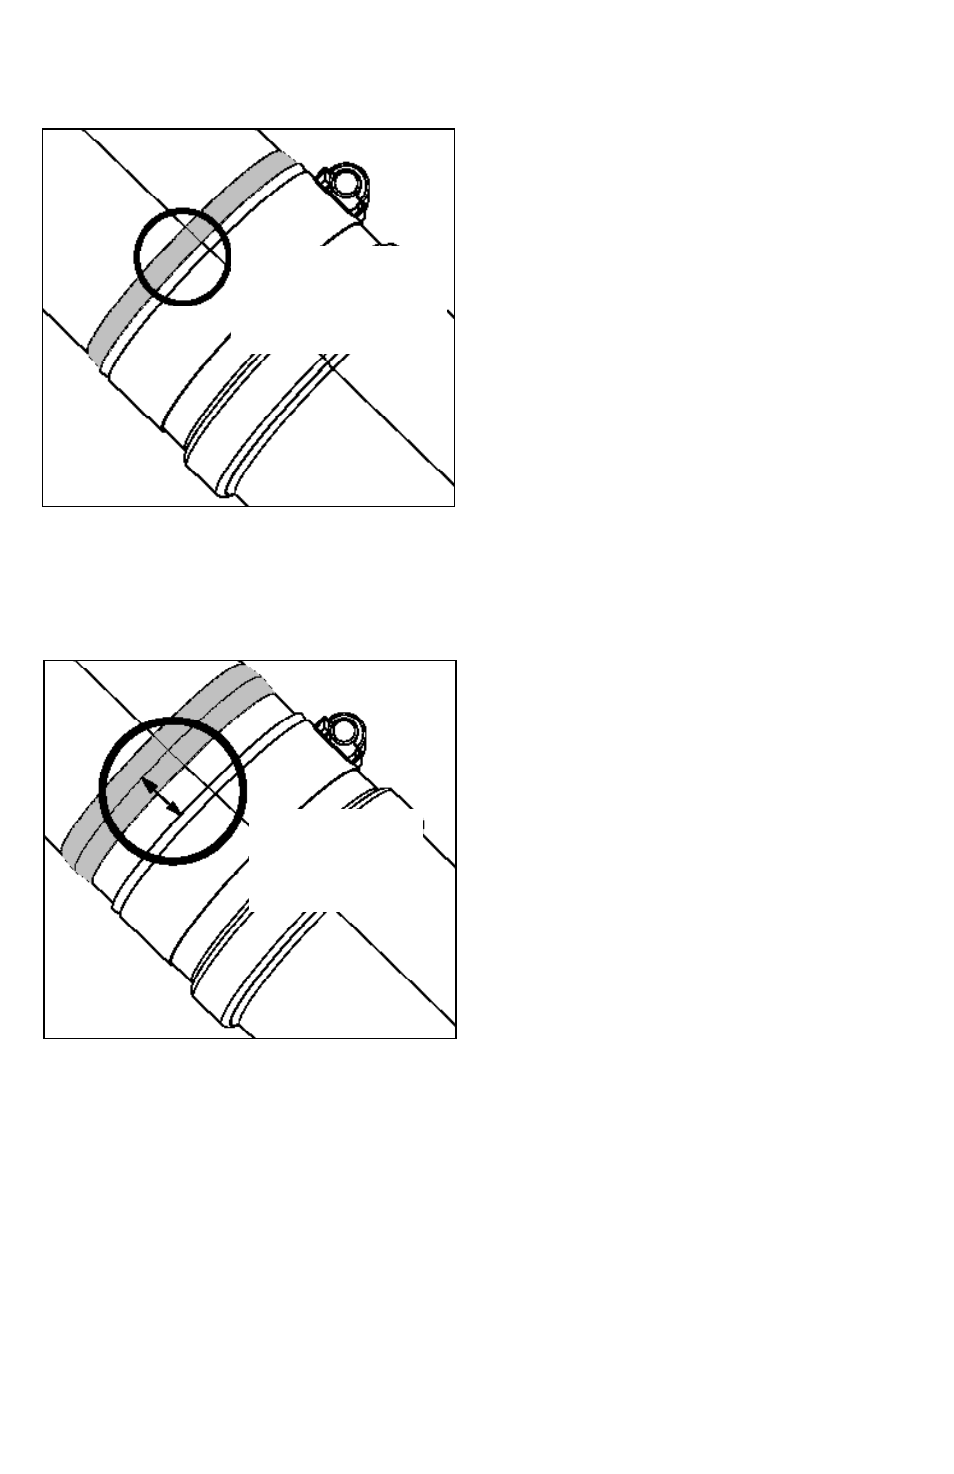
Correct Joint Connection.
Male/Female sections fully engaged.
INCORRECT Joint Connection.
Male/Female sections
NOT fully engaged.
Figure 2
jOINT CONNECTION IS
CORRECT WHEN HALF OF THE
BEAD ON THE MALE END IS
COVERED By THE FLARED EDGE
OF THE FEMALE END.
CONNECTION IS
INCORRECT IF GAP
IS BETWEEN FLARED
FEMALE EDGE AND TOP
OF BEAD