Basic fasnseal flex liner installation, Tee installation – DuraVent FasNSeal Single-Wall User Manual
Page 14
14
7. Repeat steps 3 through 5 for other end.
8. Before installation, let cure for a minimum
of 24 hours or follow the cure time called out
by the silicone manufacturer.
BASIC FASNSEAL FLEx LINER
INSTALLATION
1. Determine the required location and
opening in the masonry chimney. For a basic
FasNSeal Flex installation the opening must be
large enough for the mortar sleeve and Male
Flex Adapter to easily pass through. If a Tee
application is necessary, a larger hole may be
required. (See Tee Installation Section)
2. Make sure the union of the Male Flex
Adapter and the FasNSeal Flex is supported at
the bottom of the chimney.
3. The flex liner must be installed from the top
of the masonry chimney. To prevent damage,
one person should feed the liner through the
chimney and another person should pull the
liner from the bottom. To ease the installation,
you can attach a rope to the FasNSeal Flex
liner above the Male Flex Adapter. Doing this
will reduce the chance of breaking the seal
between the FasNSeal Flex and the Male
Flex Adapter.
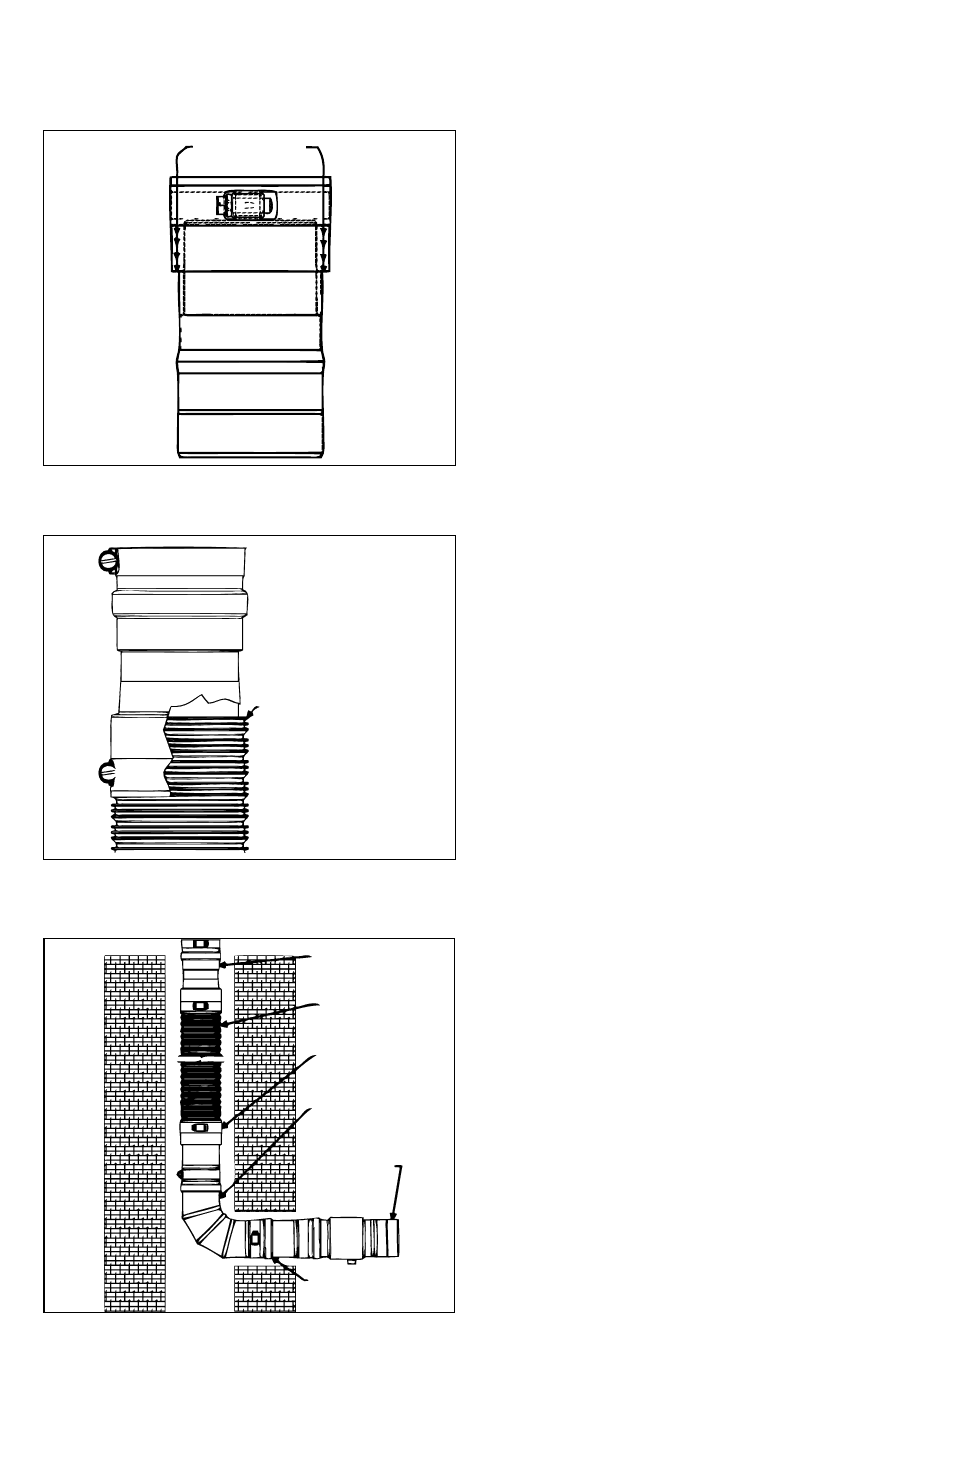
4. The FasNSeal Flex must stay within the
masonry chimney; however the Elbow or
other FasNSeal components will extend
beyond the masonry chimney. (Figure 14)
5. It is strongly recommended to use either
a Universal Condensate Drain or Tee with
Condensate Fitting right off the Male Adapter
coming out of the chimney.
TEE INSTALLATION
Figure 14
Figure 12
Figure 13
ADD SILICONE IN
CHANNEL
INSERT LINER
UNTIL BOTTOMED
OUT IN ADAPTER
(MIN 1.5" / MAx 2")
CONDENSATE
DRAIN
ELBOW/TEE
FEMALE
ADAPTER
FLEx
SECTION
MALE
ADAPTER
VENT
SECTION