Offset elbow installation – DuraVent DuraTech 10-24 Installation User Manual
Page 12
12
the chimney by setting the female end of the
Cap onto the male end of the last chimney
section. Secure the Cap by using (6) sheet
metal screws provided. Do not push down
from the top portion of the cap as this may
damage the cap. Push from the lower section
of the Cap if needed. The Chimney Cap can
be removed for chimney cleaning as described
in the Chimney Maintenance section of the
instructions. Use an Extended Roof Bracket if
the chimney extends more than 4 feet above
the roof (Figures 16 & 17 in the Extended
Roof Bracket section).
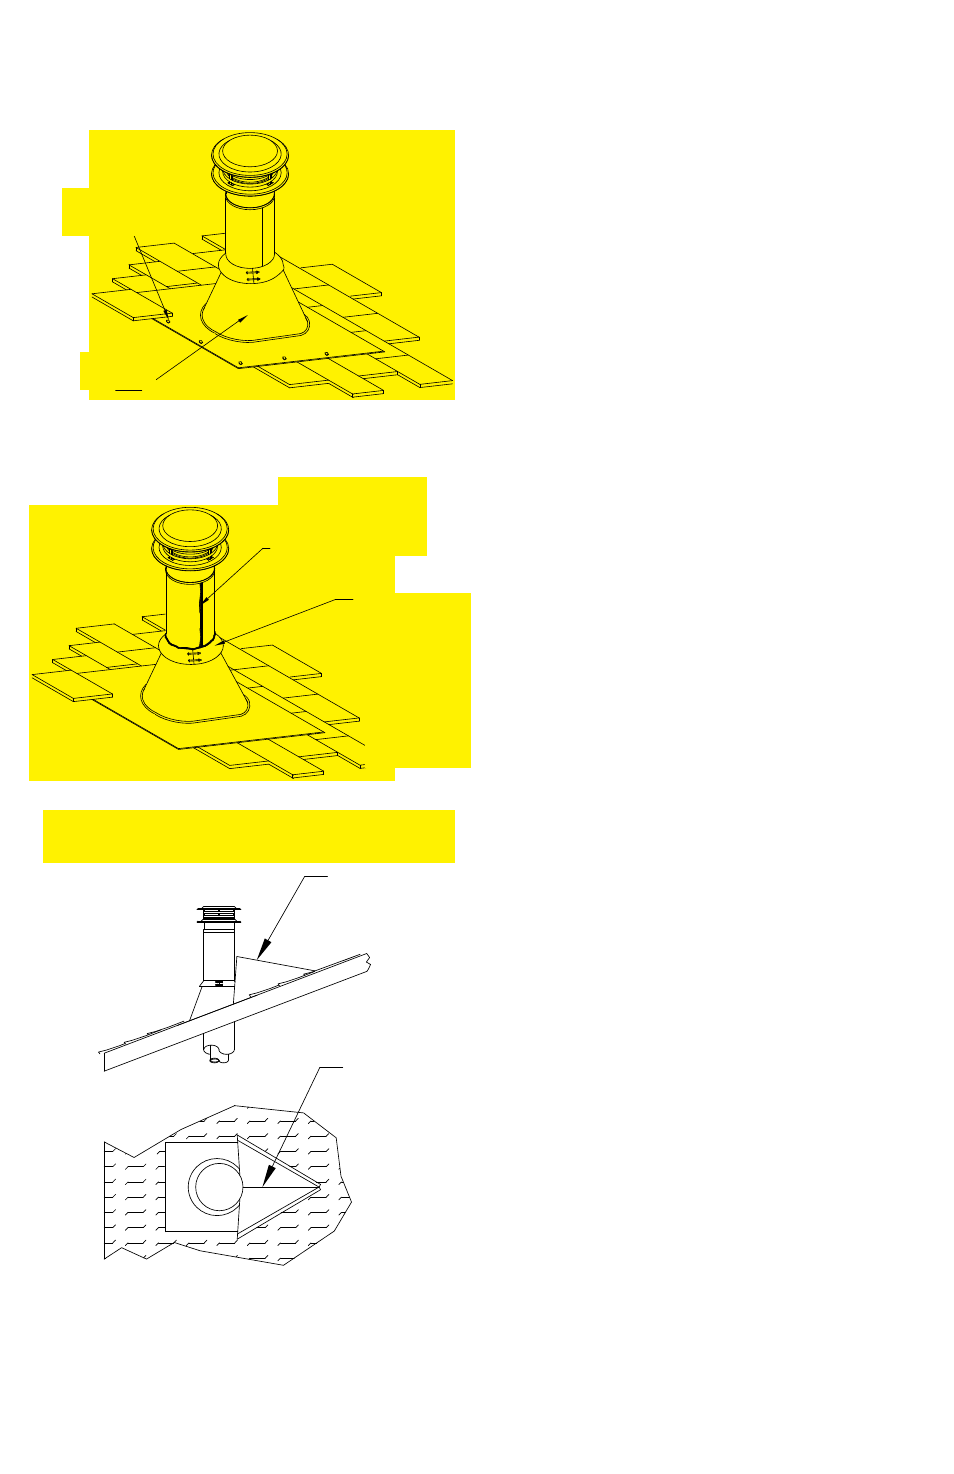
If you are located in heavy snow country, a
“snow splitter” should be used to protect the
chimney by routing snow around the pipe.
DuraVent offers a Snow Splitter or one can
be fabricated locally from heavy gauge sheet
metal (Fig 14).
12. Enclosures: Enclose chimneys where
they pass through occupied spaces, including
closets. Always maintain at least a 2 inch
clearance between the chimney and any
combustible materials. Interior enclosures
may be constructed with standard framing
and sheathed with sheetrock or plywood. Use
Wall Straps at least every 4 feet to maintain a
minimum of 2 inches of air space between the
chimney and combustible materials.
OFFSET ELBOW INSTALLATION
DuraTech allows for the use of one pair of
30° Elbows (measured from the vertical) for
chimney sizes 10” - 24”. A 30° Elbow is the
largest that can be used in an offset from
vertical. A 30° Elbow may not be combined
with another elbow to make a steeper offset
(e.g. two 30° Elbows are not allowed to be put
together to form a 60° elbow from vertical).
Avoid Elbows if possible, since a totally vertical
chimney is more efficient. When Elbows
Figure 14
SNOW
SPLITTER
SNOW
SPLITTER
TOP VIEW
Figure 13
SEAL EXPOSED SEAM
WITH
NON-HARDENING HIGH-
TEMP
SILICONE SEALANT
PUSH COLLAR
DOWN
TO FLASHING AND
SEAL WITH
NONHARDENING
HIGHTEMP
SILICONE
SEALANT
Figure 12
ROOFING
FASTENERS
ADJUSTABLE
FLASHING