DuraVent DuraTech 10-24 Installation User Manual
Page 11
11
9. Install Attic Insulation Shield: Install
the Attic Insulation Shield where the chimney
passes into an attic. It’s purpose is to prevent
debris and building insulation from getting too
close to the chimney (Fig 10). An installed
Attic Insulation Shield is 15 inches high. In
attic areas where this shield cannot fit, you
must enclose the attic portion of the chimney
in a framed enclosure. If the chimney is fully
enclosed through the attic, an Attic Insulation
Shield is not required. Where the chimney
passes into the attic, install the Attic Insulation
Shield as follows:
a. If the Firestop Radiation Shield extends
above the attic floor, no modifications are
necessary. The Firestop Radiation Shield will
fit inside the Attic Insulation Shield.
b. Assemble Chimney Sections until at least
18 inches of chimney extends above the
Firestop Radiation Shield.
c. Slip the Attic Insulation Shield over the
Chimney and Firestop Radiation Shield until
the base sits squarely on the framed opening
(Fig 6 & 10).
d. Secure the Attic Insulation Shield to the
top of the framed opening using at least (3)
8-penny nails or (3) #8, 1-1/2” wood screws
per side (Fig 10).
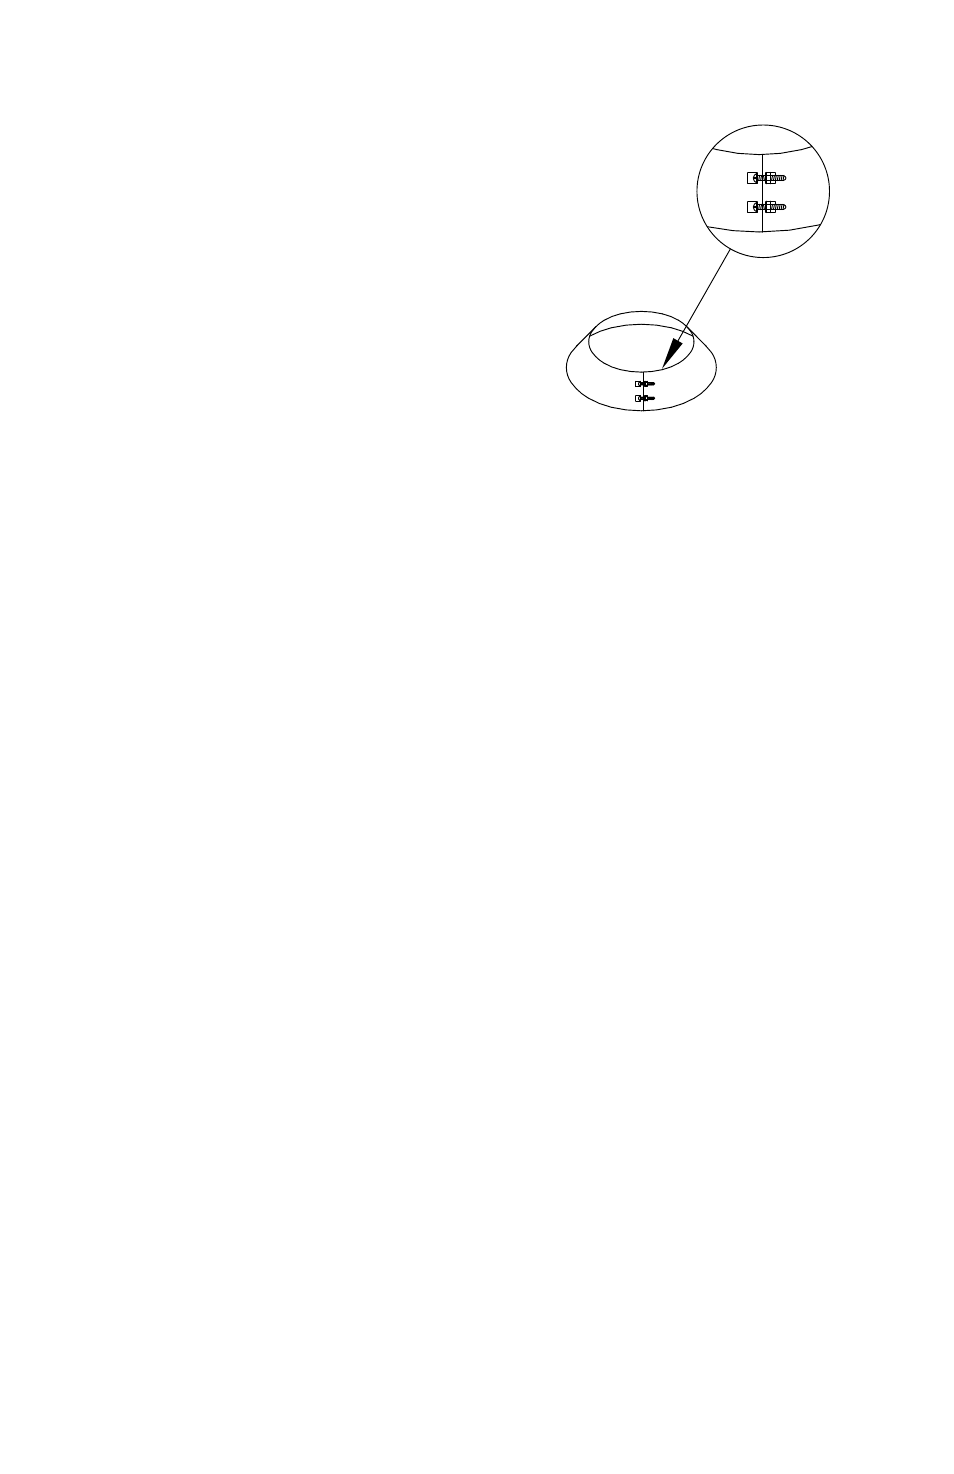
e. Wrap the Collar of the Attic Insulation
Shield around the chimney and fasten it
loosely. Slide the Collar down to meet the Attic
Insulation Shield. Tighten the bolts to secure
the Collar in place (Fig 11).
10. Attach Flashing: In new construction,
assemble the Chimney Sections to a point
above the roof, then slip the Flashing over
the chimney. On an existing roof, center
and install the Flashing before extending the
chimney above the roof. Allow space to permit
sliding the next Chimney Section up through
the Flashing. Always ensure the chimney
Figure 11
remains vertical (use a level), and that at least
a 2-inch clearance to combustible materials is
maintained all around. Install the upper edge
of the Flashing under the roofing. Nail to the
roof along the upper edge and down each
side with 1-inch roofing nails. Do not nail the
lower edge of the Flashing (Fig 12). Be sure
to follow local building practices, as needed.
Seal all nail heads with a non-hardening
waterproof sealant. On flat or tarred and
graveled roofs, nail and seal the Flat Roof
Flashing to the roof on all sides with roofing
compound. Do not put screws through the
Flashing into the Chimney Pipe.
11. Finish Top: Apply a non-hardening
waterproof sealant around the chimney at the
point where the Storm Collar will meet the
chimney just above the Flashing, and also
along the vertical seam of the chimney pipe,
where it is exposed to the weather (Figures
12 and 13). Slide the Storm Collar down
over the chimney to the top of the Flashing.
Tighten the bolts of the Storm Collar and seal
the Storm Collar against the sealant. After
installing sufficient Chimney Sections to meet
the height requirement as shown in Figure
1, attach the Chimney Cap onto the top of