6 configuring the rc-52n buttons, 1 locking and unlocking the rc-52n, 7 technical specifications – Kramer Electronics RC-52N User Manual
Page 8: Configuring the rc-52n buttons, Locking and unlocking the rc-52n, Technical specifications, Ection 6.1, Table 2 defines the technical specifications
KRAMER: SIMPLE CREATIVE TECHNOLOGY
Configuring the RC-52N Buttons
6
6 Configuring the RC-52N Buttons
To configure the RC-52N buttons, refer to the relevant Configuration guide
Before you configure the RC-52N buttons:
1. Connect the RC-52N to your PC with the USB cable
2. Open the Configuration program.
3. Follow the instructions in the Configuration guide to configure the
RC-52N buttons.
6.1 Locking and unlocking the RC-52N
You can lock the front panel buttons by pressing a predefined button on the
front panel. Pressing the lock button initiates a macro sequence (a series of
commands, which can include the dimming of the lights, shutdown of the
A/V machines and so on).
You can unlock the front panel buttons by pressing a predefined sequence of
four buttons.
The locking procedure can be configured as a part of the timeout or
scheduling event macros.
You can consult the installer of your unit regarding the specific configuration of the
locking and unlocking feature on your system.
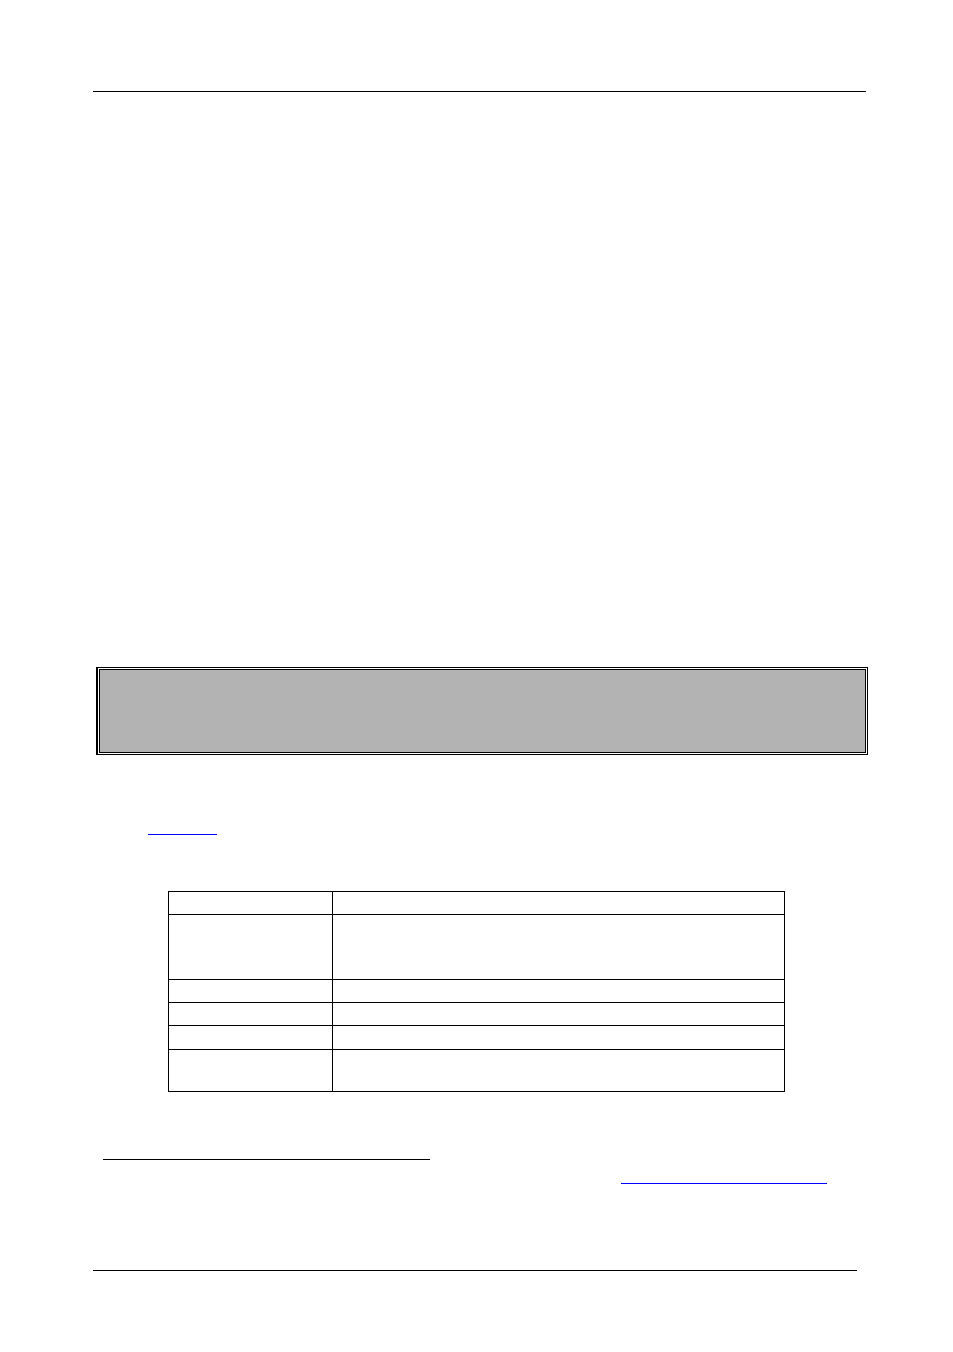
7 Technical Specifications
defines the technical specifications:
Table 2: Technical Specifications
INPUT:
of the RC-52N Room Controller
1 IR Receiver
PORTS:
1 RS-232 on a terminal block connector
1 IR OUT on a terminal block connector
1 USB port
POWER SOURCE:
5V DC, 150mA
DIMENSIONS:
1 gang (Europe and USA)
WEIGHT:
0.3kg (0.67lbs) approx
OPTIONS:
RS-232 9-pin D-sub port to 3-pin terminal block connector
cable (C-D9F/3PM-0.6)
1 Download up-to-date Kramer user manuals and guides from the Internet at this URL:
http://www.kramerelectronics.com
2 There is no need to connect the RC-52N to a power supply for configuration since power is supplied over the USB cable
3 Specifications are subject to change without notice