7 operating the vp-8x4ak, 1 switching an input to an output, 2 understanding the 7-segment displays – Kramer Electronics VP-8x4AK User Manual
Page 25: 1 the status 7-segment display, Operating the vp-8x4ak, Switching an input to an output, Understanding the 7-segment displays, The status 7-segment display, Ection 7.2.1, 7operating the vp-8x4ak
Operating the VP-8x4AK
21
21
7
Operating the VP-8x4AK
This section describes how to:
• Use the IN and OUT buttons (see
Section 7.1
• Read the 7-segment displays (see
Section 7.2
• Confirm settings (see
Section 7.3
• Store and recall input/output configurations (see
Section 7.4
• Lock the front panel (see
Section 7.5
• Choose the audio-follow-video or the breakaway feature (see
Section 7.6
• Use the audio gain control (see
Section 7.7
7.1
Switching an Input to an Output
To switch an input to an output:
1. Press the required OUT button.
The input under the selected output on the IN 7-segment display blinks.
2. Press an IN button to select the input to switch to the output.
The selected input number appears on the 7-segment display.
Incomplete operations on the VP-8x4AK timeout after 15 seconds
7.2
Understanding the 7-Segment Displays
The VP-8x4AK has two displays:
• The STATUS 7-segment display
• The REL. AUDIO LEVEL (dB) 7-segment display
7.2.1 The STATUS 7-Segment Display
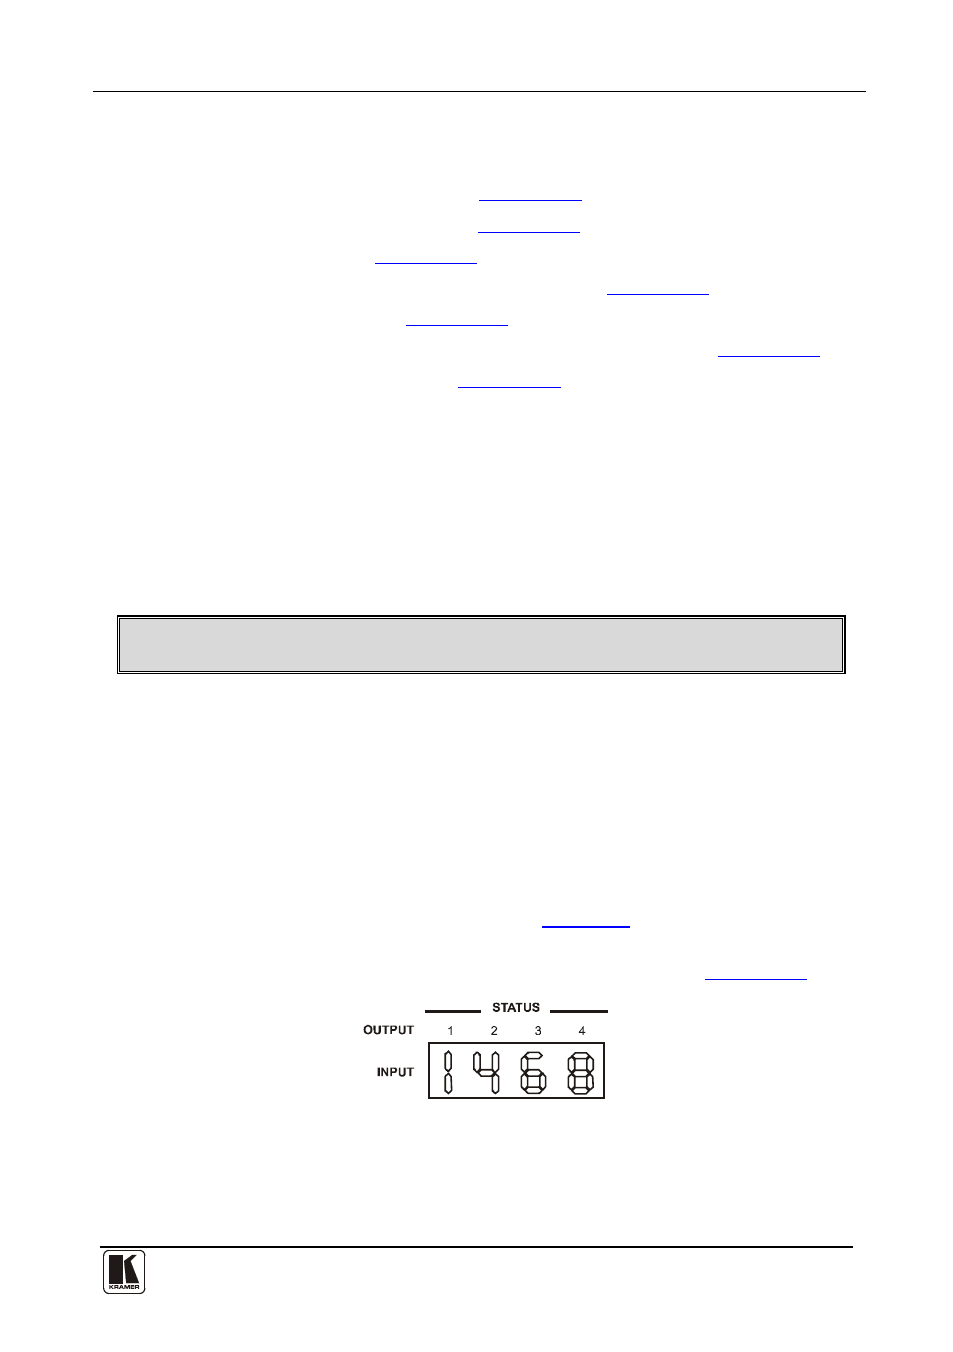
During normal operation, the STATUS display shows which inputs are
switched to which outputs, as illustrated in
. In the VIDEO mode,
the display shows the video signal setup and in the AUDIO mode, it shows
the audio signal setup. In the AFV it shows both signals (see
Section 7.6
Figure 12: 7-segment Display during Normal Operation
Immediately after switching on the power, the status display shows the
firmware version number. This display disappears after a few seconds,
replaced by the normal display.