Rivera Primo 3047-0001 "Hydraulic Chain Tensioner User Manual
Page 2
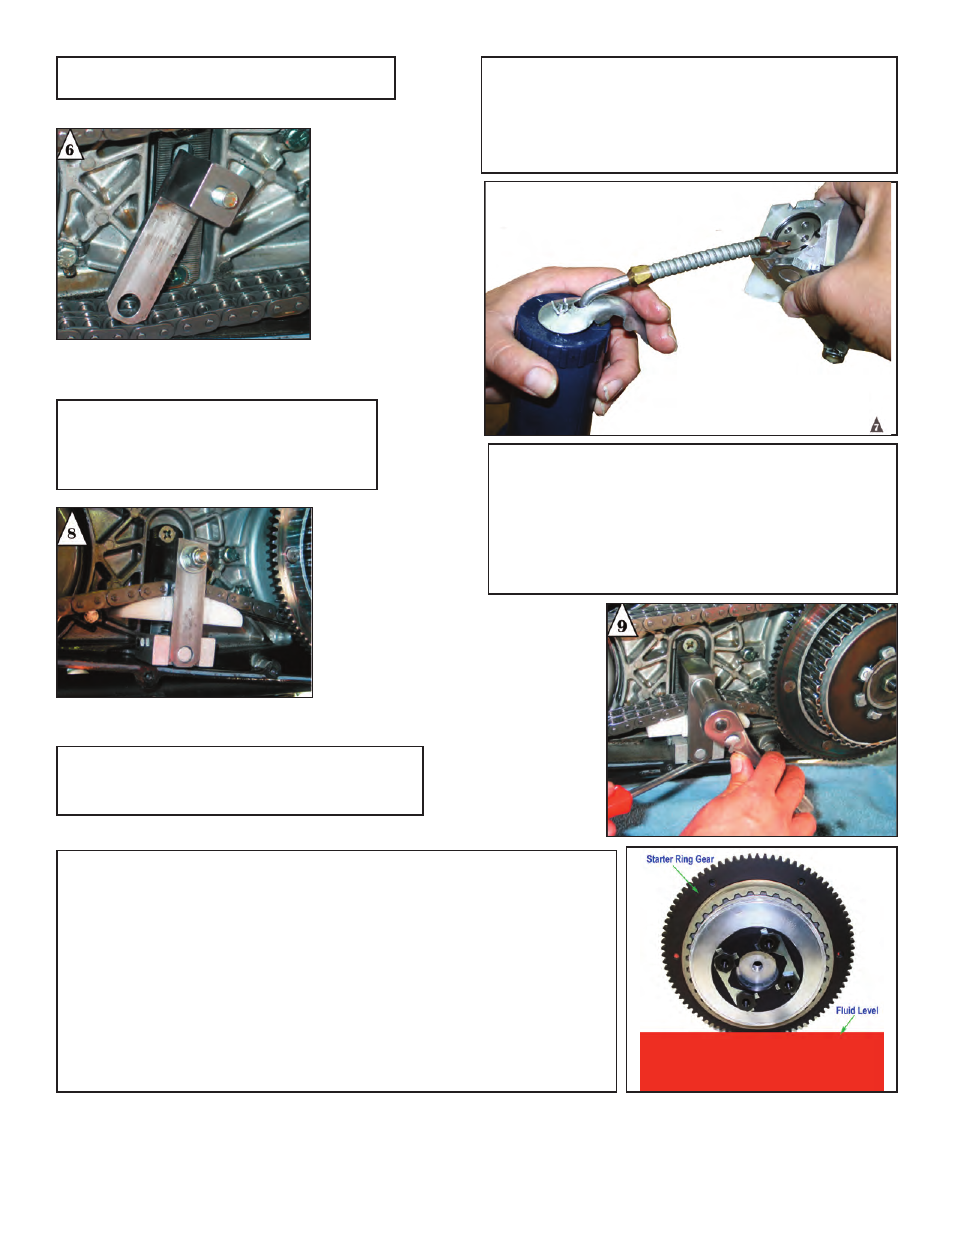
Figure 6: Install inner guide with welded
spacer.
Figure 7: Turn hydraulic unit upside down to ex-
pose the feeder holes in the bottom. Force pri-
mary fluid (if using a Rivera® Pro Clutch™ATF ‘F’
type oil) into one of the four holes unitl hydraulic
unit is full.
Figure 8: Install the complete ten-
sioner with pointed end of shoe & the
relief valve on the hydraulic unit point-
ing toward the front of the motorcycle.
Figure 9: Install outer guide with washer and
nylon locking nut and then slide hydraulic unit
and shoe up to achieve ‘zero slack. Move the
unit up 1/16” more to pre-load the chain and then
tighten the nut 28-30 ft.lbs. Too much ‘pre-load
may result in additional noise.
NOTE: The set screw and jam nut on the
hydraulic unit are pre-set from the factory.
DO NOT ADJUST!!
Finally, install a new primary cover gasket and the primary cover
being sure to properly torque all fasteners after applying a few
drops of blue thread locker. Through the derby cover opening, add
approxmitely 3/4 of a quart of primary fluid or if you are using a
Rivera® Pro Clutch™add ATF type ‘F’ fluid. (See adjacent picture
for fluid level). Now replace the derby cover being sure to properly
torque all fasteners after applying a few drops of blue thread locker.
RIVERA PRIMO INC. ~ 12450 WHITTIER BLVD. ~ WHITTIER, CA 90602
562-907-2600 VOICE ~ 562-907-2606 FAX ~ [email protected]
WWW.RIVERAPRIMOINC.COM
1108-0024