Shovelhead/iron head xl installation instructions, Air cleaner, Choke cable installation – Rivera Primo Mikuni 42mm Carb - SH & XL User Manual
Page 3: Overflow hose, Starting, Use caution
Check and make sure that the throttle cables are rout-
ed properly by rechecking the throttle play as the han-
dlebars are turned from side-to-side; the amount play
should remain consistent.
C) After the throttle cables have been adjusted, make sure
that all the lock nuts are securely tightened.
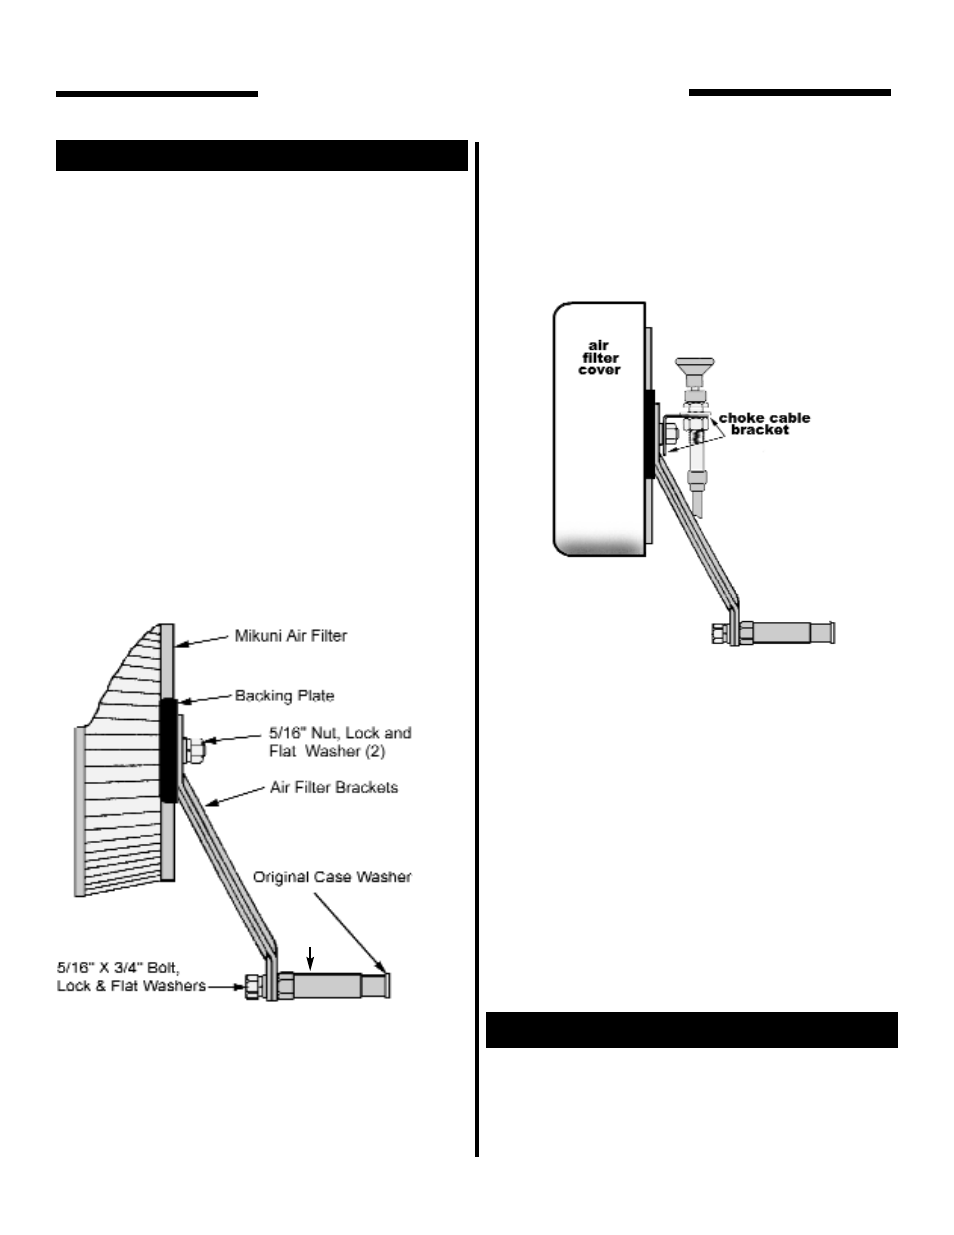
5. AIR CLEANER
A) The air filter bracket is attached to the crankcase with 1
long bolt, and a bracket-spacer. Removed the crankcase
nut located between the tappet blocks & replace it with the
enclosed bracket spacer; tighten the spacer securely.
B) Remove the stud protectors from the K&N filter and
place the two backing plates on the studs. Now slip the the
filter onto the carburetor.
C) Attach the 2 long brackets to the air filter studs with the
enclosed nuts & flat washers, and to the bracket spacer with
the enclosed bolt using the lock washers, and flat washers.
When the carburetor and air cleaner are properly aligned,
securely tighten all of the mounting hardware including the
intake manifold clamps.
In some cases it may be necessary to bend the
brackets slightly to arrive at the correct fit.
D) Use the enclosed hose clamps to secure the fuel hose to
the petcock, and the HSR carburetor. The screw clamp
goes on the petcock end and the spring clamp attaches to
the carburetor end.
E) Attach the chrome air filter cover with the enclosed
socket head screw.
7. CHOKE CABLE INSTALLATION
A) Attach the Mikuni choke cable bracket to the original
choke cable bracket on the air cleaner stud with the enclose
hardware as illustrated.
B) Route choke cable to it's mounting bracket and tighten
the jam nut securely. After the cable is securely fastened,
adjust choke cable to have 1mm (.040") of free play with the
adjuster located under the rubber cover at the carb.
8. OVERFLOW HOSE
A) Route the carburetor overflow hose between the push
rod tubes and the rear cylinder, then downward towards the
frame.
9. STARTING
Reconnect the battery and reassemble the remainder of
the motorcycle. Turn on the gas, and start the motorcycles
as you would normally. After the motor has warmed up,
adjust the idle to the desired RPM.
CAUTION
To properly maintain the HSR42's superior high
performance capabilities, it is recommended
that the air cleaner be inspected at 5,000 mile
intervals. Clean/replace the filter as needed.
3
USE CAUTION
use the new case bolt included in the kit!
USE CAUTION
SHOVELHEAD/IRON HEAD XL
Installation Instructions
spacer