Martin Universal Design U-DS92STB Ashley Table with Stool User Manual
Page 6
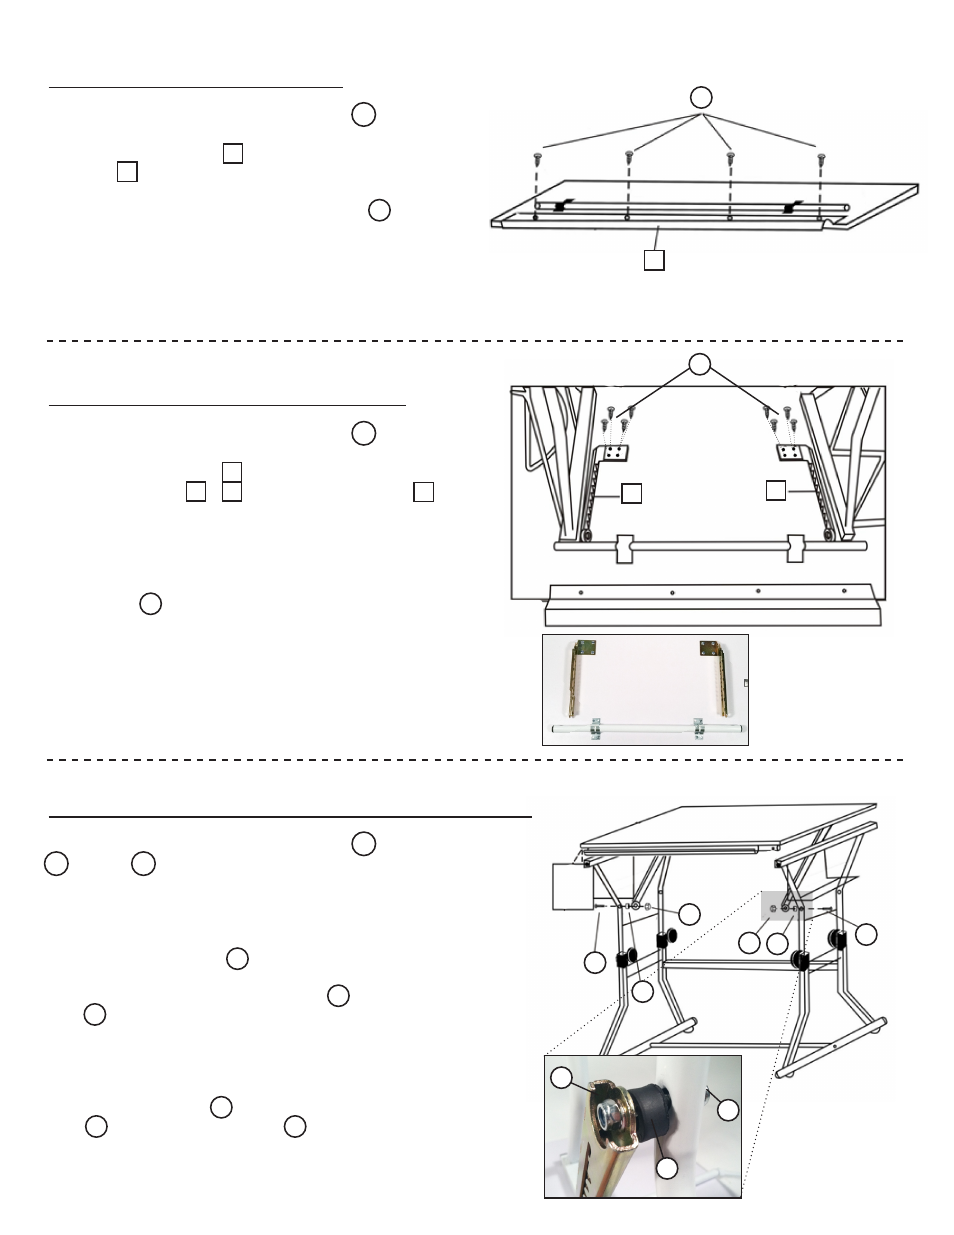
Step 9: Tool Trough
Step 10: Tilt Mechanism
Step 11: Attach Top to Top Base
Fastener Parts Needed for this Step : 21 = 4 ea.
Attach Tool Trough (Part ) to the front ledge of the Table
Top (Part ).
Secure to ledge with [4] 4x12mm screws (Part ). They
are self-tapping screws
*** Some of the holes are not pre drilled ***
Fastener Parts Needed for this Step : 26 = 8 ea.
With the Table Top (Part ) still on the floor, attach Tilt
Mechanisms (Parts & ) to the Table Top (Part ).
Line up tilt mechanisms with the pre drilled holes.
Make sure the stamp end of the tilt mechanism is on outside
closet to the edge of the table.
Secure the tilt mechanism to the tabletop with [4] 4x14mm
screws (Part )
Repeat the process with the second Tilt mechanism
Fastener Parts Needed for this Step : 27 = 2 ea.
15 = 2 ea. 18 = 2 ea.
Turn the Table Top over and place it on the base. You will
need to kneel down to finish assembly
Insert a 6x40mm bolt (Part ) into the outer side of the base.
Now place the thick plastic washer (Part ) on the bolt
(Part ) thru the inside of the base.
Slide the tilt mechanism so the stamped side is next to the
plastic washer.
Secure with a nut (Part ) and tighten with the wrench
(Part ) and Allen Wrench (Part ) and tighten till snug.
DO NOT OVERTIGHTEN, otherwise the tilt mechanism will
not work smoothly.
21
1
14
14
21
26
26
1
1
11
11
12
12
27
27
27
27
15
15
15
15
27
18
18
18
18
22
23
6
10/2011 - RPI