Installing the wall transmitter – Minka Group F707-FLP User Manual
Page 14
WARNING! HOOK UP "IN SERIES" ONLY. DO NOT CONNECT NEUTRAL SUPPLY WIRE OF
ELECTRIC CIRCUIT TO THE TRANSMITTER WALL SWITCH, DAMAGE TO THE TRANSMITTER
WALL SWITCH AND POSSIBLE FIRE COULD OCCUR.
Step 1. Remove the existing wall plate and switch from the wall outlet box.
Step 2. Make the electrical connections as shown in Fig.15. If your outlet box has a ground
wire (Green or Bare Copper) connect the Transmitter's ground wire directly to one of the
screws from the outlet box . Secure all wire connections with the plastic wire nuts provided.
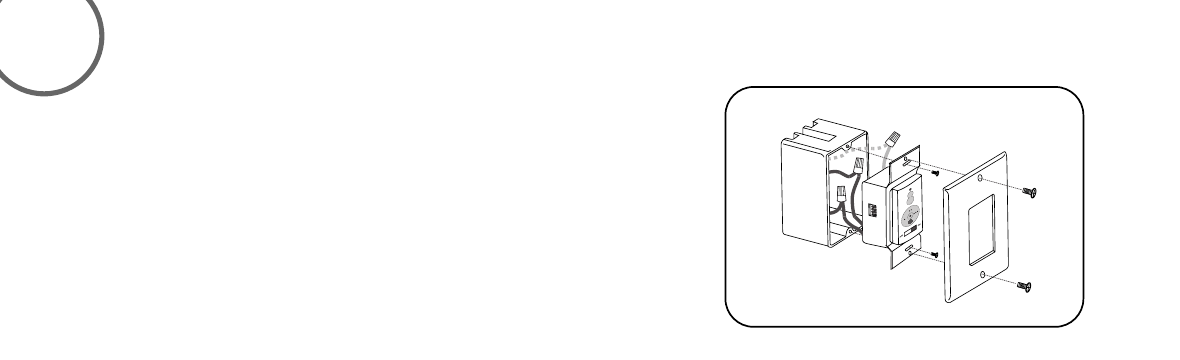
Step 3. Carefully tuck the wire connections inside the outlet box. The Touch ControlTM
System provided with your fan includes two sets of face and decorative plate color options.
The wall control comes with a standard white faceplate attached. If you desire to replace it
with the Ivory color faceplate, use your fingernail or a small flat screwdriver and gently pry it
apart from the top or bottom of the plate. Use the screws provided to secure the wall
transmitter and wall plate to the outlet box. (Fig. 16)
Fig.16
INSTALLING THE WALL TRANSMITTER
6