頁面 9, Ant: antenna a/b setting – MIPRO ACT-818 Wideband Single-Channel Digital Receiver User Manual
Page 9
1. Press the rotary controller to activate and move the cursor to the CH parameter.
When the CH cursor starts to flash, the Channel is ready to be set.
2. Rotate the rotary controller clockwise to increase the Channel number;
counterclockwise to decrease the Channel number.
3. Press the rotary controller once to confirm and save the selected Channel number
(or wait for autosave).
4. Last Group (country dependent. may not be GRP 18) is user-defined and can store
up to 16 frequencies.
!
Turn rotary control to a desired channel control when CH (channel) starts to
flash. Flashing indicates it is ready for change.
!
During flashing, Turn CH right or left to increase or decrease channel. Once
desired channel is completed, press & hold the rotary control for few seconds
until the frequency starts to flash.
!
Turn rotary control right (+1MHz) or left (-1 MHz) will set the parameter left of
the period (.). Press to set.
!
Turn rotary control right (+25 kHz) or left (-25 kHz) will set the parameter right
of the period (.). Press to set.
!
Only channels (CH) found in last group (GRP) in each bandwidth can be changed
and stored frequencies.
NOTE: When the SQ is set at full level (showing 5 bars), the "AutoScan" function
will be disabled and the user may freely select any preset group or channel
manually.
12
13
Operating Procedure:
CH: Channel Setting
Wideband Digital Receivers
Wideband Digital Receivers
Channels in last GRP (Group) are user-defined frequencies
Frequency will flash to denote for parameter change
Operating Procedure:
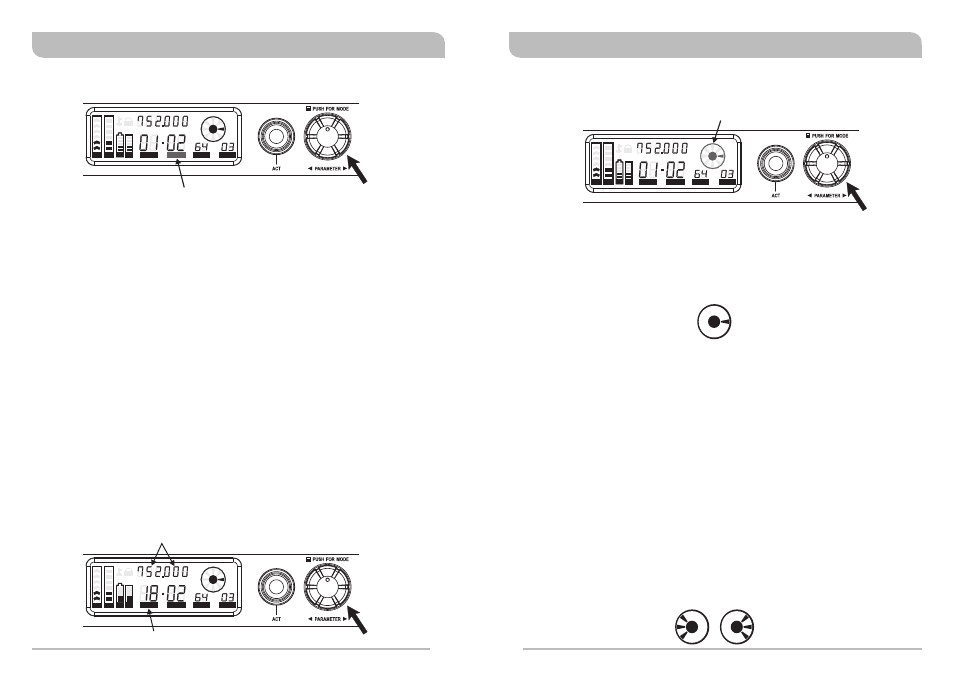
1. Press the rotary controller to activate and move the cursor to the ANT parameter.
When the outer ANT cursor starts to flash, the antenna indicator is ready to be set.
2. Press and hold the rotary controller for 3 seconds until the inner ANT cursor starts
to blink.
3. Rotate the rotary controller to the “Auto” position.
4. Press the rotary controller once to confirm and save the selected antenna position
(or wait for auto save)
ANT: Antenna A/B Setting
ANT cursor starts flashing
This is used primarily to test each remote antenna position for signal strength when
setting the system up in a venue. The Antenna selection is factory set by default to the
“Auto” setting. MIPRO recommends that the antenna is always left set to “Auto” in
normal use.
Antenna “Auto” Setting
ANT
ANT
Antenna A
Antenna B
ANT
Auto
Antenna “A” or “B” Setting:
Important: Antenna A or B setting is only to be used for testing received signal
strength during the sound check. Repeated signal dropouts may occur if the receiver is
set to just “A” or “B” only. Thus, this setting is not recommended for performance. Once
antenna testing is complete, change back to “Auto” and store the setting.
1. Press the rotary controller to activate and move the cursor to ANT parameter. When
the outer ANT cursor starts to flash, the Antenna is ready to be set.
2. Press and hold the rotary controller for 3 seconds until the inner ANT cursor starts
to blink.
3. Rotate the rotary controller to either antenna “A” or “B”.
4. Press and release the rotary controller to set the selected antenna position.
Used for setup only.
Rotate the controller to AutoScan for an
open, interference-free preset channel
CH cursor starts flashing
MHz
L
ACT
RF
AF
SQ
ANT
ADD
EQ
CH
GRP
BA
BA
MHz
L
ACT
RF
AF
SQ
ANT
ADD
EQ
CH
GRP
BA
BA
MHz
L
ACT
RF
AF
SQ
ANT
ADD
EQ
CH
GRP
BA
BA