Vaddio IN-Wall Enclosure for Sony BRC-Z330 User Manual
Page 3
IN-Wall Enclosures
IN-Wall Enclosures - Document 341-744 Rev E
Page 3 of 4
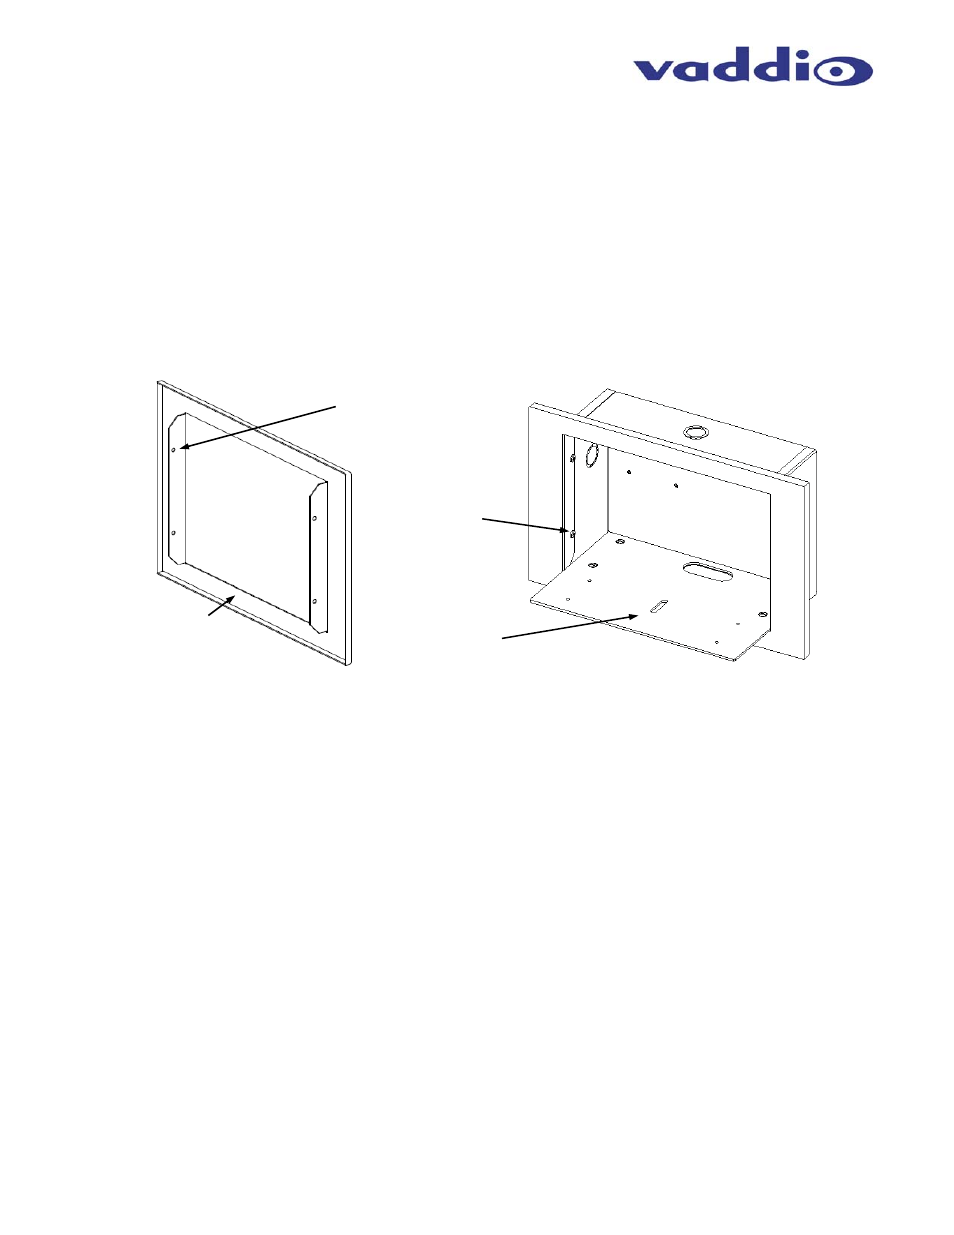
Face Frame
(rear view)
Face Frame
attached to
back box
Camera
Platform
4) Remove the Back Box from the wall and install the spiral wall anchors.
5) The in-wall cabling can be routed at this time. Decide which conduit knock-out will be used on the IN-Wall
enclosure and carefully remove it. The floor of the back box and the camera platform also have cable pass-
through openings.
6) Pull the cabling through the conduit knock-out or cable pass-through and push the back box back into the
opening. Be sure to leave enough slack in the cable to enable termination and the freedom to push the cable
back into the wall cavity when the camera is attached to the platform. Fasten the enclosure to the wall with the
supplied screws and wall anchors.
7) On the sides of the face frame, there are four holes (see drawing below) for attaching the Face Frame to the
Back Box with the supplied white pan head machine screws.
8) Place the Camera Platform onto the bottom of the Back Box, and screw the platform down with the four flat
head machine screws. If using the cable pass-through, thread the cables through the cable slot on the camera
platform before screwing down the platform.
9) If an EZIM is to be installed in the Back Box, connect the break out cable to the EZIM and screw the EZIM into
place. If you are using standard cabling for the PTZ camera, those cables can be run through either one of the
conduit knock-outs, or the slot at the bottom of the Back Box. For the EVI-D70, EVI-D100 and Canon VC-C50i,
attach the EZ Camera Shoe to the back of the camera.
a. Connect the Cat-5 cables to the EZIM, making sure that the cables are connected to the appropriate ports.
NOTE: Plugging the wrong Cat-5 cable into the wrong port can damage either the Quick-Connect system
or the camera and void the warranty, which is bad, generally.
b. Connect the break out cables to the PTZ camera, and place the camera on the shelf.
10) Attach the camera to the camera using the appropriate screws supplied with the mount.
Drawing:
Back of the face frame and front of the IN-Wall box enclosure shown. The four holes on the face frame match up with
the threaded holes in the enclosure.
Four screw holes for
mounting the Face
Frame to the Back Box
EZIM
Mounting
Nuts X 2
Cable Pass
Through