Adjusting the angle of the wall-hanging bracket, Prepare the plasma display, English – Panasonic TYWK42PR7 User Manual
Page 5: Attach the insulating spacers to the display
11
English
• Place the display face down on top of a cloth which is clean and free from other foreign particles, and then carry
out the procedure above.
N o t e
Caution
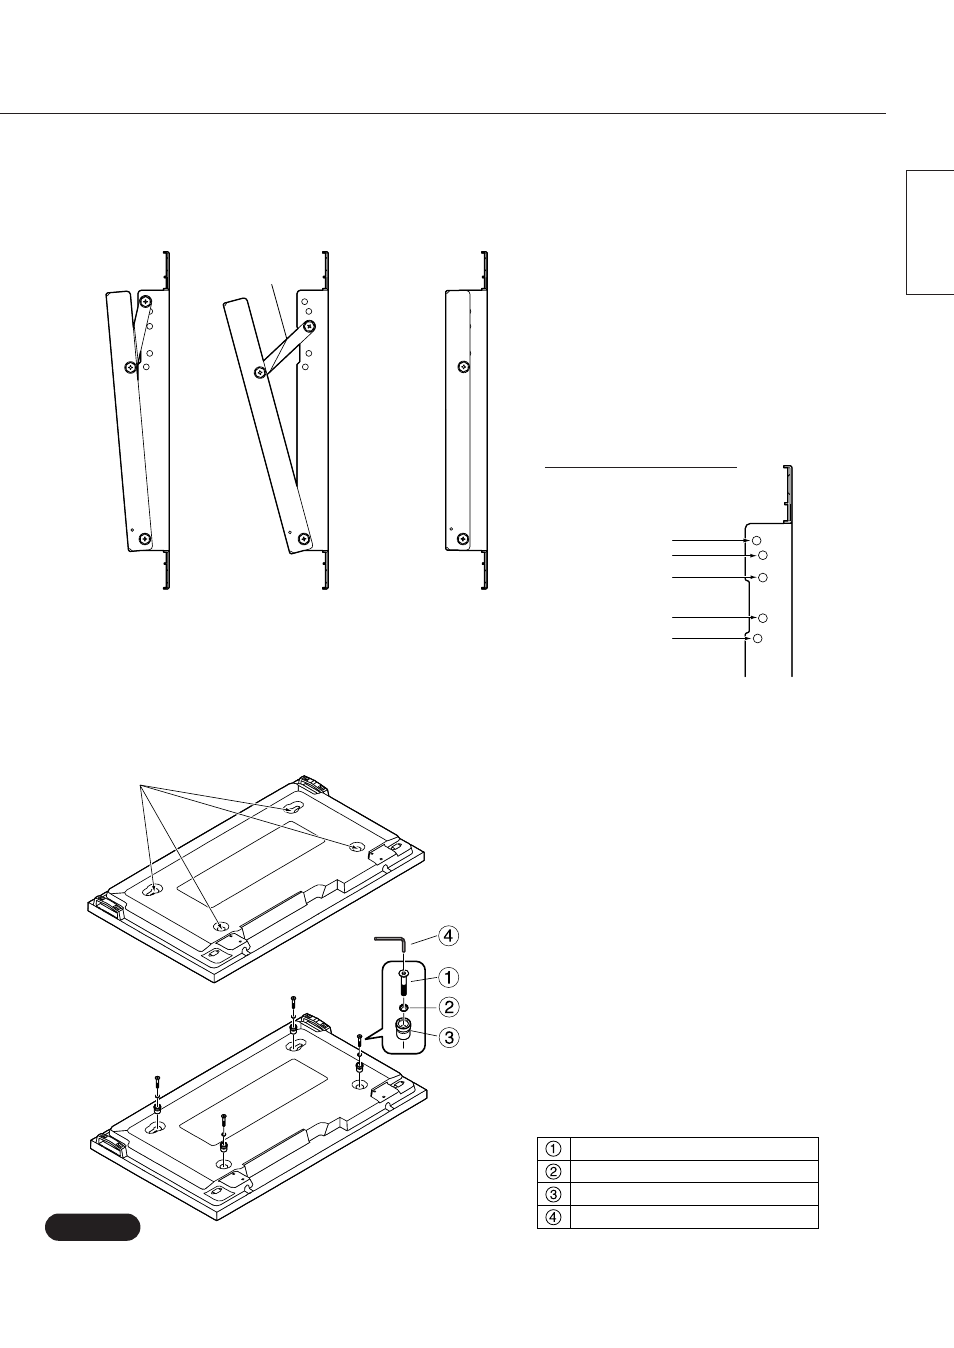
3. Adjusting the angle of the wall-hanging bracket
5
0
10
15
20
5
0
10
15
20
5
0
10
15
20
Stay
The angle for this wall-hanging bracket can be
adjusted to one of five positions ranging from
no tilt to 20° tilt in steps of 5°.
At the time of shipment from the factory, the
angle of tilt is set to 5°. To change this angle,
you should change the installation position of
the stay.
* The stay is not needed if installing the display
with no tilt.
Angle adjustment positions
5° tilt
15° tilt
No tilt
4. Prepare the Plasma Display.
Remove the four bolts.
Pan head bolt wih hex socket
Toothed pan washer
Insulating spacer
Allen key
1. Remove the four bolts from the display.
2. Use the accessory tool (Allen key) to install
the four accessory pan head bolts with hex
socket, toothed pan washers and insulating
spacers into the holes where the four bolts
used to be as shown in the illustration.
Attach the insulating spacers to the display.
5
0
10
15
20
5
°
tilt
10
°
tilt
15
°
tilt
20
°
tilt
No tilt