Setting the ink ribbon – Sony DPP-F700 User Manual
Page 33
33
GB
U
s
ing
as
a
prin
ter
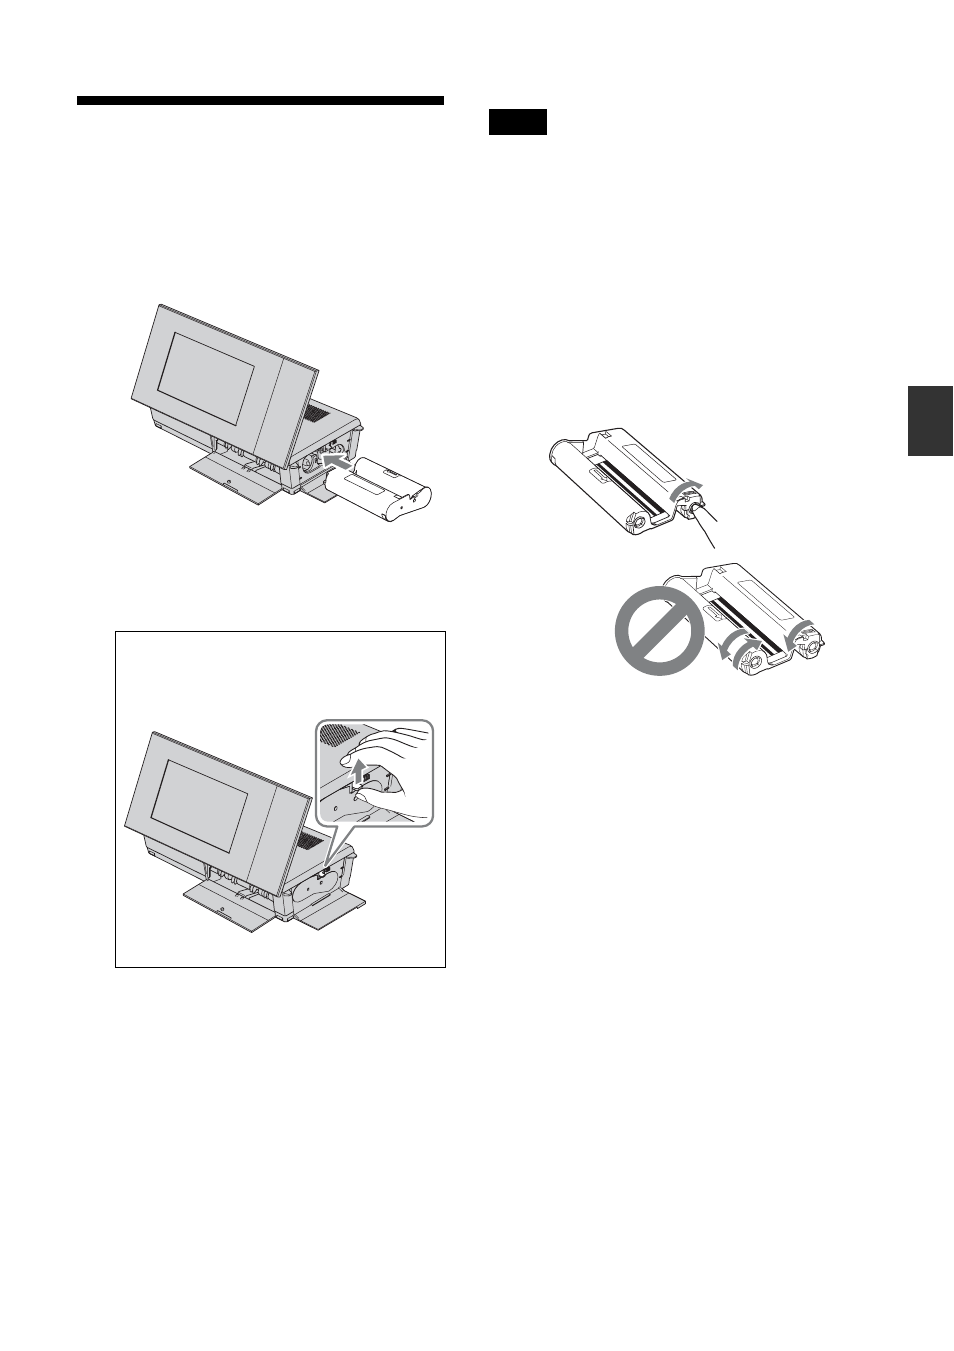
Setting the ink ribbon
1
Pull and open the ink ribbon
compartment door.
2
Insert the ink ribbon in the direction
of the arrow until it clicks into place.
3
Close the ink ribbon compartment
door.
Notes
• Do not touch the ink ribbon or store the ink ribbon
in a dusty location. Fingerprints or dust on the ink
ribbon may result in imperfect printing.
• Do not rewind the ink ribbon and use the rewound
ink ribbon for printing. Otherwise, proper printing
results will not be obtained, or a malfunction may
occur. If the ink ribbon does not click into place,
remove it and then re-insert it. Only when the ink
ribbon is too slack to be loaded, keep pressing the
core of the ribbon and wind the ink ribbon in the
direction of the arrow to remove the slack.
• Do not disassemble the ink ribbon.
• Do not pull out the ribbon from the ink ribbon.
• Do not remove the ink ribbon while printing.
• Avoid placing the ink ribbon in a location subject
to high temperatures, high humidity, excessive
dust or direct sunlight. Please store it in a cool and
dark place and use it within a short period from the
date of production. Depending on the storage
conditions, the ink ribbon may deteriorate. Use of
such an ink ribbon may affect the printed results,
for which we cannot guarantee or compensate.
Removing the ink ribbon
Push up the blue eject lever, and remove
the used ink ribbon.
Do not wind the ribbon in the
directions shown here.