Moving recorded tracks – Sony MZ-S1 User Manual
Page 43
43
-GB
3
Press x.
4
Press MENU.
5
Press . or > repeatedly until
“EDIT” flashes in the display, and
then press ENTER.
6
Press . or > repeatedly until
“G:Rls” flashes in the display, and
press ENTER.
“G:Rls?” and “ENTER” appear in the
display.
7
Press ENTER.
The group setting of the selected
group is released.
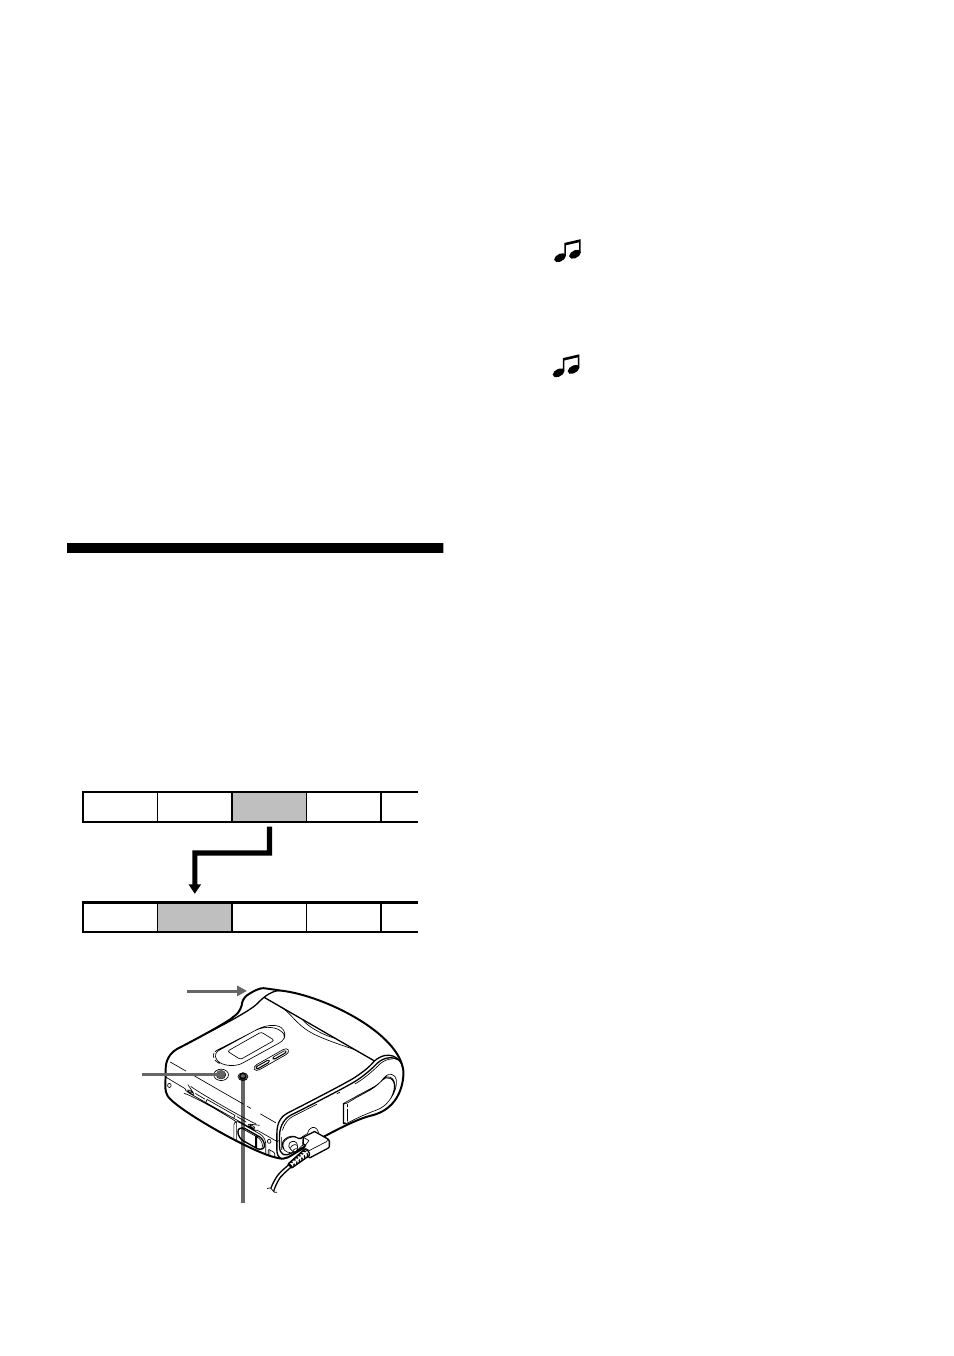
Moving recorded tracks
You can change the order of the recorded
tracks.
Example
Move track C from the third to the second
track.
1
While playing the track you want to
move, press MENU.
2
Press . or > repeatedly until
“EDIT” flashes in the display, and
then press ENTER again.
“
” and “T:Name” flashes in the
display and the recorder plays the
selected track repeatedly.
3
Press . or > repeatedly until
“
” and “T:Move” flashes in the
display, and then press ENTER.
For the example above, “003
t” and
“
t 003” appear alternately in the
display.
4
Press . or > to select the
destination track number.
For the example above, “003
t”
“
t 002” appear alternately in the
display.
5
Press ENTER again.
The track moves to the selected
destination track.
To cancel moving
Press CANCEL in step 4.
A
C
D
B
A
B
D
C
Before moving
After moving
MENU/ENTER
CANCEL
Control key
(./>)