Sonocolumn installation guide, Sonoflat panel installation guide – Auralex SonoFlat System SFS-184 User Manual
Page 3
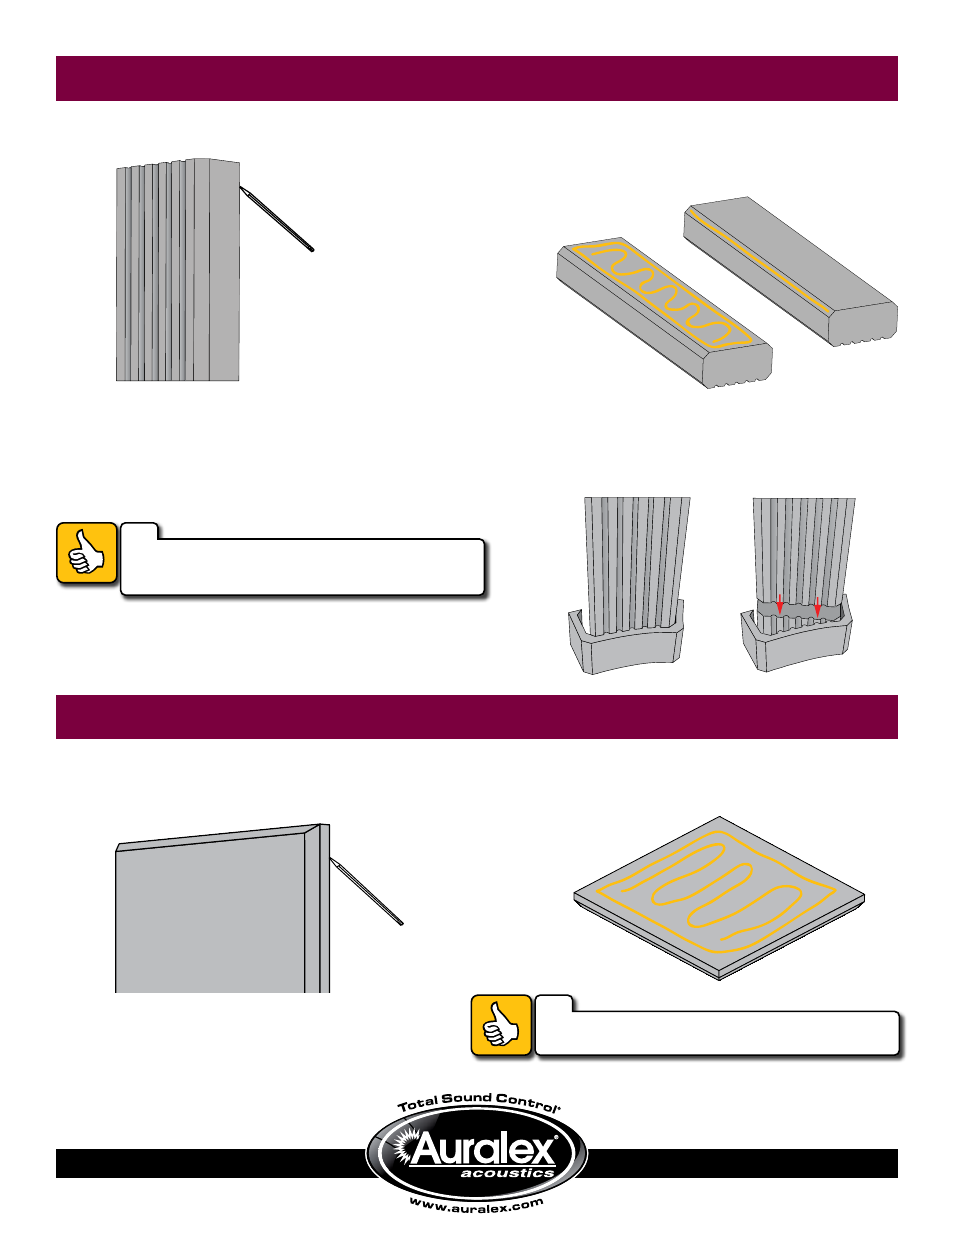
➋
Apply
Tubetak Pro to either the back or the
beveled edge of the
SonoColumn, depending
on chosen placement.
➊
Mark intended location of each
SonoColumn.
SonoColumn Installation Guide
➍
Place
SonoCollar around SonoColumn, if
desired. The inside section of each
SonoCollar
can also be used to increase the height of the
SonoColumn by 6”.
➌
Carefully press
SonoColumn to the marked
location of the wall or ceiling. Maintain continuous
pressure. Depending on environmental and
surface conditions, it will take anywhere from
2-4 minutes to hold.
TIP
For a stronger hold, with the adhesive applied, press
SonoColumn firmly into place, immediately remove panel
and press it firmly again into the same spot.
Or
Or
SonoFlat Panel Installation Guide
➋
Apply
Tubetak Pro to the back of the SonoFlat
Panel, as pictured.
➌
Carefully press
SonoFlat Panel to the marked
location. Maintain continuous pressure.
Depending on environmental and surface
conditions, it will take anywhere from
2-4 minutes to hold.
➊
Mark intended location of each
SonoFlat
Panel on the wall or ceiling.
TIP
You can use T-Pins to temporarily hold the panel in place
while the adhesive sets.