Root menu sub menu 1 sub menu 2, Dmx-512 control connection, Menus in the fixture – elektraLite UFO 8 User Manual
Page 4
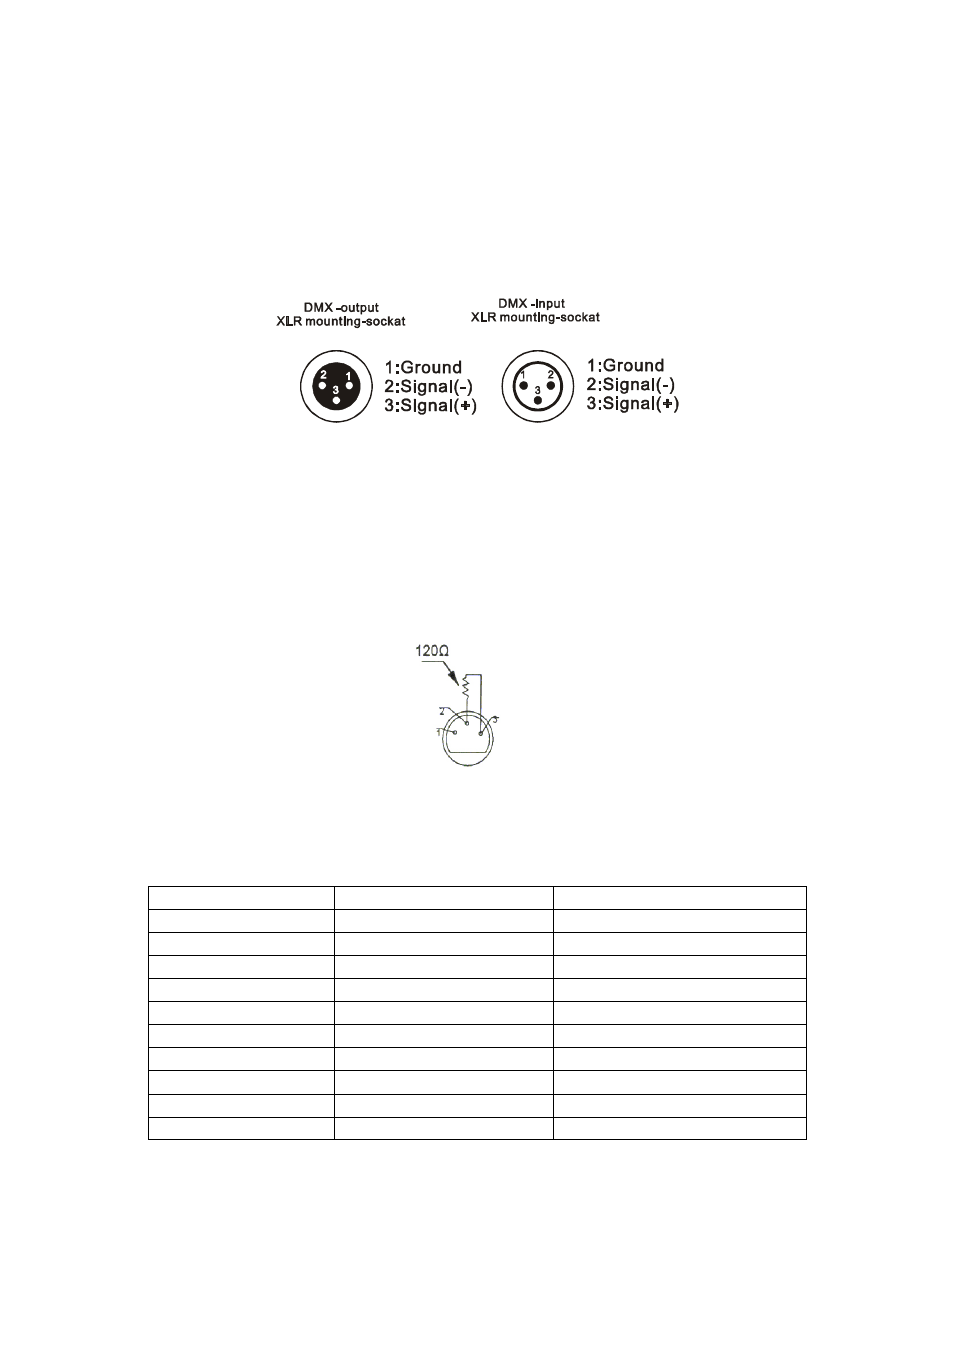
5. DMX-512 Control Connection
Connect the provided XLR cable to the female 3-pin XLR output of your Elektralite CP 10xt or other
DMX controller. The other end should be connected to the male 3-pin XLR input of the UFO 8. Then
daisy-chain out of the first UFO 8 and into the next UFO 8 or other dmx device. Never “Y” split the
DMX connection. If you need more cable, then it should be two core, screened cable fitted with a 3 pin
XLR input and output connector. Please refer to the diagram below.
DMX has a maximum running distance of 330 feet. When long distances are involved then there is a
tendency for electrical noise to be evident in which case a DMX terminator will be required. The
terminator helps prevent corruption of the DMX signal. To make a DMX terminator simply solder a 120
ohm resistor across pins 2 and 3 of an XLR male connector. Then place that connector at the very end
of the DMX cable run. In other words at the last in the dmx chain. Do not just wire up the three pins to
the left or right because the male and female connectors have the pins on different sides of the
connector. Please read the pin numbers which are written beside the pins to get the wiring correct.
6. Menus in the fixture.
Root Menu Sub Menu 1 Sub Menu 2
DMX (PRESS ENTER)
ASSIGN DMX ADDRESS
1-512, ENTER (TO CONFIRM)
PAN INVERT (PRESS ENTER)
YES OR NO
ENTER (TO CONFIRM)
TILT INVERT (PRESS ENTER)
YES OR NO
ENTER (TO CONFIRM)
MODE (PRESS ENTER)
DMX OPERATION
ENTER (TO CONFIRM)
SLAVE
ENTER (TO CONFIRM)
AUTO(metism)
ENTER (TO CONFIRM)
SOUND
ENTER (TO CONFIRM)
MANUAL (PRESS ENTER)
CHOOSE CHANNEL (PRESS ENTER)
↑
OR
↓
DMX VALUE. ENTER (TO CONFIRM)
RESTORE (PRESS ENTER)
MOTOR
ENTER (TO CONFIRM)
FACTORY DEFAULT SETTINGS
ENTER (TO CONFIRM)