Nikon LS-3500 - LS-3510 User Manual
Page 54
6-4
Using the Windows Scanner Plugin
Software Reference for Scanners
Commands sent to the scanner will be preceded by a ">" symbol and data received
from the scanner will be preceded by a "<" symbol.
Calibration
The lamp should be calibrated when the scanner is first unpacked from the
shipping carton. Thereafter, you can calibrate whenever you change the lamp, or if
you move the scanner to a new location. The bulb may change position in transit
and the distribution of light must be adjusted to.
> Note
The
Calibrate Lamp
button should be used sparingly.
Calibrating the lamp will save data in the scanner's EEPROM memory. This
type of memory will retain data when power is not supplied, but can only be
written to about 10,000 times. Therefore, lamp calibration should NOT be a daily
procedure.
Before calibrating the unit, any film or film holders must be removed from
the scanner. If this is not done, the scanner will misinterpret the light balance and
attempt to calibrate to a setting that is outside normal limits. Next, close the dust
cover, press the
Calibrate Lamp
button and wait until the busy light goes out and
you are returned to the Scanner Tools dialog. This process will take a few minutes
on the LS-3500 and up to 30 seconds on the LS-3510AF. Do not disturb the
scanner or it may not calibrate properly.
The Scanner Tools dialog is closed by pressing the
Done
button.
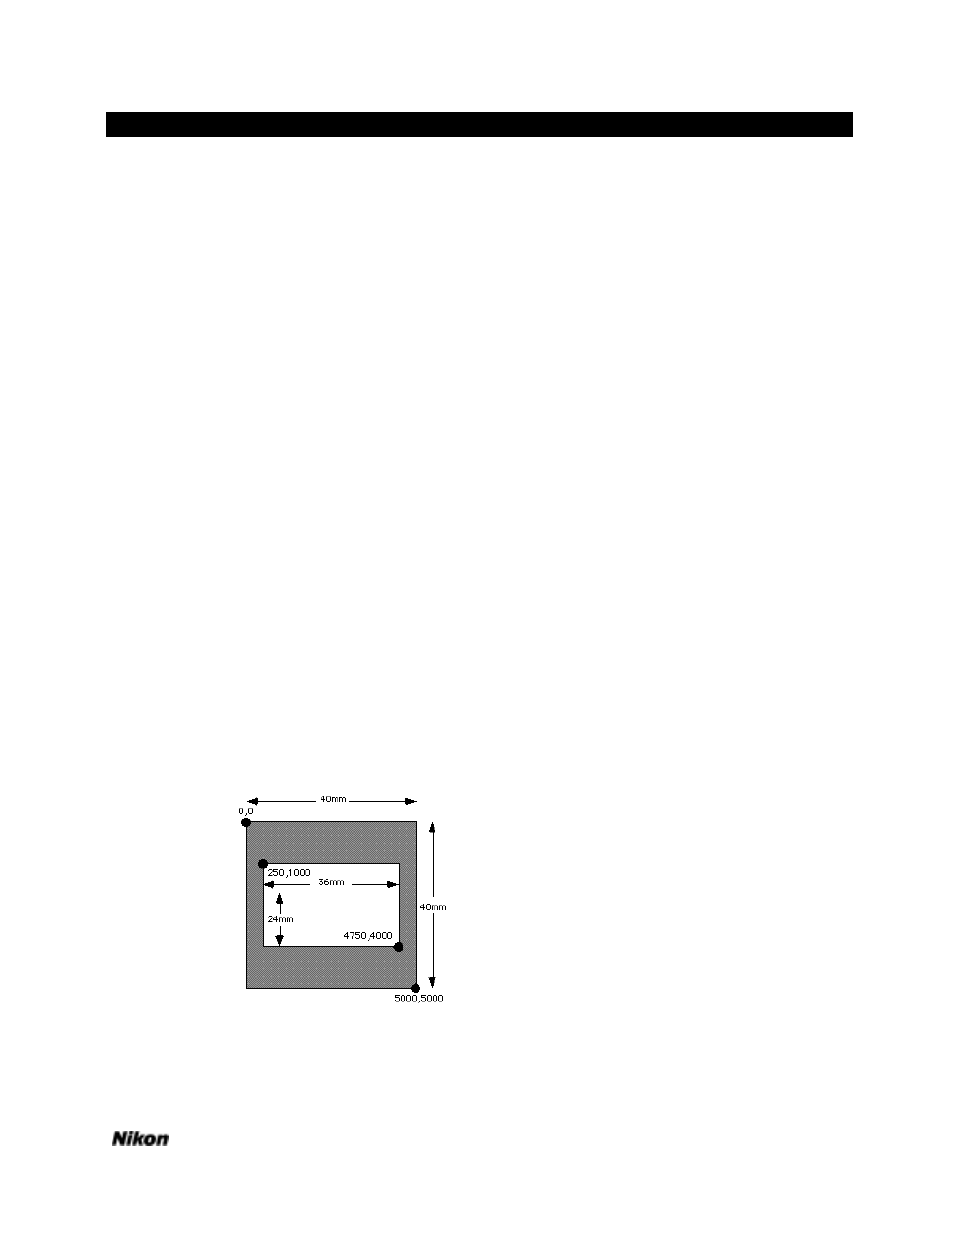
Scan Size and Resolution
The LS-3510AF total scanning area is a 5000 pixel by 5000 pixel scan
covering 40 x 40 millimeters. This makes for a scan resolution of 3175 pixels per
inch or 125 pixels per millimeter. All lower resolution scans are derived from this.
Fig. 59
Scan Area of the LS-3510AF
A standard 35mm frame has a scannable area of approximately 36mm by
24mm; or 4500 pixels by 3000 pixels at highest resolution. The full scan area is