Installing the ar750s on a wall, Installing expansion options – Allied Telesis AR700 Series Router User Manual
Page 17
Installation and Safety Guide
17
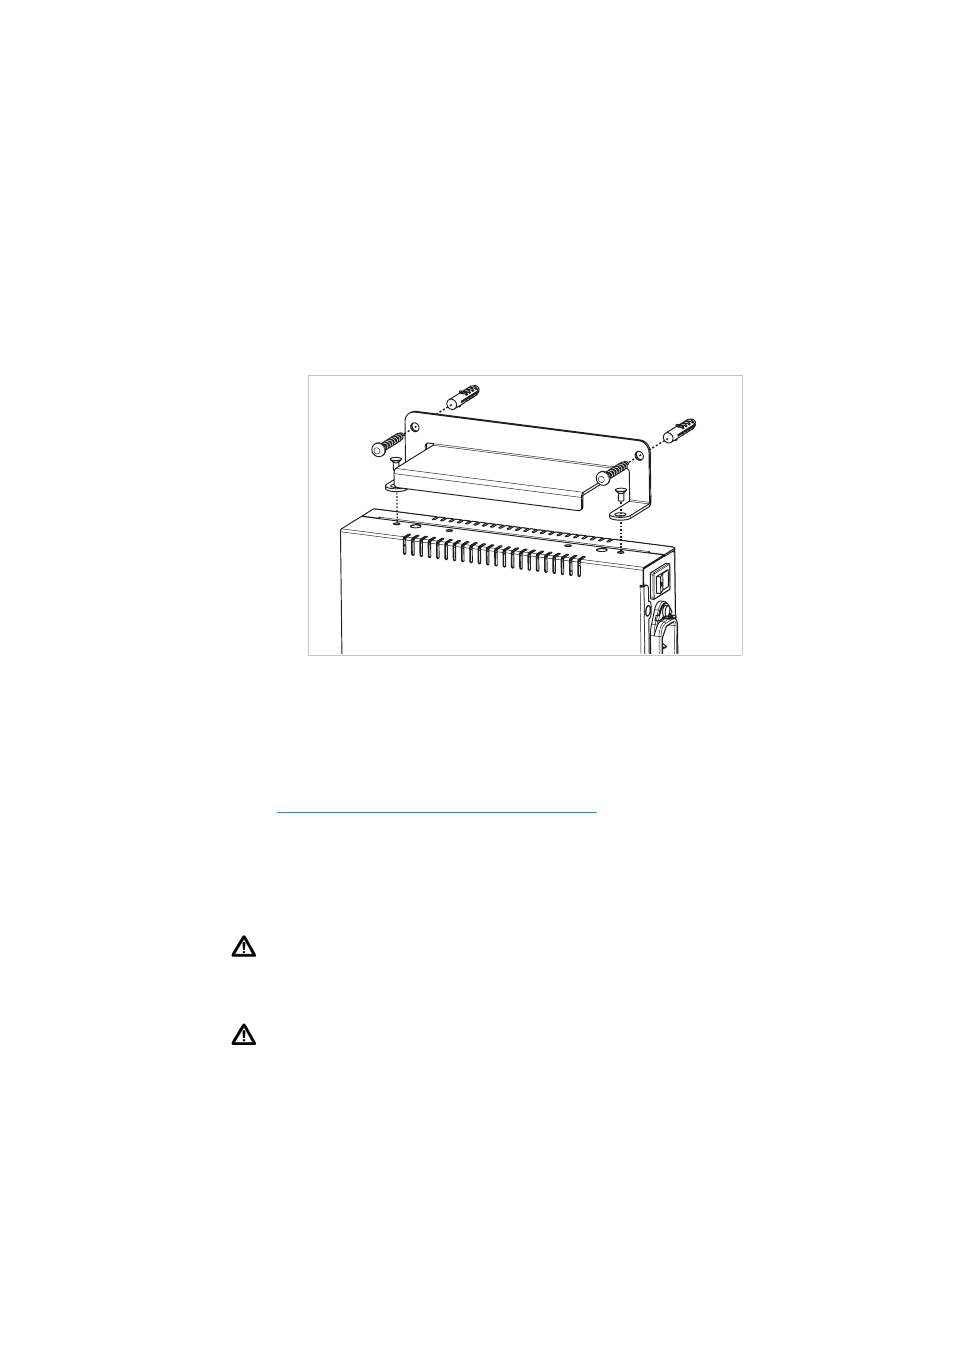
Installing the AR750S on a wall
1.
Screw the brackets to the router. Screw a wall mount bracket to the outer
screw holes on each side of the router using the shorter screws supplied
(see figure below).
.
2.
Screw the wall brackets to the wall with the brackets at the top and bottom
of the router, the feet against the wall, and the power inlet near the top.
Installing expansion options
If you purchased optional Port Interface Cards (PICs), install them by following
their Quick Install Guide. That guide can be found with the PIC, on the
Documentation and Tools CD-ROM, or can be downloaded from
.
Applying power to the router
Check that the supply voltage and the router’s rated voltage match. The AR750S
router is fitted with a universal power supply that will function over the range
100–240 VAC and 50–60Hz.
Warning The specific power supply requirements for a particular model are
clearly displayed on the rear or underside of the router. If the supply is outside
the accepted range for the router, the router may not operate or damage to the
router may result.
Warning This equipment must be earthed.
Fit the power cord retaining clip to the AC power inlet on the router’s rear
panel.