Installation and safety guide 19, Switch ports, Router – Allied Telesis AR400 Series Router User Manual
Page 19
Installation and Safety Guide
19
613-000313 Rev B
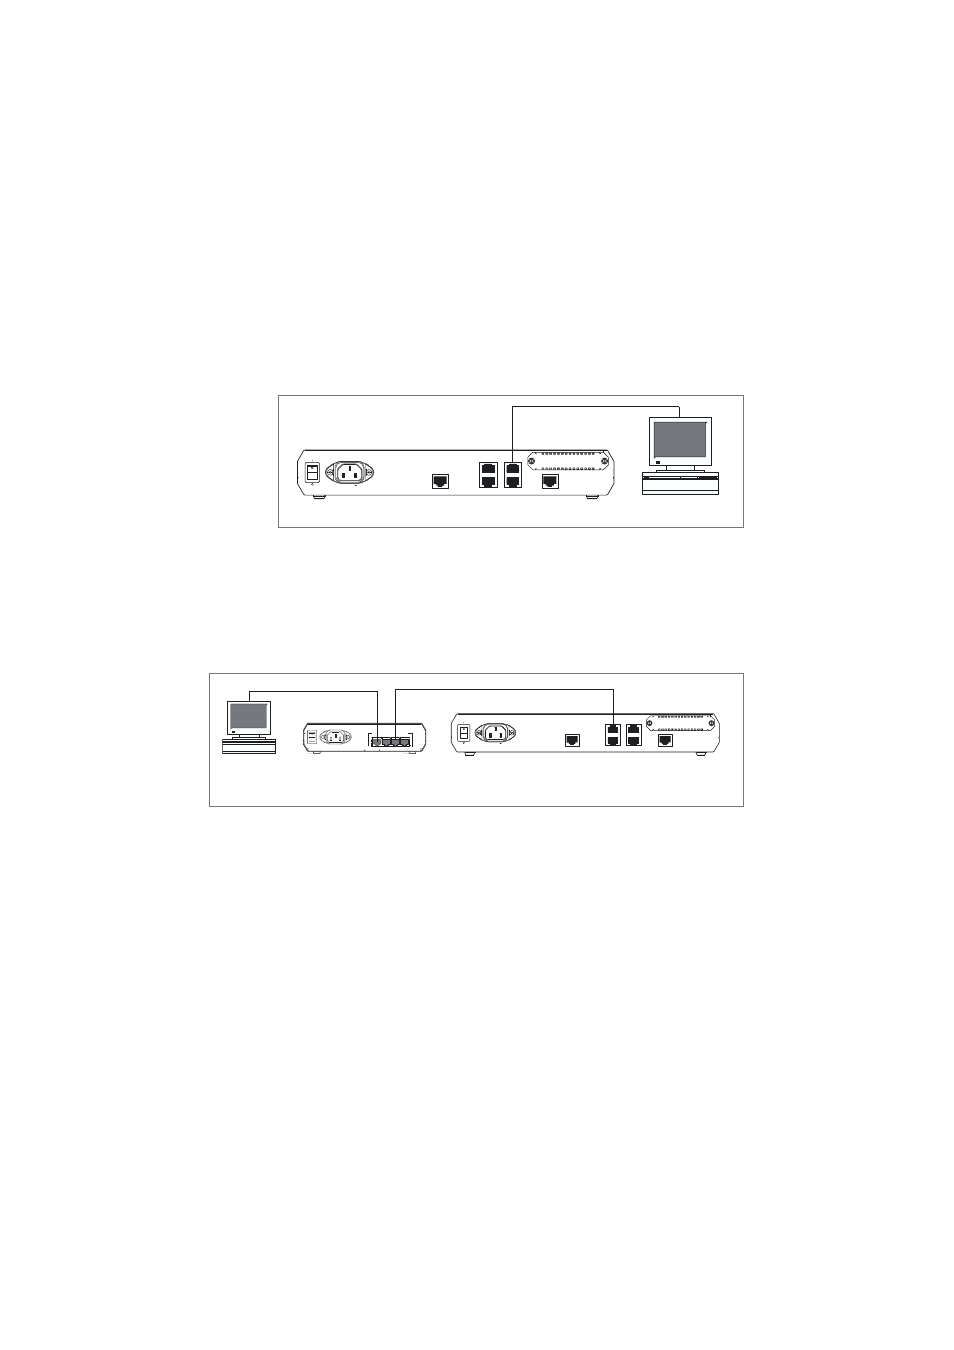
1. Connect the PC to a router switch port.
The PC can be connected directly, or through your LAN.
To connect the PC directly to the router, use a straight-through Ethernet cable
to connect an Ethernet card on the PC to any one of the router’s switch ports.
See the following figure.
To connect via a LAN, use an Ethernet cable to connect the router’s switch
port(s) to the device(s) on the LAN. Select the LAN PC from which you wish to
configure the router. The PC should be in the same subnet as the part of the
LAN that contains the router. For example, the PC could be connected to a hub
or Layer 2 switch that is directly connected to one of the router’s switch ports.
See the following figure.
2. Set PC to automatic IP address.
Set the PC to accept an IP address assigned to it by the router’s DHCP server.
In Windows XP:
From the Start menu, select Control Panel > Network and Internet
Connections > Network Connections. Select the connection, right-click and
select Properties. In the connection Properties dialog box General tab, select
Internet Protocol (TCP/IP), and click Properties. In the General tab, select
Obtain an IP address automatically and Obtain a DNS server address
automatically. Close all the dialog boxes you opened.
In Windows 2000:
From the Start menu, select Settings > Network and Dial-up Connections. In
the Network and Dial-up Connections window, right click on the connection
and select Properties. In the list of components, select Internet Protocol (TCP/
PC
router
switch ports
straight-through cable
POWER
ETH0
ASYN0
SWITCH PORTS
PIC BAY
3
1
4
2
POWER
100-240 VAC
50/60 Hz
2.1 A
ON
OFF
PC
router
switch ports
hub or layer 2
switch
3
4
2
1
10BASE-T/100BASE-TX SWITCH PORTS
POWER
ON
OFF
POWER
ETH0
ASYN0
SWITCH PORTS
PIC BAY
3
1
4
2
POWER
100-240 VAC
50/60 Hz
2.1 A
ON
OFF