Class 1 laser p roduct d/c l/a, L/a d/c d/c l/a l/a, L/a busy read y fault – Allied Telesis x600-48Ts/XP User Manual
Page 41
x600 Layer 3 Gigabit Ethernet Switch Installation Guide
41
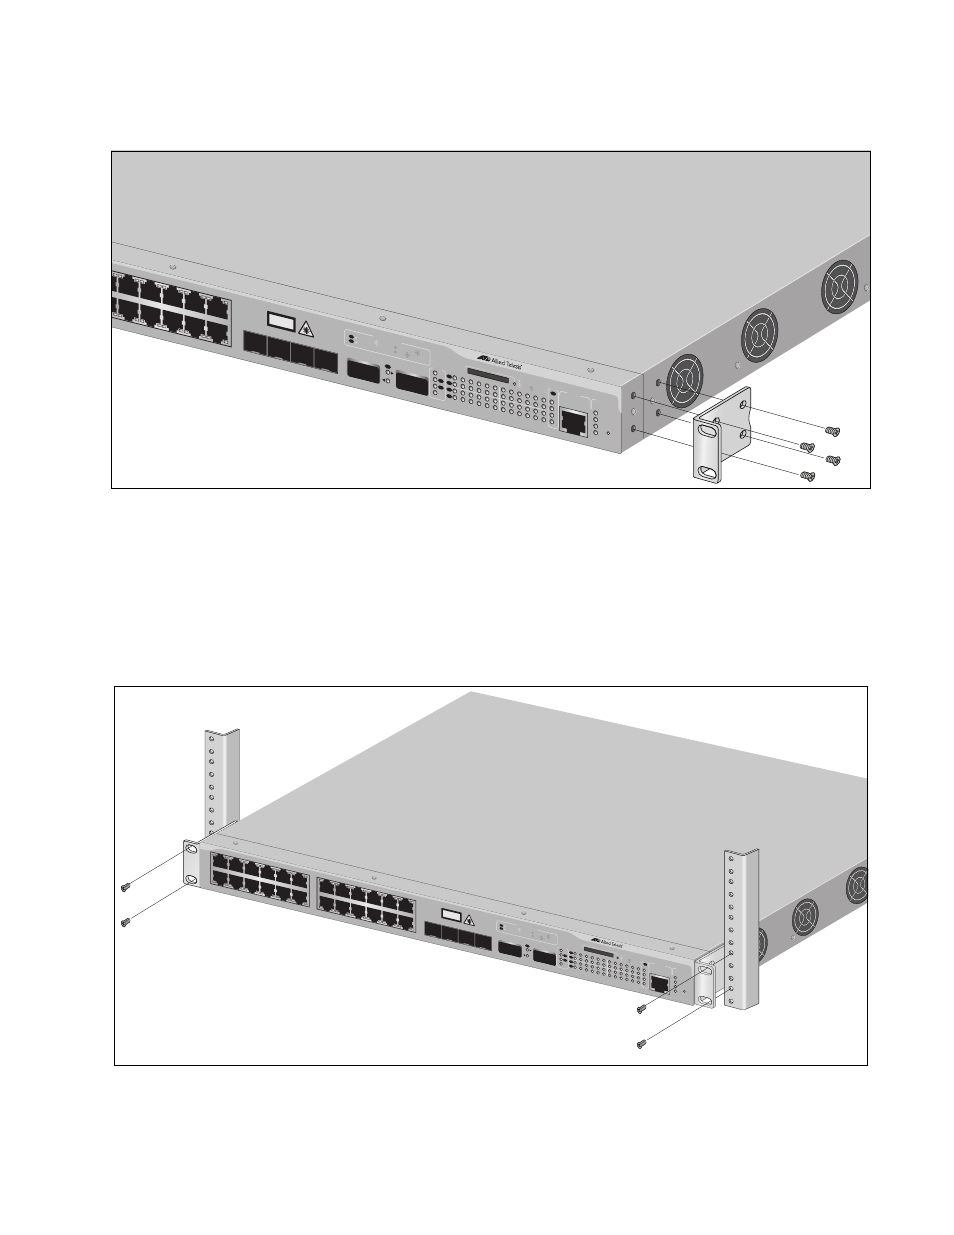
Figure 19. Attaching Rack-Mount Brackets
5. Install the second rack-mount bracket on the other side of the switch
with the four remaining screws.
6. Mount the switch in a 19-inch rack using standard screws (not
provided), as shown in Figure 20.
Figure 20. Mounting the Switch in a Rack
15
17
19
21R
23R
16
18
20
22R
24R
x600-
24Ts
/XP
Layer 3
Gigabi
t Ether
net Switch
CLASS 1
LASER PRO
DUCT
D/C
L/A
1000 LINK /
ACT
HDX / COL
FDX
10/100 LINK
/
ACT
PORT A
CTIVITY
26
25
L/A
XFP
XFP
L/A
D/C
D/C
L/A
L/A
STACK
PRES
MSTR
L/A
1
2
SFP
1
3
5
7
9
11
13
15
17
19
21R
23R
2
4
6
8
10
12
14
16
18
20
22R
24R
FAULT
RPS
MASTE
R
PWR
STATUS
21
22
23
24
SFP
L/A
BUSY
READY
FAULT
SD
RESET
CONSOLE
21
22
23
24
1327
1
3
5
7
9
11
13
15
17
19
21R
23R
2
4
6
8
10
12
14
16
18
20
22R
24R
x600-
24Ts
/XP
Layer 3
Gigabit Ethe
rnet Switch
CLASS 1
LASER P
RODUCT
D/C
L/A
1000
LINK /
ACT
HDX / C
OL
FDX
10/100
LINK /
ACT
PORT AC
TIVITY
26
25
L/A
XFP
XFP
L/A
D/C
D/C
L/A
L/A
STACK
PRES
MSTR
L/A
1
2
SFP
1
3
5
7
9
11
13
15
17
19 21R
23R
2
4
6
8
10
12
14
16
18
20 22R
24R
FAULT
RPS
MASTER
PWR
STATUS
21
22
23
24
SFP
L/A
BUSY
READ
Y
FAULT
SD
RESET
CONS
OLE
21
22
23
24
1328