Ael series, Aeon, Ceiling mounted fixture – AFX AEL232RBMV User Manual
Page 2
AEL SERIES
Aeon
Models 232/432
Ceiling Mounted Fixture
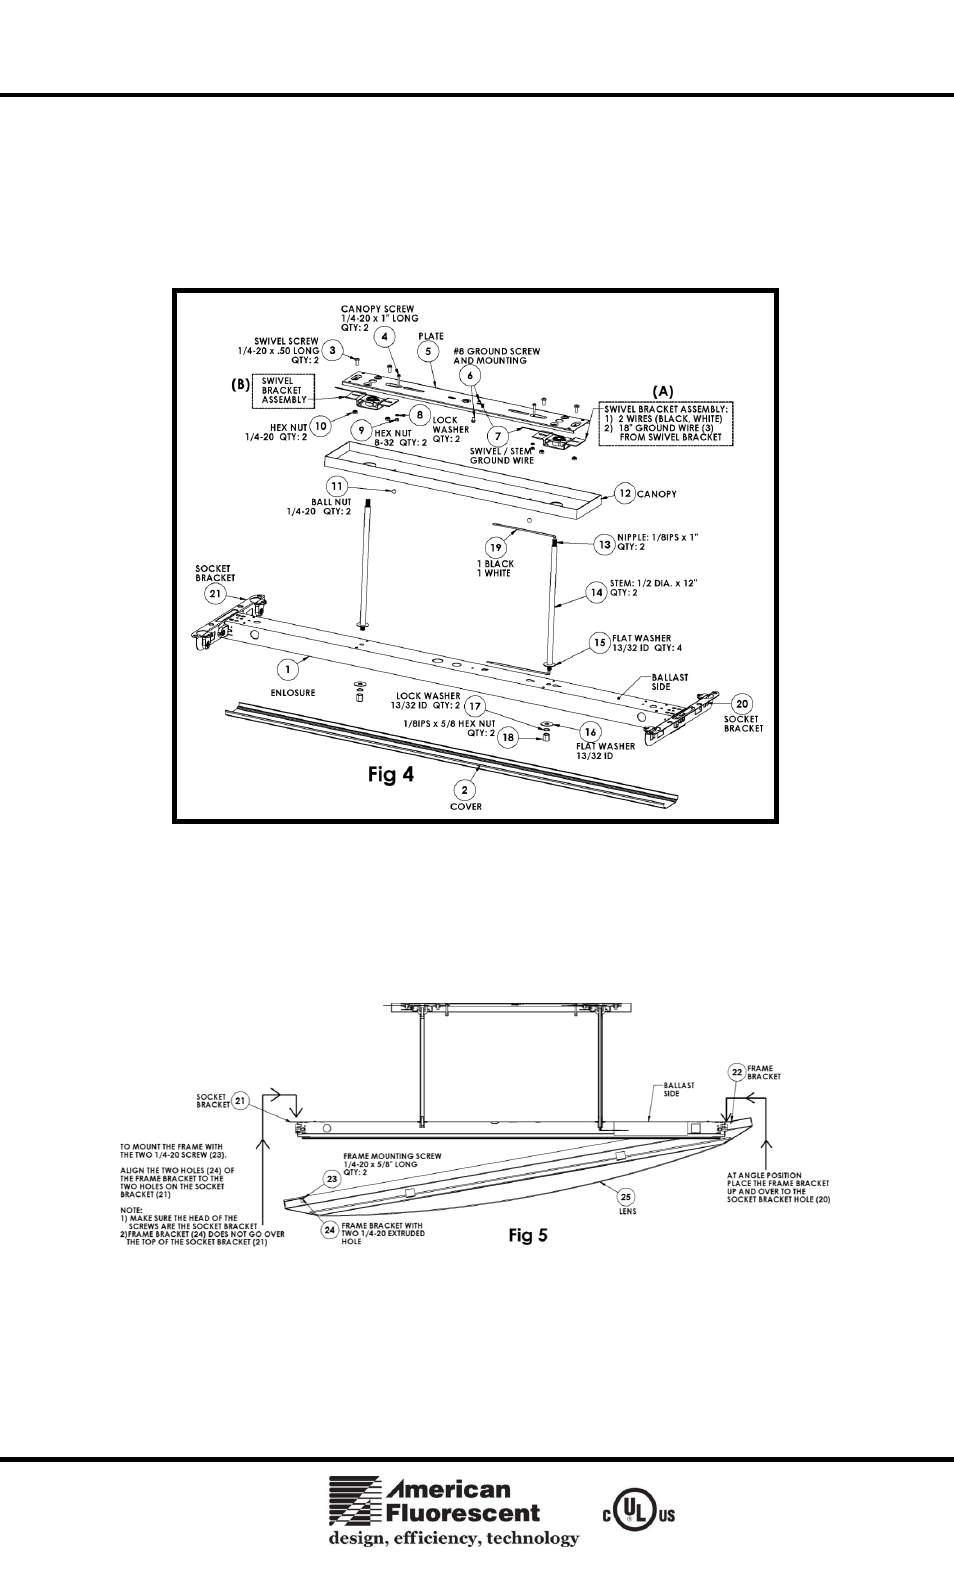
6. Wiring the Fixture (Use Fig 1 to Fig 4)
A. First, connect the ballast black wire with the wire nut (provided) to the black wire of the stem/swivel (A), now, connect the
ballast white wire with the wire nut (provided) to the white wire of the stem/swivel (A) (Fig 4). Note – for models with
luminaire disconnect pre-wired to ballast, reference the included instruction insert.
B. Re-install the channel cover (2) as it is shown in Fig 2.
C. Connect the power service in-line wires: First, remove the canopy (12) and unscrew the two #8-32 ball nut (11), with the wire
nut provided, connect the power service in-line black wire to the black wire from the swivel bracket assembly (A), with the
use of the wire connector provided, connect the power service in-line white wire to the white wire of the stem bracket
assembly (A) and the last wires to connect are the swivel ground wire and the power service in-line ground wire to the plate
(5) ground screw (6).
D. Now, re-install the canopy (12) and the two #8-32 ball nuts (11), which you removed for the purpose of wiring the fixture.
7. Installing the 4FT Metal Frame with the Two ¼-20 screws
(Use Fig 5).
A. Tip the 4ft metal frame as it shown in Fig 5 and make sure the frame bracket bent tab (22) is on the hole of the socket bracket
(20), then swing the other end of the frame Up and against the socket bracket (21), now align the holes of the frame bracket
(24) to the socket bracket (21) two holes. Now, you can install and tighten the two ¼-20 x 5/8 screws. To install the screws,
you have to start from the top of the socket bracket (21) and screwed on to the two threaded holes of the frame bracket (24).
Note hold on one hand and use the other hand to fasten the two screws.
Limited Factory Warranty
American Fluorescent Corporation hereby warranty that this fixture is free from defects in materials and workmanship when installed and used under
normal operating conditions
for
a period of 2 years from date of purchase from factory. This warranty covers all component parts and extends only to
replacement of defective fixture or components; it does not cover failure due to improper installation, misuse, mishandling or damage incurred in transit.
2 of 2
8060146 R2