Install the hub plate (20 light only) – LBL Lighting Twilight 20 Chandelier User Manual
Page 2
2
5
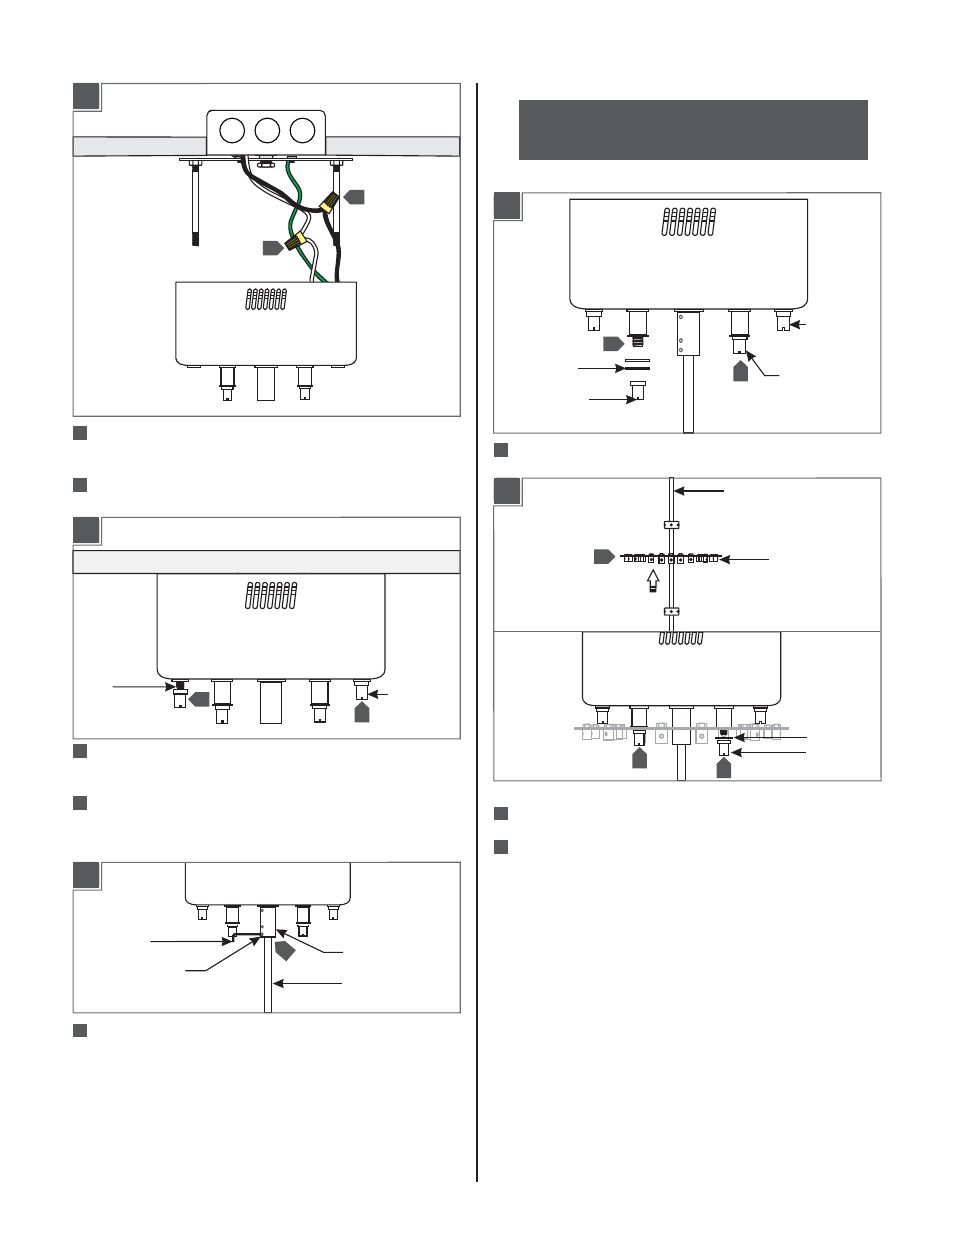
Connect the canopy white wire to the neutral power line wire
with a wire nut.
Connect the canopy black wire to the hot power line wire
with a wire nut.
Place all wires and wire nut connections properly inside the
canopy housing.
Slide the canopy housing onto the backplate threaded rods and
secure it in place by tightening the two cap nuts completely to
the threaded rods.
CAP NUTS
THREADED
RODS
Push the stem completely into the canopy’s center power post,
and tighten the two bottom two M3 set screws with the
provided 2 MM Allen wrench.
To raise the chandelier height: Determine the desired
length of the stem, remove the stem from the power
post, and follow the instructions on the next page.
STEM
2MM ALLEN
WRENCH
POWER POST
M3 SET
SCREW
Remove the two inner cap nuts and washers.
CAP NUT
WASHER
STEM
HUB PLATE
Slide the hub plate center hole completely onto the stem.
Align the hub plate holes with the inner power posts. Secure
the hub plate in place by tightening the cap nuts and washer
completely to the power posts.
CAP NUT
WASHER
INNER CAP
NUT
OUTER CAP
NUT
NOTE:
The 12 light version does not have a hub plate. If
installing a 12 light, skip to section 4.
Install the Hub Plate (20 Light Only)
1E
1F
1G
2A
2B
7
8
9
10
11
2
3
1
8
7
10
10
11
1
1
2
3
3