Ashcroft 2084 Precision Digital Test Gauges User Manual
Page 19
– 19 –
Gauge Installation:
Pipe Mount – The Ashcroft digital test gauge comes standard with a
1
⁄
4
NPT
connection. Good piping practices recommend using teflon tape or a pipe
sealant on the gauge threads. Utilize a
7
⁄
16
˝ wrench on the wrench flat of the
gauge to tighten the gauge to the process.
NEVER TIGHTEN GAUGE THREADS BY HOLDING THE BODY OF THE GAUGE.
DOING SO MAY DAMAGE THE GAUGE AND MAKE THE GAUGE INOPERABLE.
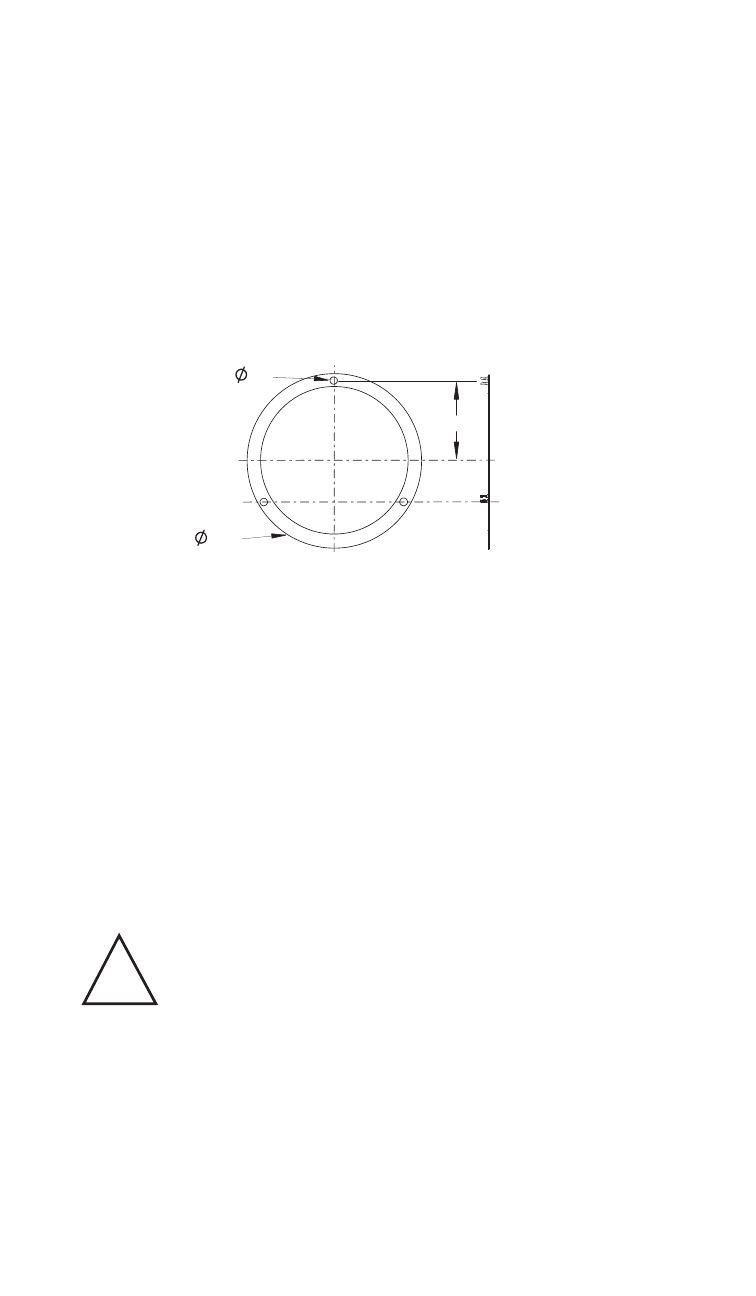
Panel Mount – The lower connected Ashcroft digital test gauge is available
with an optional flange for panel mounting. Please refer to illustration and
dimensions below.
!
Pipe to which gauge is attached must be properly grounded.
4.00
1.860
.17
Battery Installation and Replacement:
The gauge comes standard with a quantity of three AAA alkaline batteries
(installed). Use either Duracell MN2400, MX2400 or Energizer E92BP,
X92RP AAA alkaline, non-rechargeable batteries.
Batteries have a life of approximately 1000 hours. Battery life is dependent
on gauge usage, backlite settings and power off settings. When the display
flashes LOW BAT, batteries should be replaced.
To replace the batteries:
1) Remove the single screw on the back of the gauge case.
2) Hold the keypad in the palm of hand.
3) Carefully remove the three batteries from the holder and replace the
batteries. Use only AAA alkaline non-rechargeable batteries.
HOLE
CUTOUT
DIAMETER
3.406
(3
13
⁄
32
±
1
⁄
32
)