Installing the housing, Changing the germanium glass, Limits to use – Videotec NTL User Manual
Page 7
7
ENGLISH
Housing for big lenses
will be connected by the terminals shown in
the diagram in Fig. 4.
Version 115/230V AC: When the power
supply voltage is 115/230V AC the circuit
will be connected by the terminals shown in
the diagram in Fig. 5.
4. Fix the frontal flange, complete with the
germanium glass, and the back flange,
complete with the 4 cable glands, to the
housing body using the supplied fixing
screws (Fig.6). Pay attention not to damage
the sealing rings (be sure they are properly
inserted in their seats).
Installing the housing
This section describes how to install the housing on
the wall bracket or on the Pan & Tilt head.
1. Sunshield mounting: screw the equipped
exagonal mounting spacers on the side-
flanges of the housing (Fig. 7) in diametrically
opposite position in order to mount the
sunshield above the housing. Fit the sunshield
on the housing and fix it with the equipped
screw on the spacers.
2. Mount the housing on the wall bracket (Fig. 9)
or on the Pan & Tilt head bracket (Fig. 8).
Changing the germanium glass
Germanium glass has two colours. Inside the
housing there is an anti-reflection coating that
changes colour (depending on the direction
of vision). On the outside, on the other hand,
there is a scratchproof coating to make the glass
dark grey in colour. To install the new glass see
Fig. 6.
Limits to use
The housing can be installed with 3 kind of
flange:
• With window Ø 55 mm and glass 2 mm
thick
• With window Ø 70 mm and glass 2 mm
thick
• With window Ø 110 mm and glass 3 mm
thick
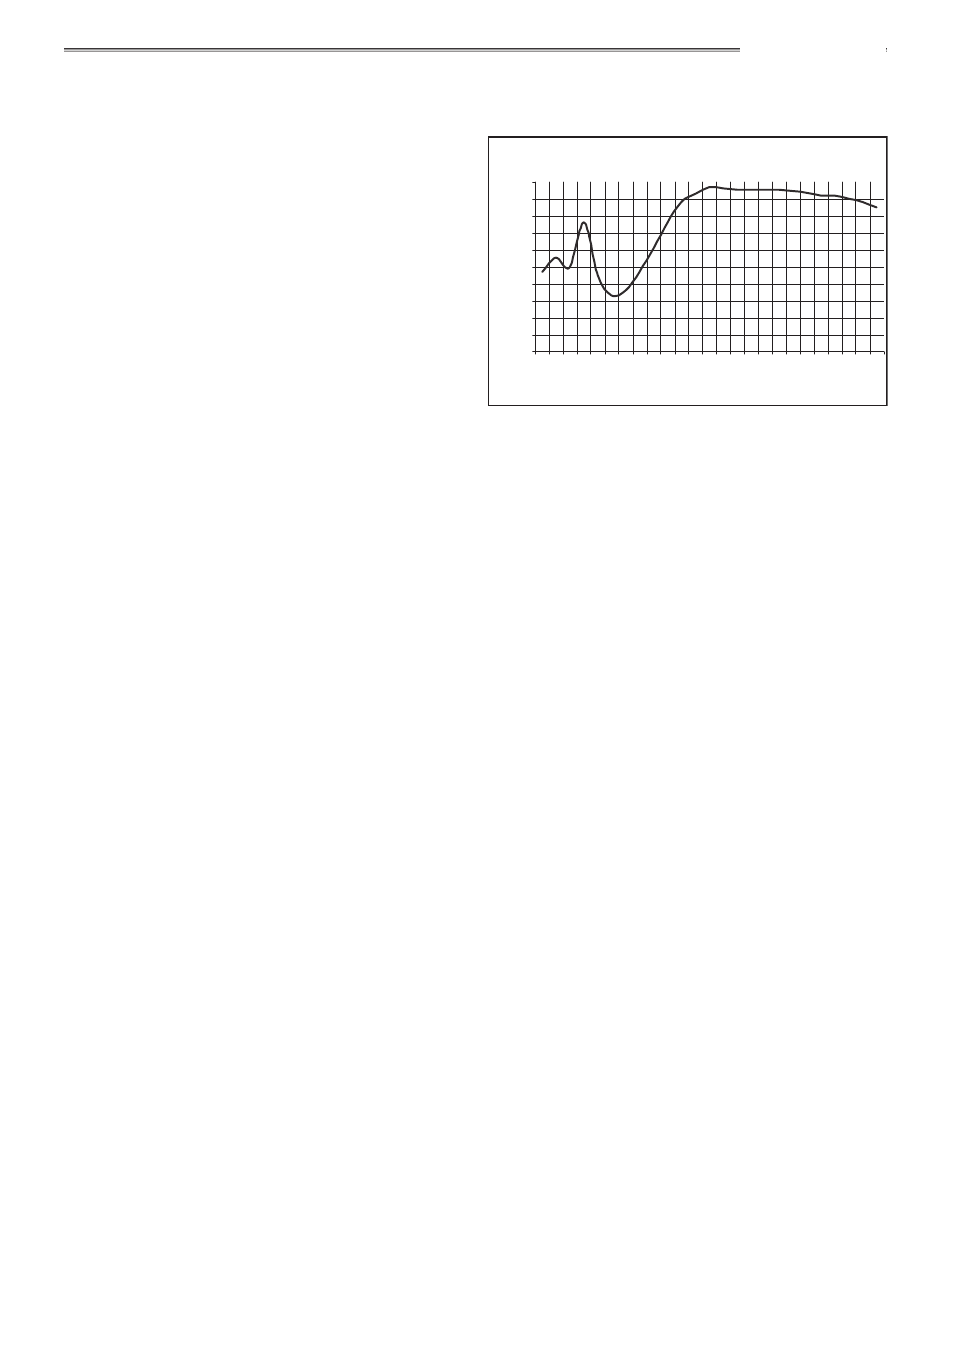
The graph shows the visible spectrum for the
window.
0
10
20
30
40
50
60
70
80
90
100
2,5
3
4
5
6
7
8
9 10 11 12 13 14
Ge AR 2 sides - 2mm Thick
Wavelength (µm)
Tr
ansmitt
anc
e (%)
Field of application from 7.5 to 14 µm.