Compactflash, Card, Protocol conversion – Red Lion CSMSTR LE/SX/GT User Manual
Page 3: Din rail, Figure 4 - installation complete
3
RS232
ETHERNET
CF
RS485
STS
RS232/PG
USB/PG
DIN RAIL
4
DEPRESS
3
4
1.00"
TOP
min. clearance
1.00"
BOTTOM
min. clearance
USB/PG
ETHERNET
RS232
CF
RS485
DIN RAIL
5
STS
RS232/PG
ETHERNET
RS232
CF
USB/PG
RS485
STS
RS232/PG
DIN RAIL
COMPACTFLASH
®
CARD
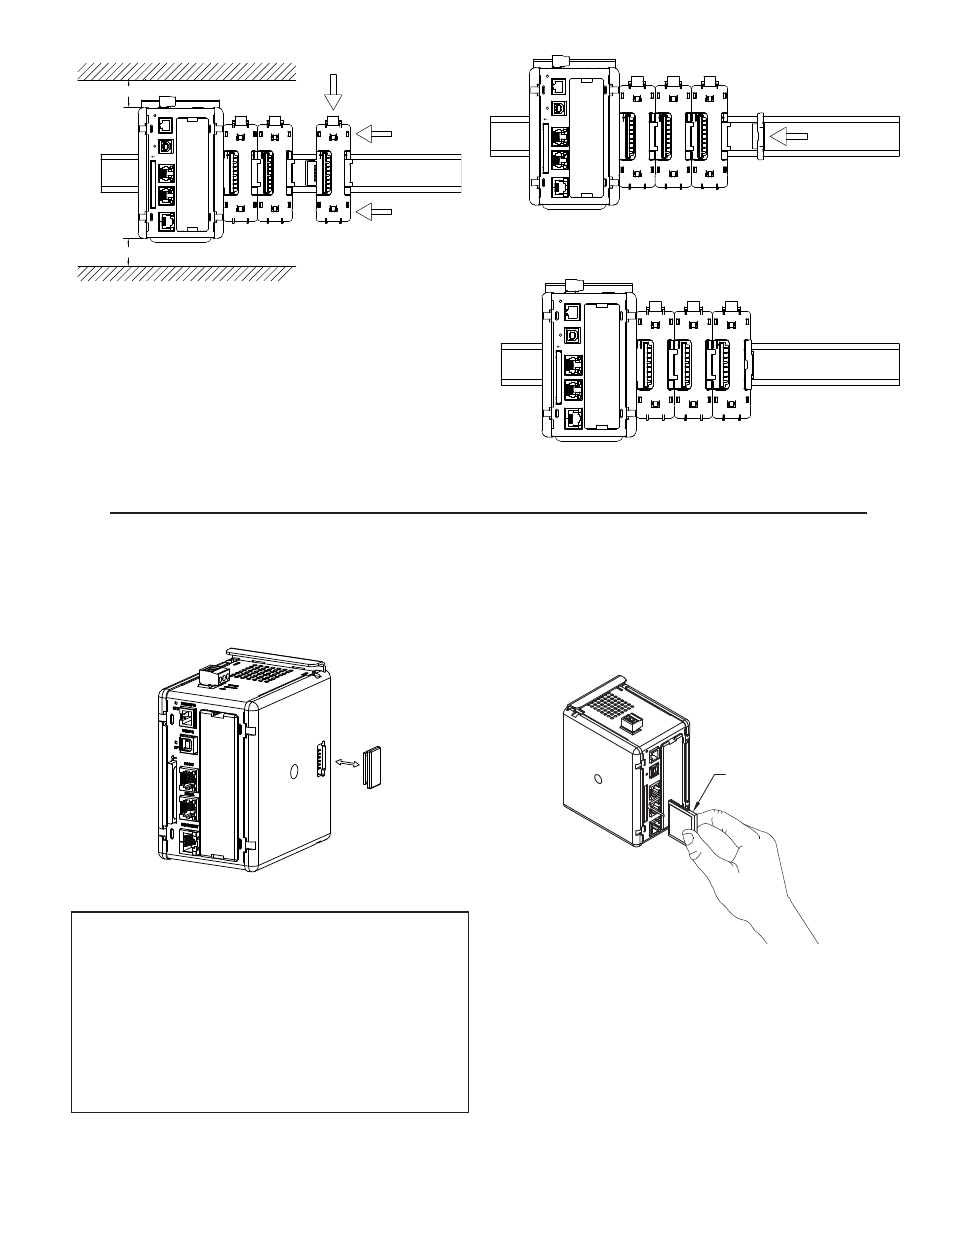
CompactFlash socket is a Type II socket that can accept either Type I or II
cards. Use cards with a minimum of 4 Mbytes and formatted to a maximum of 2
Gbytes (see Note box below) with the Master’s CompactFlash socket. Cards are
available at most computer and office supply retailers. CompactFlash can be used
for configuration transfers, data logging, and trending.
Information stored on a CompactFlash card can be read by a card reader
attached to a PC. This information is stored in IBM (Windows
®
) PC compatible
FAT16 file format.
CompactFlash
(Top Side)
CompactFlash-
Insert Top Side
Towards Left
Note: Do not remove or insert
the CompactFlash card while
power is applied.
PROTOCOL CONVERSION
Mount the Master as shown under Hardware Installation Figure 1 above.
Install the rubber end cap. The end cap protects the pins from damage. Configure
the Master for zero modules.
NOTE
For reliable operation of this and other Red Lion products, one of the
following brands of CompactFlash card must be used...
SimpleTech SMART
®
Modular
SanDisk
®
Silicon Systems
Not all of the above manufacturers offer CompactFlash cards recognized to
UL standards, which may be required for your application.
Although RLC products limit use of CompactFlash card memory to 2 GB,
cards with a larger capacity can be used. They MUST be formatted to 2
GB and use the FAT 16 file system. It is recommended to format the CF
card using the format utility from within Crimson.
Figure 2 - Attach Slave Bases To DIN Rail
Figure 3 - Attach Termination Plug*
* Supplied with CSMSTR Master Module.
Figure 4 - Installation Complete