Ronbow Verona User Manual
Verona
Installation Sheet
www.ronbow.com
Ronbow Corporation, All Rights Reserved.
VERONA
36”
Model:
064036
Traditions Collection
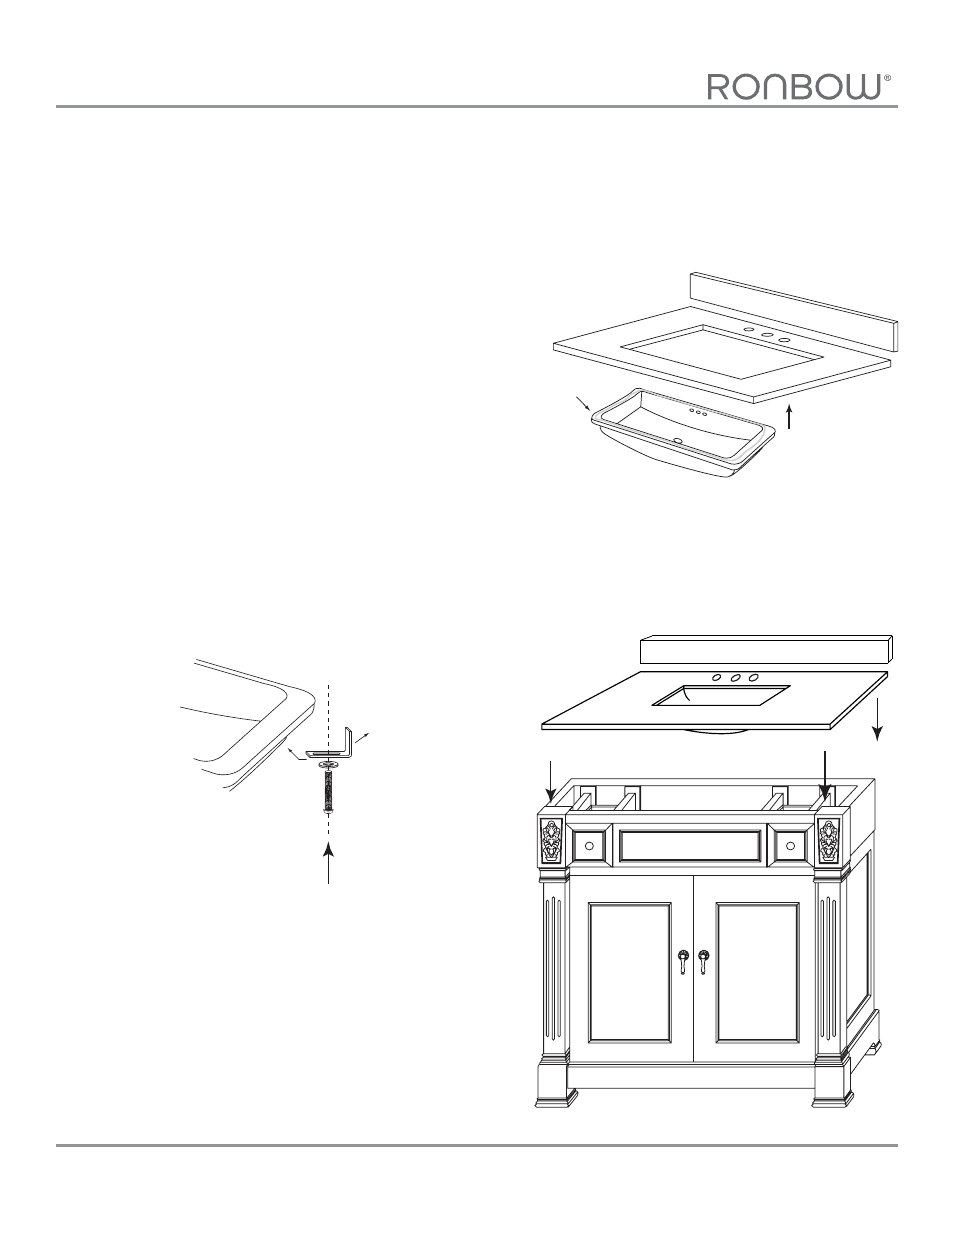
Step 1 :
Note :
Step 2 :
Step 3 :
Apply adhesive caulking around the
topside of rim near the edge, Carefully
raise sink in place, align, and press firmly
See Figure 1.
For installing under counter sink with
counter top
Attach 4 undermount-clips to hold
lavatory in place
See Figure 2.
Secure top & back splash to cabinet by
using adhesive caulk
See Figure 3.
Figure 1.
Figure 2.
Figure 3.
Counter top
Back Splash
adhesive caulking
Undermount Clip
adhesive caulking
See also other documents in the category Ronbow Accessories for water:
- 200003 (1 page)
- 200032 (1 page)
- 200043 (1 page)
- 200102 (1 page)
- 200211 (1 page)
- 200212 (1 page)
- 200213 (1 page)
- 200214 (1 page)
- 200223 (1 page)
- 200271 (1 page)
- 217737 (1 page)
- 420101-S16 (1 page)
- 420202-G05 (1 page)
- 420302-D23 (1 page)
- 420520-L5 (1 page)
- 200555 (1 page)
- 350301-AB (1 page)
- 350418-CW (1 page)
- 200390 (1 page)
- 200392 (1 page)
- 200480 (1 page)
- 218023 (1 page)
- 215524 (1 page)
- 216624 (1 page)
- 200520 (1 page)
- 200521 (1 page)
- 218132 (1 page)
- 212225 (1 page)
- 436624 (1 page)
- Ariella (1 page)
- Vanessa (1 page)
- Adina (1 page)
- Bella (1 page)
- Catalina (1 page)
- Rebecca 18 (1 page)
- Chloe (2 pages)
- Jenna (2 pages)
- Leonie (3 pages)
- Athena (2 pages)
- Brennon (2 pages)
- Calabria (2 pages)
- Cami (2 pages)
- Devon (3 pages)
- Elise (1 page)
- Haley (2 pages)