Ronbow Elise User Manual
Elise
Installation Sheet
www.ronbow.com
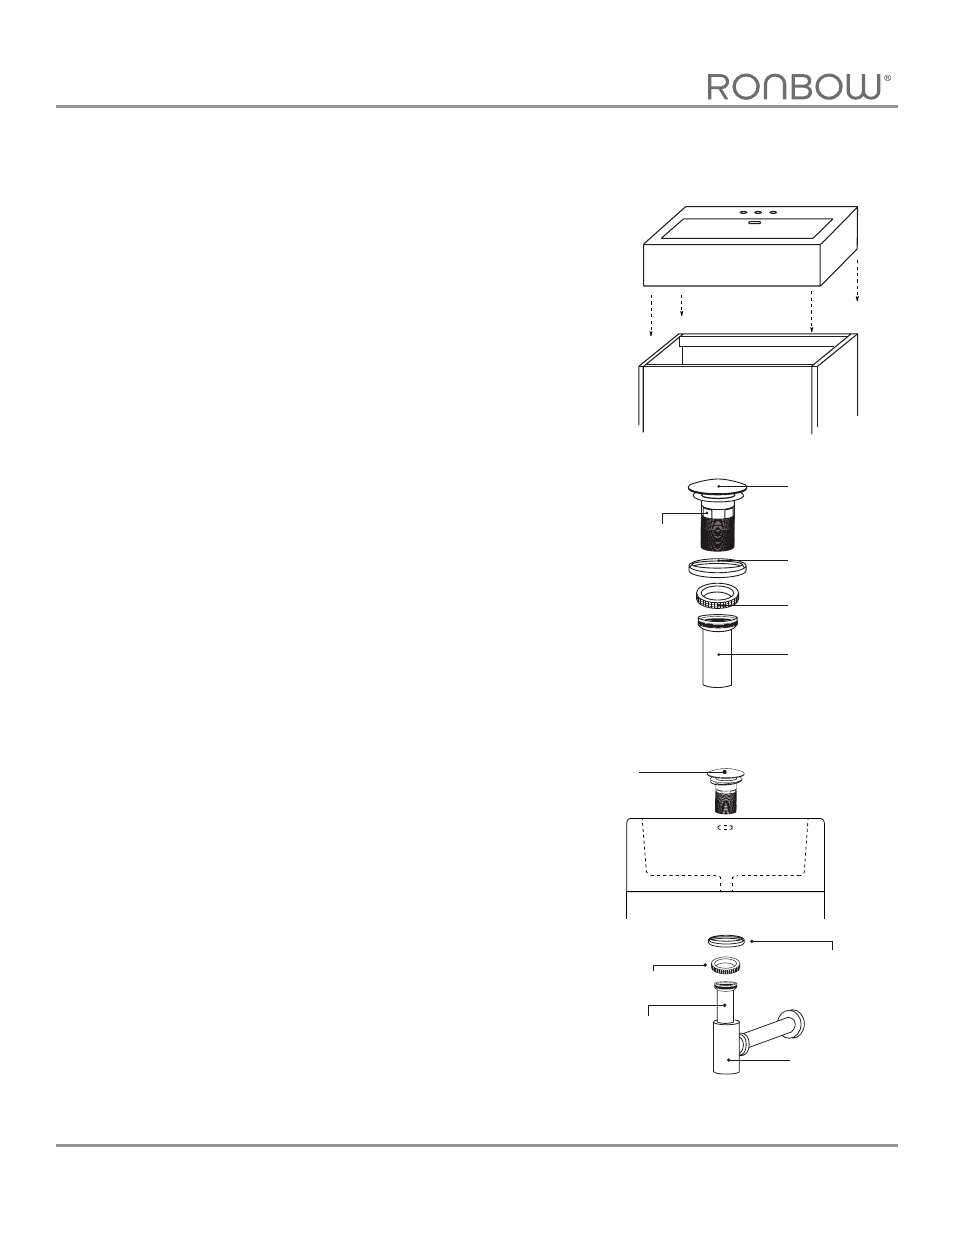
Step 1 :
Step 2:
Ronbow Corporation, All Rights Reserved.
ELISE
Model:
032618
Step 3 :
Step 4 :
Step 5 :
Place adhesive around top of cabinet
See Figure 1.
Place a generous portion of plumbers’
putty under drain cap and insert
whole drain body inside the bowl and
through the countertop
(There may be a small beveled rubber
washer packaged with your drain, please
discard this and use plumbers’ putty instead)
See Figure 2.
Place adhesive around top of cabinet
See Figure 1.
From under the drain, insert the thick
rubber washer and screw on and
tighten the metal nut. Remove excess
plumbers’ putty
See Figure 3.
Attach p-trap to tailpiece
Note :
Figure 1.
Figure 2.
Figure 3.
For Ceramic Sinktop
Drain Cap
Overflow hole
Metal Nut
Thick rubber
washer
Tailpiece
Drain Nut
Tailpiece
Thick rubber
washer
P-trap
Drain
Contempo Collection
18”
- 200003 (1 page)
- 200032 (1 page)
- 200043 (1 page)
- 200102 (1 page)
- 200211 (1 page)
- 200212 (1 page)
- 200213 (1 page)
- 200214 (1 page)
- 200223 (1 page)
- 200271 (1 page)
- 217737 (1 page)
- 420101-S16 (1 page)
- 420202-G05 (1 page)
- 420302-D23 (1 page)
- 420520-L5 (1 page)
- 200555 (1 page)
- 350301-AB (1 page)
- 350418-CW (1 page)
- 200390 (1 page)
- 200392 (1 page)
- 200480 (1 page)
- 218023 (1 page)
- 215524 (1 page)
- 216624 (1 page)
- 200520 (1 page)
- 200521 (1 page)
- 218132 (1 page)
- 212225 (1 page)
- 436624 (1 page)
- Ariella (1 page)
- Vanessa (1 page)
- Adina (1 page)
- Bella (1 page)
- Catalina (1 page)
- Rebecca 18 (1 page)
- Chloe (2 pages)
- Jenna (2 pages)
- Leonie (3 pages)
- Athena (2 pages)
- Brennon (2 pages)
- Calabria (2 pages)
- Cami (2 pages)
- Devon (3 pages)
- Haley (2 pages)