Installing the new water heater (cont’d), Installation checklist, Warning – State PR6 40 NHDST2 User Manual
Page 18
Installation Checklist
BEFORE LIGHTING THE PILOT:
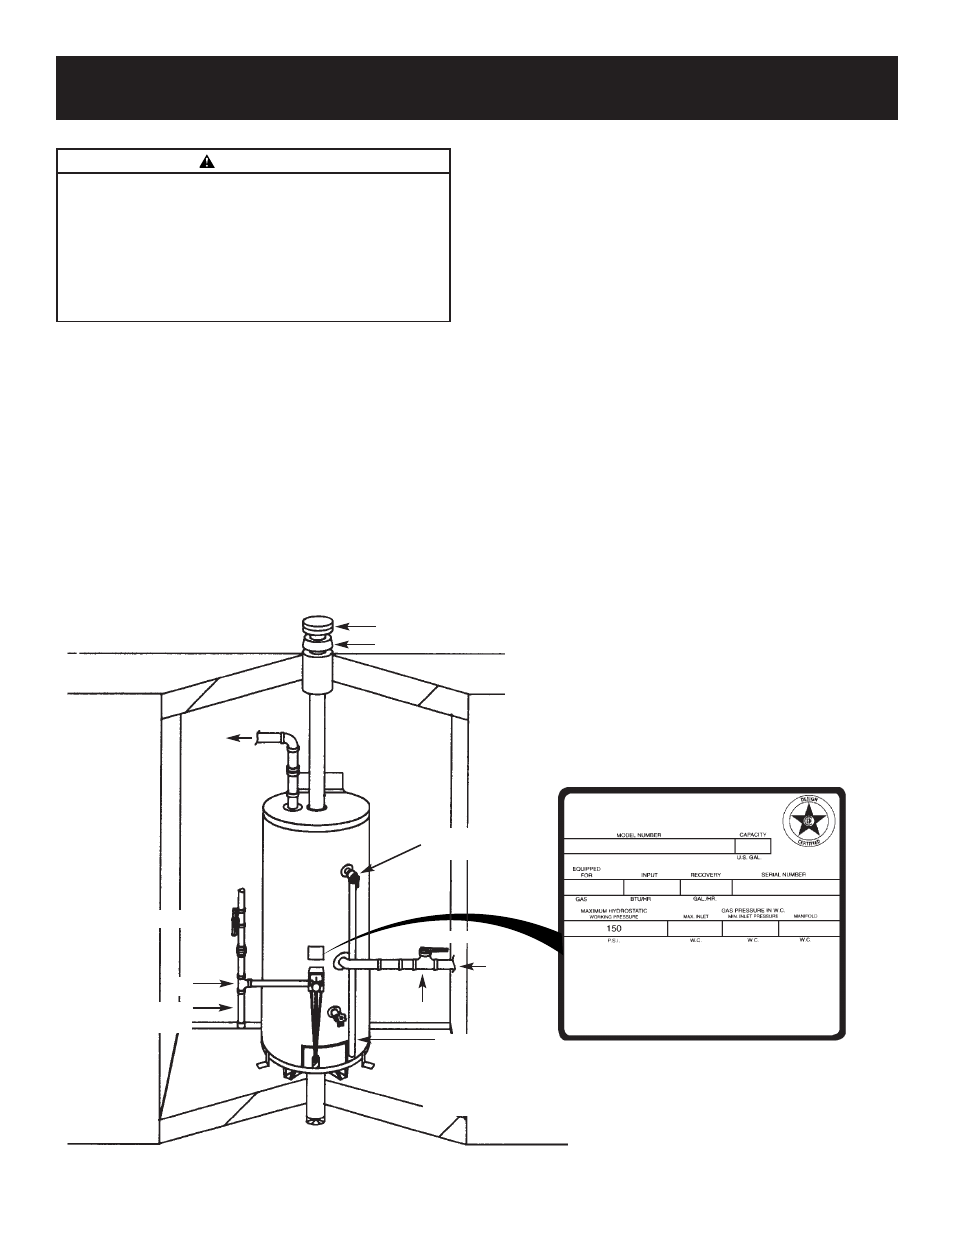
VENT CAP
PIPE CAP
HOT
COLD
DRIP LEG
(Sediment trap)
GAS SUPPLY
SHUTOFF VALVE
TEMPERATURE-PRESSURE
RELIEF VALVE
UNION
TEE
DISCHARGE PIPE
(Do not cap or plug.
Must terminate
beneath manufactured
home, unless drain pan
is installed.)
ROOF JACK
Installing the New Water Heater (cont’d)
18
SHUTOFF VALVE
MODEL RATING PLATE
* For 30 Gal. heater: as shown above
For 40 Gal. heater:
ORIFICE SIZE: #38 FOR NAT. / #51 FOR LP
IF CONVERTED - PROPANE RATE: 32,000 BTU
For 50 Gal. heater:
ORIFICE SIZE: #35 FOR NAT. / #51 FOR LP
IF CONVERTED - PROPANE RATE: 38,000 BTU
*
SUITABLE FOR WATER (POTABLE)
HEATING ONLY
AUTOMATIC STORAGE WATER HEATER FOR
DIRECT VENT INSTALLATION IN A MFG. HOME
ORIFICE SIZE: #40 FOR NAT. / #52 FOR LP
IF CONVERTED - PROPANE RATE: 30,000 BTU
WARNING
Contaminants in the gas lines may cause improper opera-
tion of the gas control valve that may result in fire or explo-
sion. Before attaching the gas line be sure that all gas pipe is
clean on the inside. To trap any dirt or foreign material in
the gas supply line, a drip leg (sometimes called a sediment
trap) must be incorporated in the piping. The drip leg must
be readily accessible. Install in accordance with the “Gas
Piping” section. Refer to the latest edition of the National
Fuel Gas Code, ANSI Z223.1, also referred to as NFPA 54.
1. Check the gas line for leaks.
a. Use a soapy water solution. DO NOT test for gas
leaks using a match or open flame.
b. Brush the soapy water solution on all gas pipes,
joints and fittings.
c. Check for bubbling soap. This means you have a
leak. Turn “OFF” gas and make the necessary
repairs.
d. Recheck for leaks.
e. Rinse off soapy solution and wipe dry.
2. Is the new temperature-pressure relief valve properly
installed and piped to an adequate drain? See
“Temperature-Pressure Relief Valve” section.
3. Are the cold and hot water lines connected to the
water heater correctly? See “Water Piping” instruc-
tions in the “Installing the New Water Heater” sec-
tion.
4. Is the water heater completely filled with water? See
“Filling the Water Heater” instructions in the
“Installing the New Water Heater” section.
5. Will a water leak damage anything? See the “Locating
the New Water Heater” section.
6. Is there proper clearance between the water heater
and anything that might catch fire? See the “Locating
the New Water Heater” section.
7. Do you have adequate ventilation so that the water
heater will operate properly? See the “Locating the
New Water Heater” section.
8. Is the vent piping properly secured? See “Installing the
New Water Heater” section.
9. Is there proper clearance between the vent pipe and
anything that might catch fire? See “Installing the New
Water Heater” section.
10. Is the vent pipe properly sloped and does the vent ter-
minate outdoors? See “Installing the New Water
Heater” section.
11. Do you need to call your gas company to check the
gas pipe and its hookup?