2 unpacking and inspection, 3 pv panel assembly and adaptor mounting – Sol TP Series Top of Pole Mount Lighting User Manual
Page 5
5
rev.1011 MKTG-IM-TP-12-002
Installation and Owner’s Manual | TP Series Solar LED Lighting System
Fastener
Qty.
Torque*
Qty.
Torque*
5/16-11 x 1” screws (washers/lock washers/nut)
4 ‘A’
11 ft. lbs
3/8-16 x 1/2” cup point screws 6 ‘A’
20 ft. lbs
5/16-18 x 1” screws (washers/ lock washers/nut) 12 ‘A’ 11 ft. lbs
3/4-10” x 12” bolts (washers/
lock washers/nut)
2 ‘B’
11 ft. lbs
5/8-11 x 6” bolts (washers/lock washers/nut)
1 ‘A’
93 ft. lbs
1/4”–20 x 1/2” hex head bolts
4 ‘B’
6.3 ft. lbs
TABLE 1
LIST OF FASTENERS
2.2 Unpacking and Inspection
The Sol TP Series lighting system is shipped as a complete kit. Prior to assembly, remove
the entire contents of the kit from the packaging and check the contents of the kit against
the Packing list you received in the ”OPEN FIRST” envelope.
The fasteners that are provided with the parts and components and the torque to which
each type of fastener should be tightened is shown Table 1.
Refer to packing list for complete parts and call Sol Customer Service at
+1.772.286.9461 if any components or hardware are missing,
* Recommended Torque
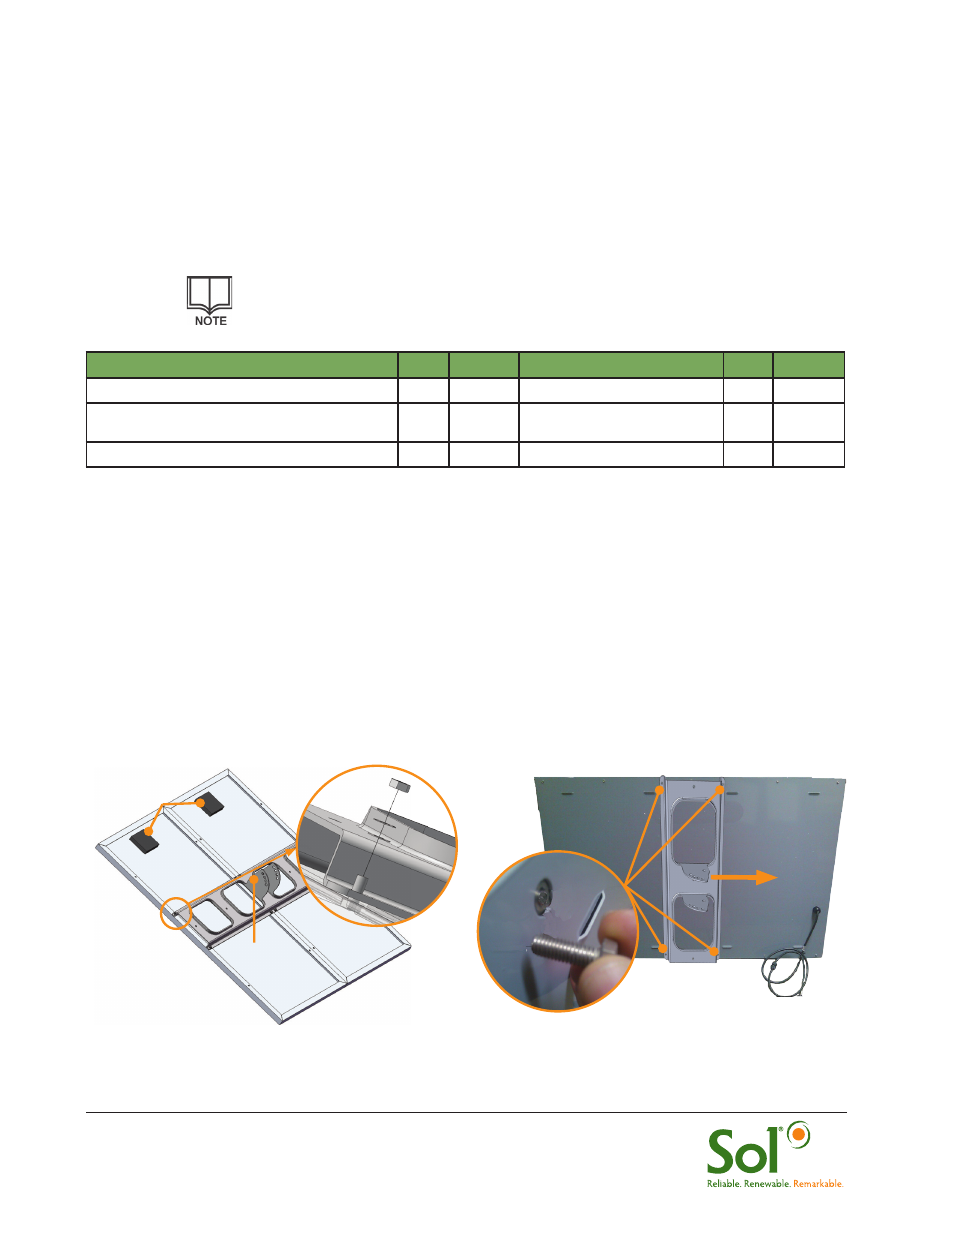
2.3 PV Panel Assembly and Adaptor Mounting
1.
Your PV panels may come with a panel pan cover on the back portion of the pv
array(s).
2.
Center TP mount, lining up screw holes with PV Modules or with panel pan
cover (Figure 3A). Ensure flat end of TP mount faces top end of panels. Secure
with 8x 5/16-18 1” screws (Figure 3).
A - Part of TP fastener kit
B- Part of Battery fastener kit
L - Loose part
Extra 5/16 fasteners included
FIGURE 3A
MOUNTING TP WITH PANEL PAN
Flat end of
mount faces up
Secure screw in
mounting hole
(only 4X screws
required)
Orientation of PV J-boxes
should be at top end of
tilted panel
Flat end
faces up
FIGURE 3
MOUNTING TP BRACKET