Step 3 rear crossbrace assembly – Aussie VANTAGE 6122S8X641 User Manual
Page 9
9
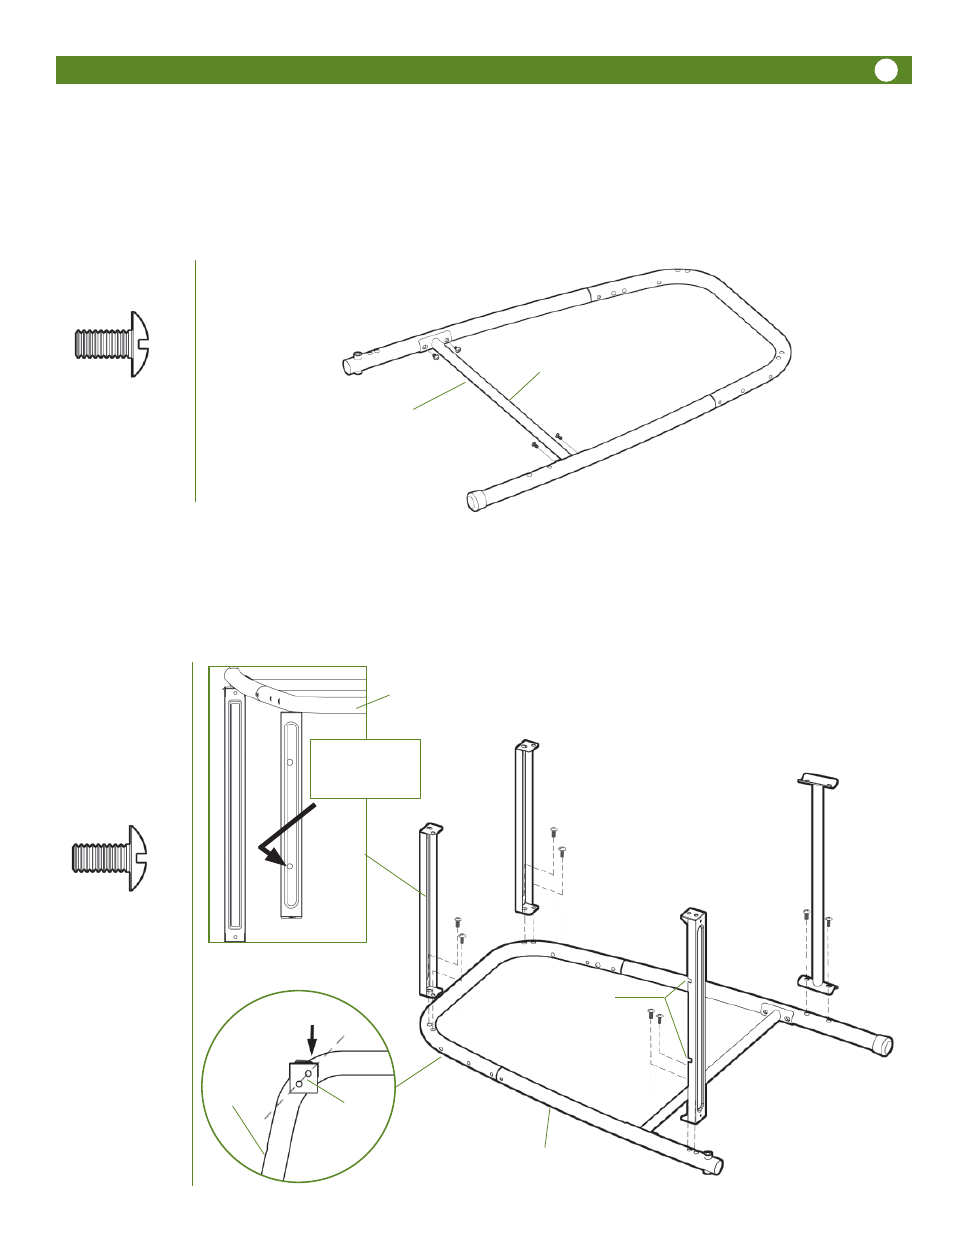
NOTE:
notches closest
together to outside
Rear Leg Assembly
Cylinder Support
Side Crossbrace
Right
Bowl Support
Left
Bowl
Support
Step 3
Rear Crossbrace Assembly
Attach Rear Crossbrace inside Rear Leg Frame with 4) 1/4-20 x .39” Bolts. Note: The flanges on the ends of the cross-
brace tube are angled inward toward the top to match the angle of the legs.
1/4-20 x .39” Bolt
4 pcs
Step 4
Bowl Supports, Cylinder Support and Side Crossbrace Assembly
Attach the Left and Right Bowl Supports, Clyinder Support and Crossbrace to rear leg assembly with 8) 1/4-20 x .39”
Bolts. Note: Each part must be oriented as shown for proper assembly. Bolts should be snug but do NOT tighten com-
pletely at this stage. Note: The flanges on the ends of the crossbrace tube are angled inward toward the top to match
the angle of the legs.
1/4-20 x .39” Bolt
8 pcs
Rear Leg
Assembly
Holes in Bowl
Support align
with leg
Low side of raised area
to center
Rear Leg Assembly
Left Bowl Support
Holes are closest to
OUTSIDE edge
Rear
Crossbrace
NOTE:
Threaded Insert on top