Ridetech 11052899 User Manual
Page 2
Installation Instructions
Note: These arms will not work with stock 1958 spindles.
1. Raise and support car at a safe, comfortable working height. Let the front suspension
hang freely.
2. Remove coil spring, shock absorber, and lower control arm. Refer to factory service manual for
proper disassembly procedure.
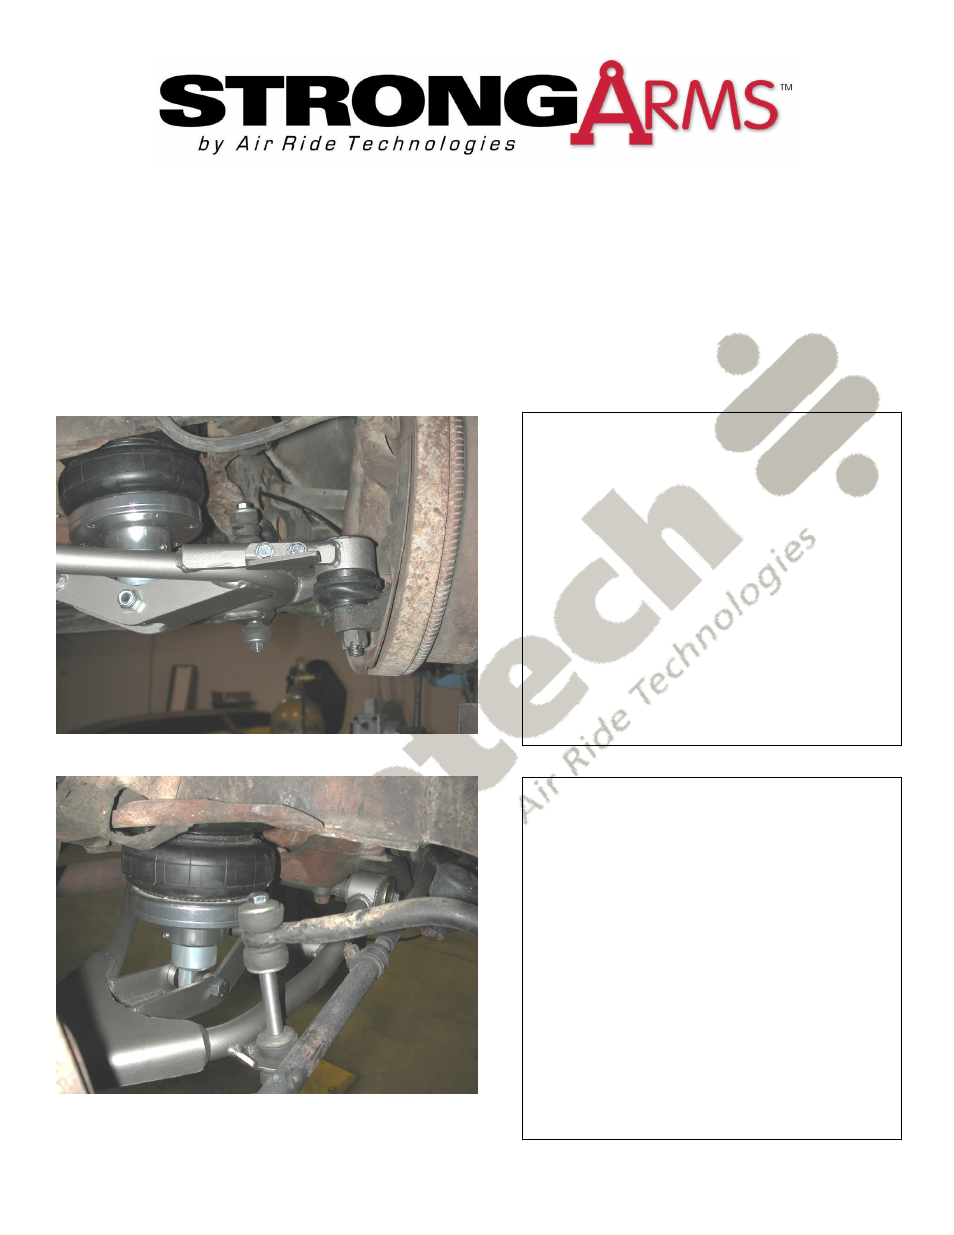
3. Bolt the lower StrongArm shaft to the
frame. 7/16” x 2” bolts, lock washers and
flat washer will be used to fasten the
aluminum clamp to the frame.
4. Slide the ball joint boot over the ball
joint stud. Slide the stud through the
spindle, secure assembly w/ new castle
nut and cotter pin supplied.
5. Attach the adjustable steering stop to
the lower arm using two 5/16” x 1” bolts.
This can be adjusted to maintain tire/shock
clearances.
6. Attach the ShockWave to the lower
StrongArm using the ½” x 3 ¼” bolts and
aluminum spacers provided.
7. The sway bar end link must be
shortened to 2” tall optimize clearance and
alignment. Use the shorter 3/8” x 6 ½” bolt
supplied. (Discard if using RideTech
MuscleBar)
8. Check all clearance with brake lines,
airlines, tie rod, sway bar, and tire through
full suspension travel and turn wheel lock
to lock.
9. Grease ball joints.