Installation instructions – Ridetech 11380500 User Manual
Page 2
350 S. St. Charles St. Jasper, In. 47546
Ph. 812.482.2932 Fax 812.634.6632
www.ridetech.com
Installation Instructions
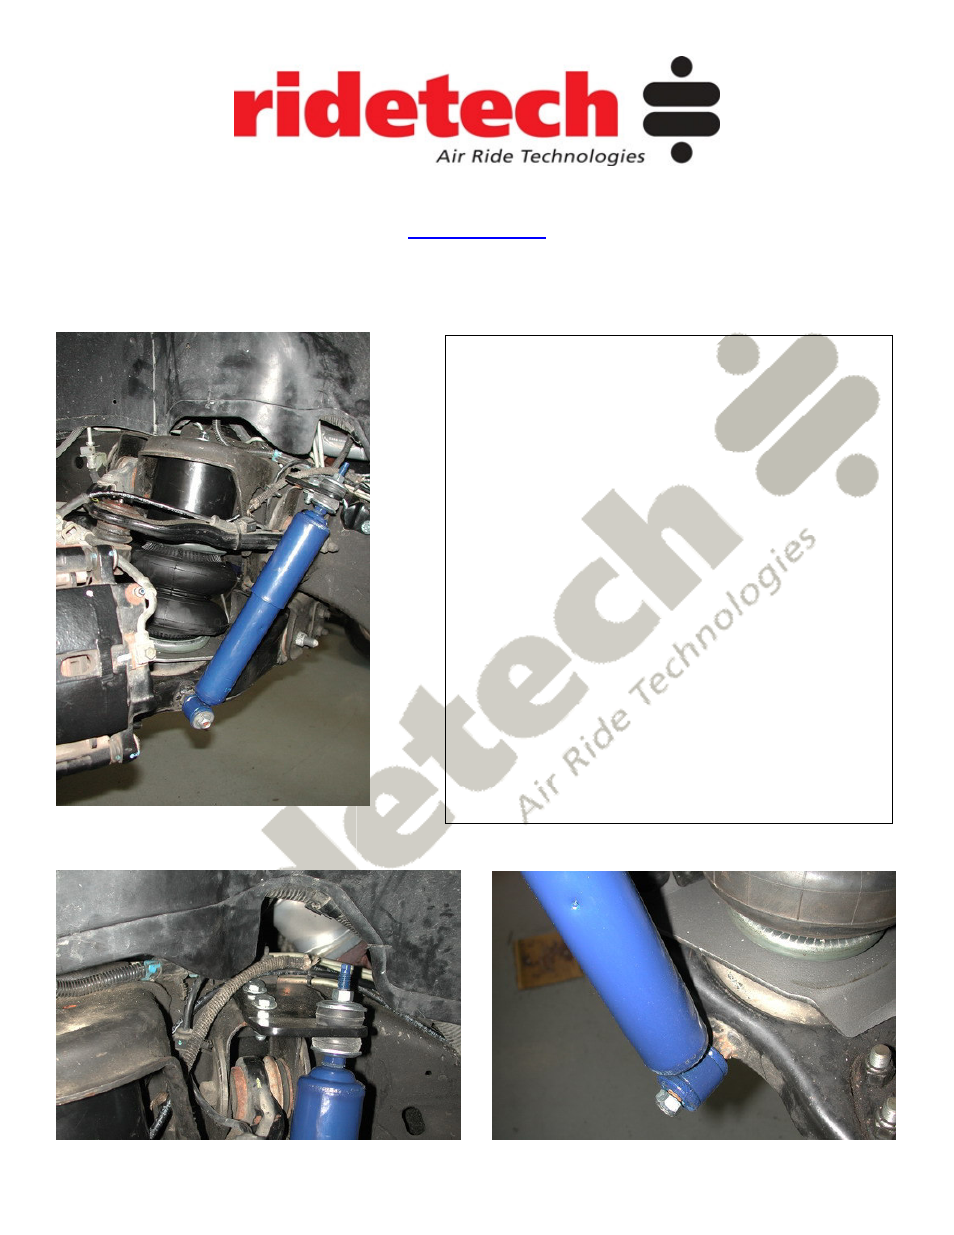
1. The upper shock mount will bolt the rear upper
control arm mounting bracket and to the side of
the frame rail. It will use one existing hole in the
control arm bracket. A 2
nd
3/8” hole must be
drilled in the control arm bracket. A 5/16” hole
must be drilled into the frame rail for the 3/8” self
tapping bolts.
2. Fasten the shock to the bracket using new
bushings/hardware supplied.
3. The lower shock stud must be welded to the
rear leg of the lower control arm. To determine
it’s location; place a jack under the lower control
arm and fully compress the air spring. Then fully
compress the shock absorber. Swing the shock
up to the center of the control arm and mark the
center of the eye. Drill 5/8” hole in the arm and
then weld in the stud.
4. Fasten the shock to the stud w/ hardware
supplied.
- 13076799 (5 pages)
- 13056799 (5 pages)
- 13027199 (8 pages)
- 13017199 (7 pages)
- 13006799 (4 pages)
- 12226799 (5 pages)
- 12186799 (5 pages)
- 12176799 (7 pages)
- 12167199 (6 pages)
- 12087199 (8 pages)
- 11456799 (9 pages)
- 11446799 (6 pages)
- 11436799 (6 pages)
- 11406799 (5 pages)
- 11396799 (5 pages)
- 11386799 (8 pages)
- 11376799 (6 pages)
- 11366799 (6 pages)
- 11267199 (7 pages)
- 11257199 (8 pages)
- 11177199 (8 pages)
- 11167199 (7 pages)
- 11167197 (7 pages)
- 11037199 (7 pages)
- 11027199 (7 pages)
- 19004901 (4 pages)
- 19004900 (4 pages)
- 19003005 (4 pages)
- 19003004 (4 pages)
- 19003003 (3 pages)
- 19003002 (4 pages)
- 19002005 (4 pages)
- 19002004 (4 pages)
- 19002003 (3 pages)
- 19002002 (4 pages)
- 12014099 (4 pages)
- 11014099 (4 pages)
- COIL-OVER Stud Top Assembly (1 page)
- COIL-OVER (2 pages)
- 12106509 (2 pages)
- 12103510 (4 pages)
- 12103509 (4 pages)
- 11326110 (6 pages)
- 11323510 (4 pages)
- 11323509 (4 pages)