Ridetech 12011099 User Manual
Page 2
This system is compatible with either stock or dropped spindles
1. Raise and support vehicle at a safe comfortable working level.
2. Remove coilspring. Refer to service manual for proper and safe procedure.
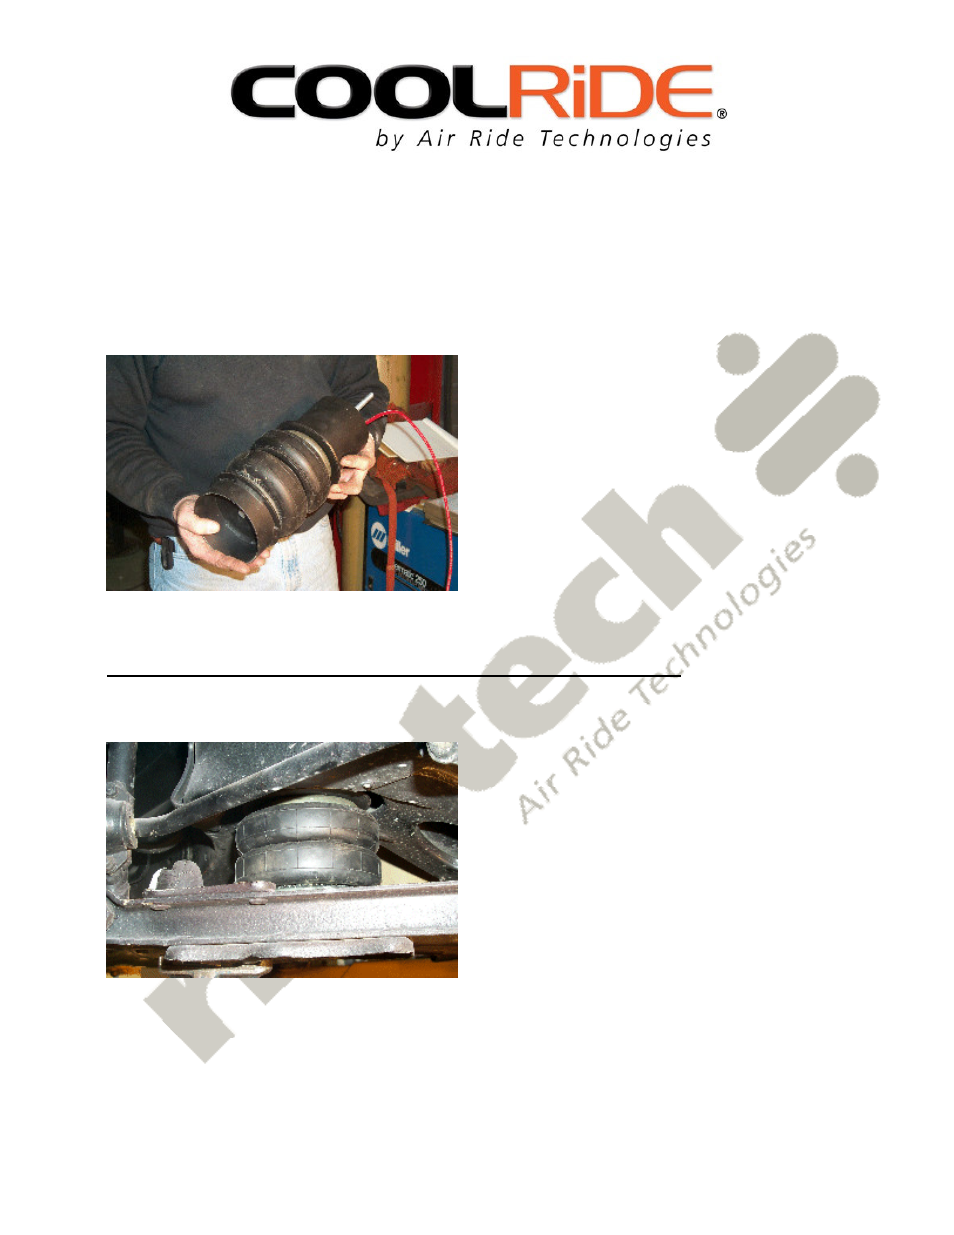
3. Assemble airspring onto its mounts. The tall cup is the top. The short angled cup goes
into the lower control arm with the tall part of the angle toward the spindle. This will
properly align the airspring when the vehicle is a ride height. The airline fitting, airline,
and the attachment stud will also be installed at this time.
4. Insert assembly into coilspring pocket. Route airline through an available existing
opening in the frame. Insert attachment stud through the oem shock hole.
NOTE: Coil spring pocket may need to be trimmed for clearance.
NOTE: IT IS THE FINAL RESPONSIBILITY OF THE INSTALLER TO ENSURE THAT THE
AIRSPRING BOES NOT RUB ON ANYTHING AT ANYTIME!
This is the airspring/bracket assembly at ride height, approximately 4.5-5.5” tall.
- 13076799 (5 pages)
- 13056799 (5 pages)
- 13027199 (8 pages)
- 13017199 (7 pages)
- 13006799 (4 pages)
- 12226799 (5 pages)
- 12186799 (5 pages)
- 12176799 (7 pages)
- 12167199 (6 pages)
- 12087199 (8 pages)
- 11456799 (9 pages)
- 11446799 (6 pages)
- 11436799 (6 pages)
- 11406799 (5 pages)
- 11396799 (5 pages)
- 11386799 (8 pages)
- 11376799 (6 pages)
- 11366799 (6 pages)
- 11267199 (7 pages)
- 11257199 (8 pages)
- 11177199 (8 pages)
- 11167199 (7 pages)
- 11167197 (7 pages)
- 11037199 (7 pages)
- 11027199 (7 pages)
- 19004901 (4 pages)
- 19004900 (4 pages)
- 19003005 (4 pages)
- 19003004 (4 pages)
- 19003003 (3 pages)
- 19003002 (4 pages)
- 19002005 (4 pages)
- 19002004 (4 pages)
- 19002003 (3 pages)
- 19002002 (4 pages)
- 12014099 (4 pages)
- 11014099 (4 pages)
- COIL-OVER Stud Top Assembly (1 page)
- COIL-OVER (2 pages)
- 12106509 (2 pages)
- 12103510 (4 pages)
- 12103509 (4 pages)
- 11326110 (6 pages)
- 11323510 (4 pages)
- 11323509 (4 pages)