Prepare the rough opening - continued – JELD-WEN JII100 Custom Wood and Fiberglass Door Systems User Manual
Page 5
5
Prepare the Rough Opening - Continued
• For door with step-down landing: fold down at remaining crease line (Fig. 5).
• Trim height of fold-down to rise of step if necessary.
• For door on continuous slab, cut along the remaining crease line.
5. Place sill pan in rough opening so the open side faces the exterior.
NOTE: Door sits inside sill pan; back dam of the sill pan should just clear the
back edge of door sill when it is placed in the rough opening.
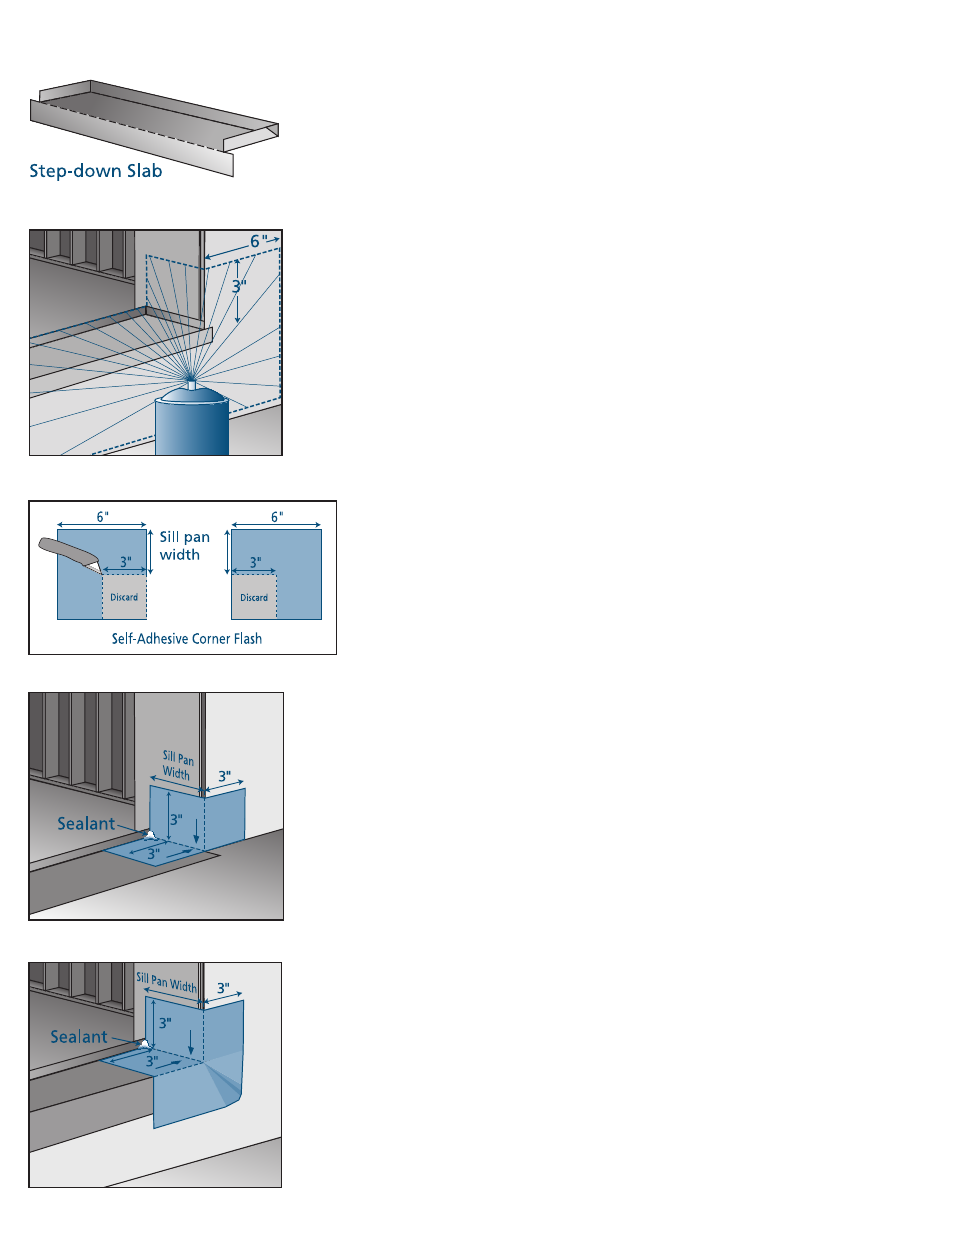
Fig. 5 Finished sill pan for step down landing
1. Coat the sill pan with spray adhesive extending 3" up both side jambs; spray the
vertical face of the rise, if applicable, as shown in Fig. 6.
(Follow manufacturer‘s instructions for tack time.)
2. Apply self-adhesive flashing to the sill pan floor as follows:
•
Cut adhesive flashing to sill length; for continuous slab, cut to width of sill
pan.
•
Remove backing paper.
•
Carefully apply to rough opening sill, flush with back dam of sill pan and fully
covering the bottom of the sill pan.
- Fold flat onto rise (if applicable) or cut to sill pan width if on continuous
slab.
• Smooth out any bubbles or creases with a j-roller.
3. Apply self-adhesive flashing to lower corners as follows:
•
Cut two pieces (one for each corner of the rough opening sill) 6" x distance
between the exterior and the interior edge of the door frame + 3".
•
For doors on continuous slab, cut out the inside corner as shown in Fig. 7:
- Remove paper backing from one piece.
- Adhere to one bottom corner tightly at 90˚ with 3" up the side and wrap
flashing onto wall sheathing (Fig. 8); do not stretch or tear flashing;
eliminate as many wrinkles as possible.
•
For step-down landings:
- Remove paper backing from one piece.
- Adhere to one bottom corner tightly at 90˚ with 3" up the side and overlap
onto the vertical face of the rise (Fig. 9); do not stretch or tear flashing;
eliminate as many wrinkles as possible.
- Press self-adhesive flashing tight into corners with j-roller.
- Repeat in opposite bottom corner.
4. Seal back corners of sill pan with sealant (Fig. 9).
Fig. 7 Cut self-adhesive flashing
Fig. 8 Apply self-adhesive tape (continuous slab)
Fig. 9 Apply self-adhesive flashing (step-down landing)
Spray Adhesive
Fig. 6. Apply adhesive spray