JELD-WEN JII101 Custom Wood & Fiberglass Exterior Folding Door Systems User Manual
Page 7
ASSEMBLY AND INSTALLATION INSTRUCTIONS
for Custom Wood & Fiberglass Exterior Folding Door Systems (JII101)
7
5. Open and close the door system to check for smooth operation.
6. Remove the yellow shipping clips from the roller hinges and top pivot
blocks and make sure all locking pins are in their slots and are secure.
7. Insert the cap into
the pivot hinge
leaf if not already
installed.
FINISH INSTALLATION
1. Fully seat any fasteners not yet completely driven into the rough opening.
2. If the door has a strike jamb against a rough opening jamb, drive
#10 x 3" screws through the screw holes in the strike plate. Replace
existing screws if necessary. This will secure the door to the structure.
3. Install drip cap if required or desired. Fold the building wrap
(previously taped up) down over the drip cap and seal the cut ends
with self-adhesive flashing or building wrap tape.
4. Some clad products
are shipped with
separate astragal
covers. If these
are not already
installed, wipe the
panel area with
denatured alcohol,
let dry, remove the
backing tape and
adhere into place.
AFTER INSTALLATION
1. Install exterior wall surface within seven days of door installation.
2. Maintain gap of 1/4"- 3/8" between door frame and final exterior
wall surface (siding, stucco, etc.).
3. Seal this gap on the sides with backer rod and sealant. For step-down
landings, also seal under the door sill, leaving a 1" gap every 12". Do
not apply sealant on top of the drip cap.
4. On the interior, insulate the void between the rough opening and the
door frame with backer rod and sealant or low expansion foam.
5. Protect recently installed units from damage from plaster, paint, etc.
by covering the unit with plastic.
6. Remove labels or other materials adhered to glass within 30 days
after installation.
7
COMPLETE INSTALLATION
MAKE FINAL ADJUSTMENTS - IF NECESSARY
1. Doors are adjusted at the factory and should not need additional
adjusting. Slide doors into the closed position and push the flush bolt
handles down to secure. Check for a 3/16" gap between the panels
and the head track, 3/8" gap between the panels and the sill track
and proper lock function.
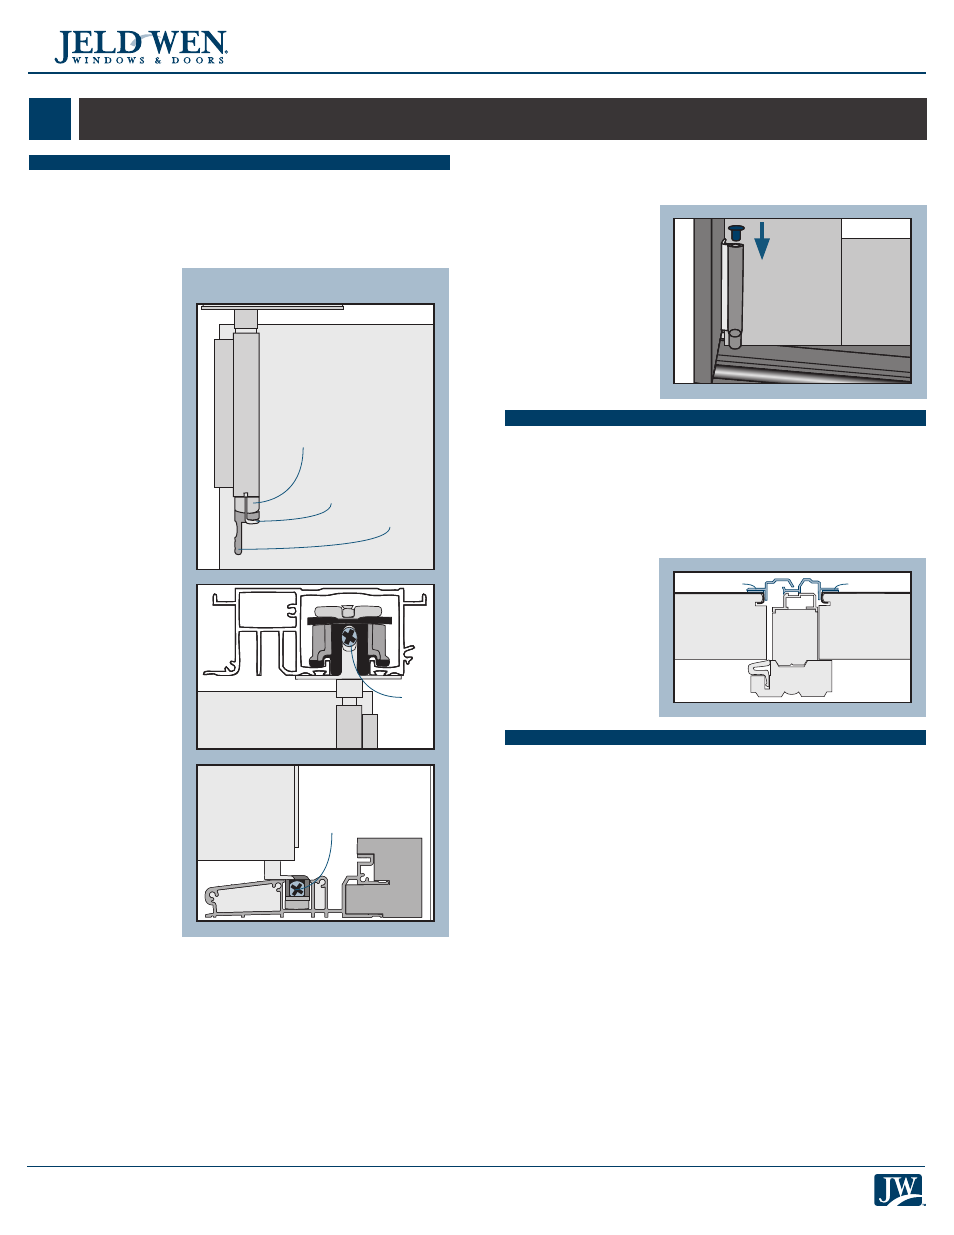
2. Roller hinges and
top pivot blocks
adjust vertically
using a flat head
screwdriver. Insert
the screwdriver into
the bottom and
turn to the right to
raise and to the left
to lower. Adjust as
necessary to achieve
a consistent reveal
across the opening.
If the yellow
shipping clip is not
installed, pull the
locking pin down
while turning the
adjustment screw.
3. Top and bottom
pivots adjust
horizontally using
a Phillips head
screwdriver. Open
panel and adjust
until equal spacing
exists between the
panels and jambs.
Check to ensure
the lock functions
properly. If the
panels are too far
apart for the lock
to function, adjust
both ends equally
toward the center
until the lock
functions normally.
4. If the configuration
has the passage
door meeting with
a strike door, make
sure the doors are
aligned along the
full height of the door when closed. If the doors are not aligned, the
hinges may have to be adjusted vertically for the doors to align.
Top Pivot Block Shown from the Exterior,
Roller Hinges are Similar
Adjustment
screw
Panel
Active panel
Passive
panel (with
astragal
attached)
Cover
Cover
Locking pin
Yellow
shipping clip
Adjustment
screw
Adjustment
screw
Panel
Panel
Head
Sill