JELD-WEN PDS013 Custom Sliding Patio Doors User Manual
Page 2
Custom Sliding Patio Door Assembly
Page 2
PDS013 02/10
AssEMbLE FRAME
The frame is already handed and is not field reversible.
1. Lay out frame components (exterior side up) in a large, flat
workspace.
2. On the sill
piece, apply a
continuous bead
of silicone at each
end as shown.
3. Seal the top of
each side jamb
piece as follows:
• Place the clad
extrusion
gasket on
the open end
of the clad
extrusion as
shown.
• Apply a
rectangular,
grey gasket
to the wood
portion of the
top of each
side jamb.
4. Seal the bottom
of each side jamb
piece as follows:
• Place the
clad extrusion gasket on the open end of the clad extrusion as
shown.
• Apply a rectangular, grey gasket to the wood portion of the
bottom of each side jamb.
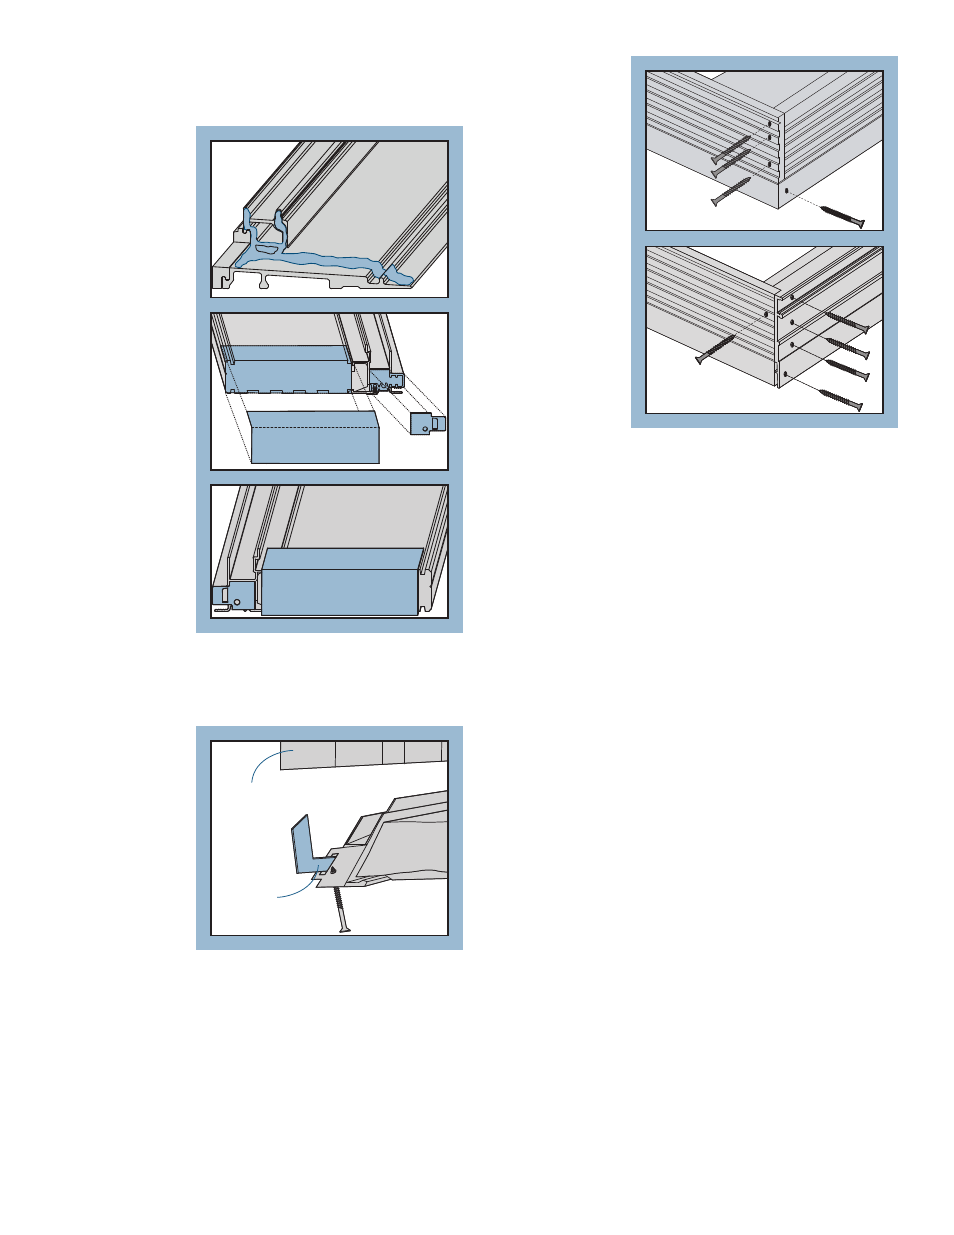
5. Secure the head and side jamb frame pieces as follows:
• Start a #8 x 2"
screw through
the top of each
side jamb.
• Insert a corner
key through
the designated
slot in the
clad extrusion
gasket. Align
the side jambs
with the
head jambs,
inserting the
corner keys
into the head
jamb.
• Drive the #8 x 2" screw into the head jamb ends to secure.
6. Drive three
#8 x 2" screws
through both
ends of the head
jamb as shown.
7. Secure the sill as
follows:
• Align the sill to
the side jambs.
• Drive a #8 x 2"
screw through
the pilot hole
at the bottom
of each side
jamb. The
screws should
engage the
screw boss
on the sill.
Advance screw
until the jambs
and sill are
flush.
Note: be careful
not to damage the
gasket at the bottom of the side jambs.
• Drive a #8 x 2" screw through the bottom of the sill into the side
jambs through the pilot holes at each end of the sill.
iNsTALL PATio DooR
1. Use the JELD-WEN installation instructions attached to the product
(also available at www.jeld-wen.com/resources) to install the
patio door. Perform the following steps in conjunction with the
installation instructions.
2. After the patio door frame is in the wall (rough opening) and
properly shimmed:
• Fasten the patio door through the nailing fin 6" from the
bottom corners.
• Install the stationary panels (as described below) to help square
the frame.
3. Continue with the JELD-WEN installation instructions.
Corner key
Side jamb top
Rectangular gasket
Clad
extrusion
gasket
Side jamb bottom
Side jamb
Side jamb
Head jamb
Head jamb
Side jamb
Sill
Sill